Across all milestones, Satisfactory constantly unlocks new ways to turn existing materials into different items. Automated machines, which you unlock as you progress, do most of the heavy lifting. Early on they’re straightforward, but later production lines become extremely complex and consist of many interlinked parts. To help you keep track and know exactly what each machine is for, we’ve put together a clear, general overview!
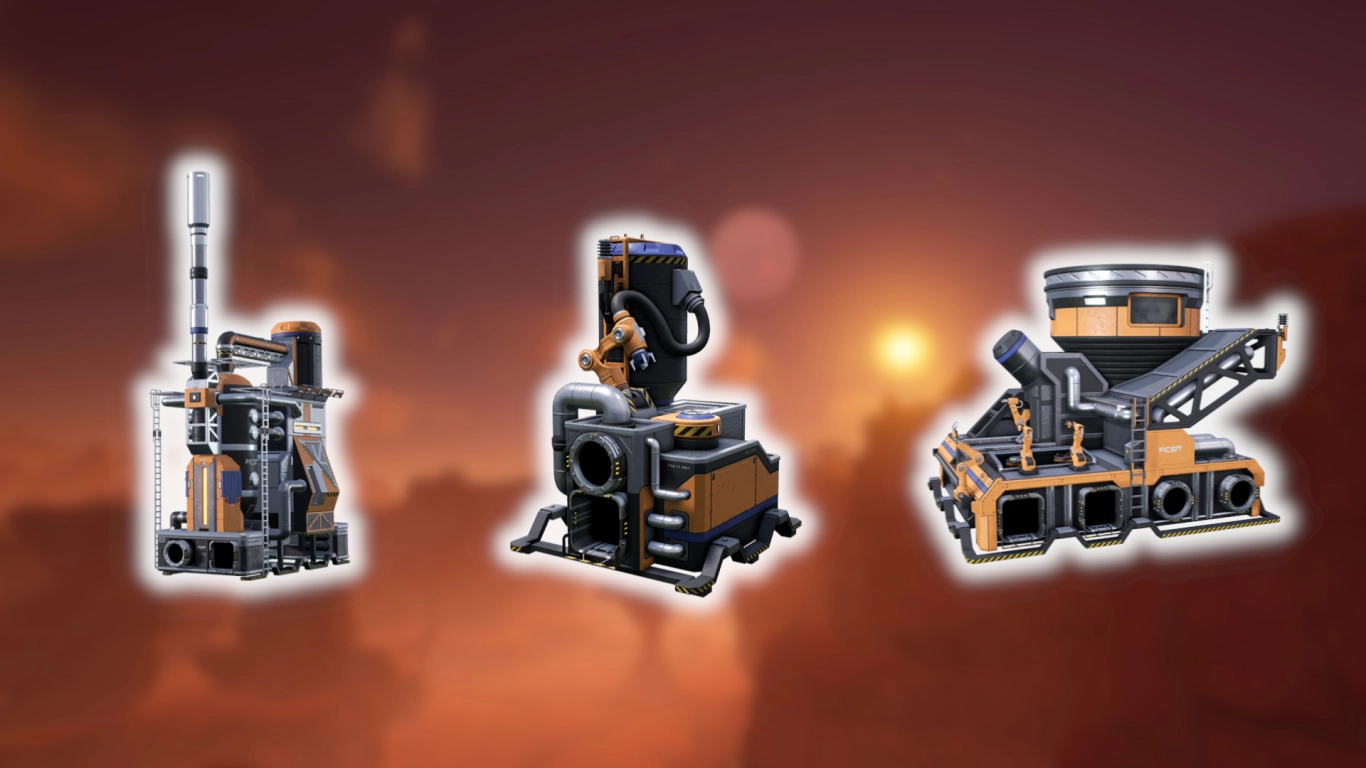
Satisfactory Smelter: Smelt ores and produce ingots
Unlock: Tier 0 - HUB Upgrade 2
Build cost: 5x Iron Rod, 8x Wire
Ores are among your most important sources for production and are available right from the start. The Smelter lets you process mined deposits with ease. Smelters are small and compact and process Iron, Copper, and Caterium. Later, they’re partly or completely replaced by the Foundry.
Key items produced:
- Iron Ingot
- Copper Ingot
- Caterium Ingot
Satisfactory Foundry: Alloys and alternate ingot recipes
Unlock: Tier 3 - Basic Steel Production
Build cost: 10x Modular Frame, 10x Rotor, 20x Concrete
In the Foundry you can create alloys from multiple ores, unlike the Smelter. Single-ingredient smelting is no longer possible here, but later you’ll unlock alternate recipes for simple ingots as well. In fact, most recipes here are alternates. As with the Smelter, the Foundry underpins many future production lines.
Key items produced:
- Steel Ingot
- Aluminum Ingot
- other ingots (alternate recipes)
Satisfactory Constructor: Produce basic items
Unlock: Tier 0 - HUB Upgrade 3
Build cost: 2x Reinforced Iron Plate, 8x Cable
The Constructor is one of your most important machines because it converts one item into another. It’s used for an enormous number of recipes and remains relevant through the endgame. All basic items in Satisfactory are produced here.
Key items produced:
- Cable
- Wire
- Screws
- Biomass
- Iron Rods
- Concrete
- Iron Plates
Satisfactory Assembler: Combine two resources into components
Unlock: Tier 2 - Part Assembly
Build cost: 8x Reinforced Iron Plate, 4x Rotor, 10x Cable
From Tier 2 onward, the Assembler lets you combine two items into one. This grows ever more important as you progress. It can’t make alloys, but it covers almost all other fabrications. It offers over 60 recipes, many of which are alternate options.
Key items produced:
- Nobelisk
- Modular Frames
- Reinforced Iron Plates
- Rotors, Motors, Stators
- Encased Industrial Beams
- AI Limiter
- Smart Plating
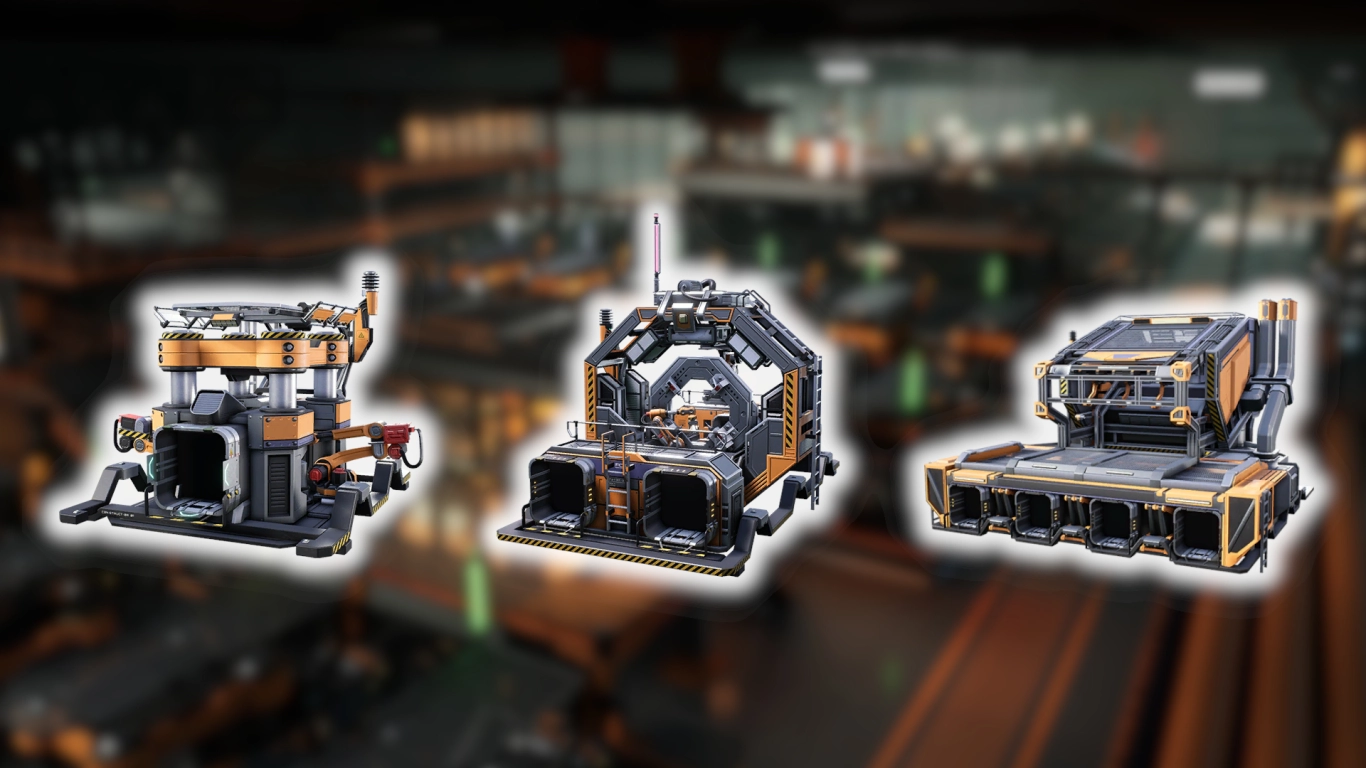
Satisfactory Manufacturer: Assemble 3 to 4 components
Unlock: Tier 6 - Industrial Manufacturing
Build cost: 10x Motor, 20x Modular Frame, 50x Plastic, 50x Cable
Around the midgame you unlock the Manufacturer, which lets you assemble three or four previously produced items. That makes your planning more complex, but it’s standard from Tier 6 onward. It becomes the focus of your late-game work in Satisfactory, so be sure to explore its alternate recipes.
Key items produced:
- Computer
- Supercomputer
- Crystal Oscillator
- Heavy Modular Frame
- Adaptive Control Unit
- Nuclear Fuel Rods
- Turbo Motor
- Radio Control Unit
Satisfactory Refinery: Oil, fuel, and by-products
Unlock: Tier 5 - Oil Processing
Build cost: 10x Motor, 10x Encased Industrial Beam, 30x Steel Pipe, 20x Copper Sheet
Oil is a key resource you can extract at Tier 5 and then process in the Refinery. Many recipes produce Heavy Oil Residue and Polymer Resin as by-products. The Refinery is also crucial for making Fuel and aluminum components.
Key items produced:
- Plastic
- Rubber
- Fuel
- Sulfuric Acid
Satisfactory Packager: Package fluids and gases
Unlock: Tier 5 - Fluid Packaging
Build cost: 20x Steel Beam, 10x Rubber, 10x Plastic
You’ll also handle fluids in Satisfactory, but they aren’t always easy to transport (Satisfactory: Transporting fluids and gases efficiently) . With the Packager, you can package them into Canisters or Tanks and then move them via conveyor belts. You can unpackage them again wherever you need the fluid form.
Key items produced:
- Packaged Fuel
- Bottled gases
- Packaged Water
Satisfactory Blender: Mix solids, liquids, and gases
Unlock: Tier 7 - Control System Development
Build cost: 10x Computer, 10x Heavy Modular Frame, 20x Motor, 50x Aluminum Casing
The Blender allows you to combine different solid, gaseous, and liquid items. It produces several late-game components needed to progress. A fun detail is the color of the fluid inside the machine, which changes depending on the recipe.
Key items produced:
- Rocket Fuel
- Cooling System
- Nitric Acid
- Encased Uranium Cell
- Battery
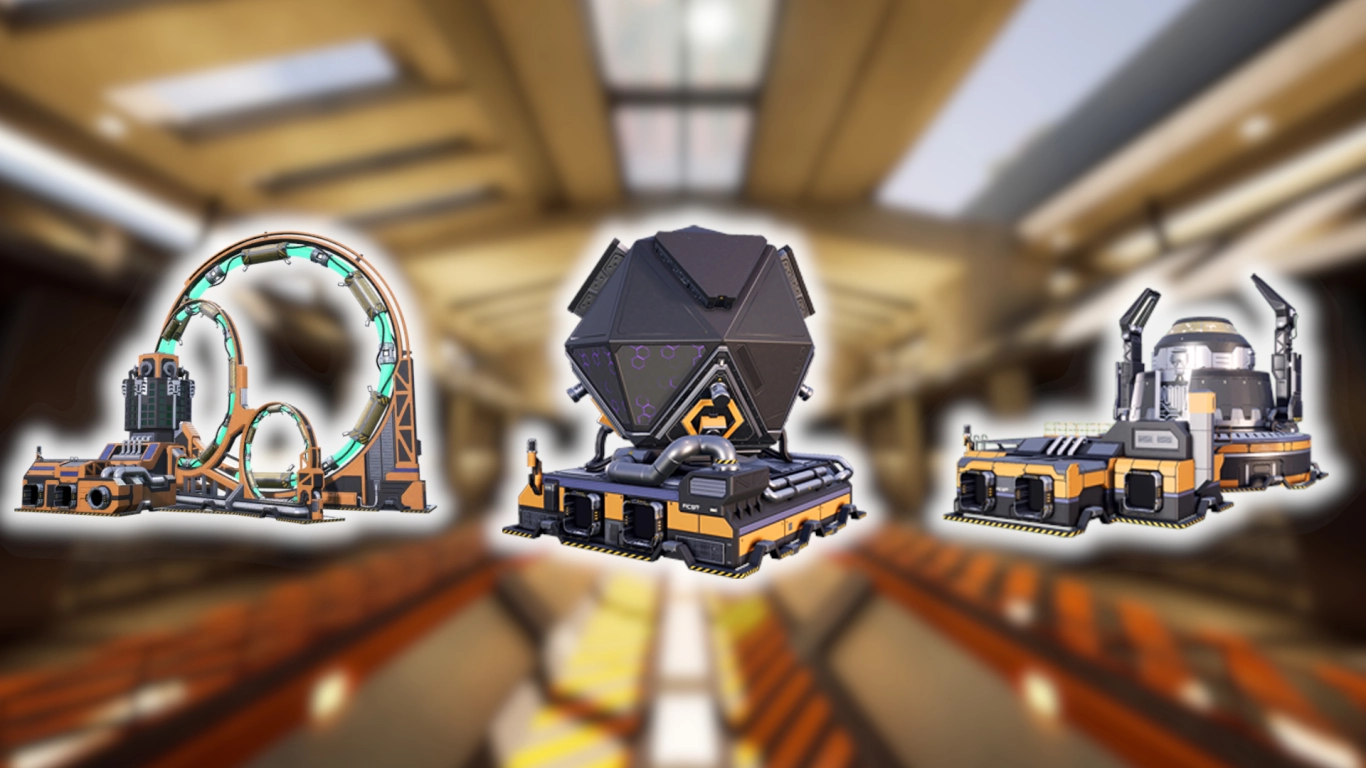
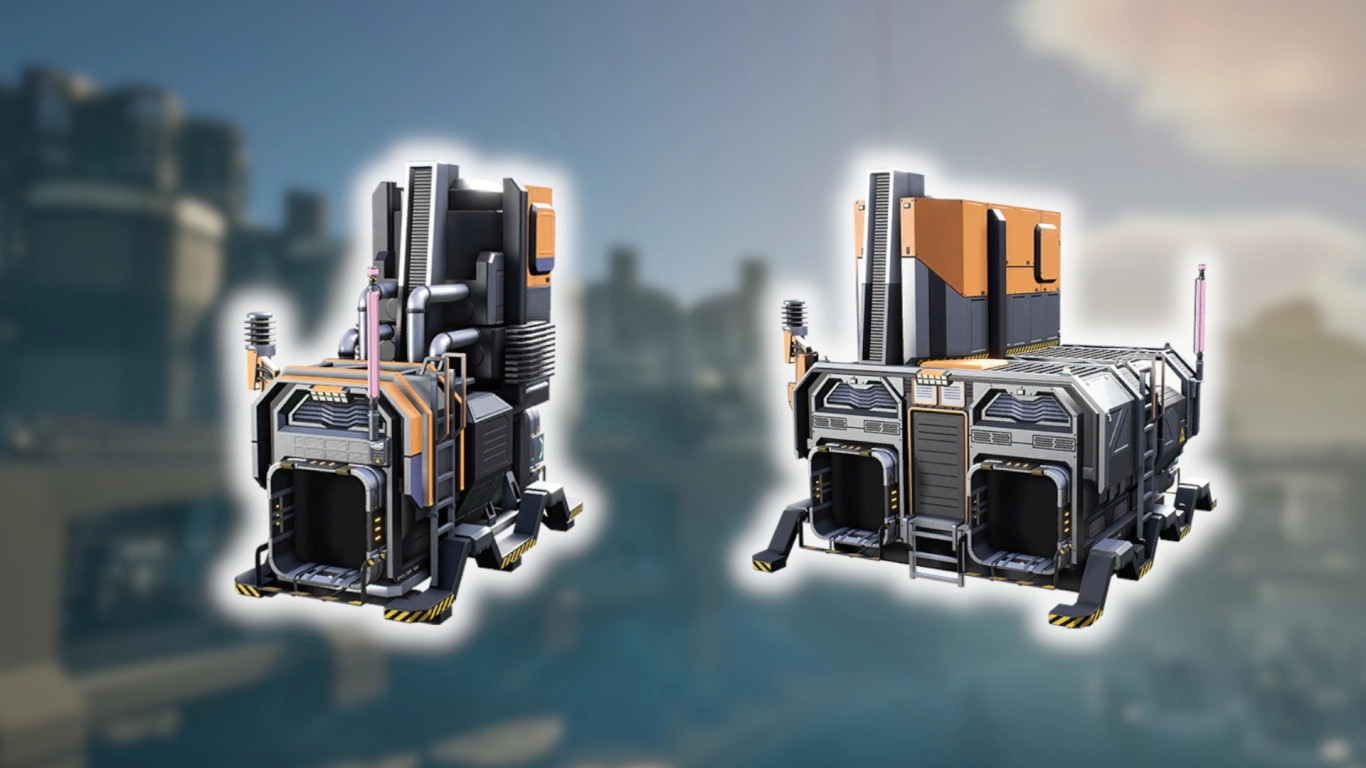
Satisfactory Particle Accelerator: Nuclear power and Dark Matter
Unlock: Tier 8 - Particle Enrichment
Build cost: 10x Turbo Motor, 10x Supercomputer, 25x Fused Modular Frame, 50x Cooling System, 500x Turbo Wire
Now we come to the final three machines, which increase in complexity significantly and surpass all others. First up is the Particle Accelerator, which not only consumes varying amounts of power but also looks futuristic. Many recipes focus on nuclear power or Dark Matter, and a large share are alternate recipes.
Key items produced:
- Dark Matter Crystal
- Diamonds
- Nuclear Pasta
- Plutonium Pellet
- Ficsonium
Satisfactory Converter: Transform ores with Reanimated SAM
Unlock: Tier 9 - Matter Conversion
Build cost: 10x Fused Modular Frame, 25x Cooling System, 50x Radio Control Unit, 100x SAM Fluctuator
This is where Reanimated SAM finally comes into play. Convert all kinds of ores into other variants. It’s also the only way to craft the new FICSIT Ingots. Lastly, the Converter also outputs Excited Photonic Matter.
Key items produced:
- Ore conversion
- FICSIT Ingots
- Excited Photonic Matter
- Dark Matter Residue
- Time Crystals
Satisfactory Quantum Encoder: Working with Excited Photonic Matter
Unlock: Tier 9 - Quantum Encoding
Build cost: 20x Turbo Motor, 20x Supercomputer, 50x Cooling System, 50x Time Crystal, 100x FICSIT Trigon
Finally, there’s the Quantum Encoder, which unlocks only six recipes. Use the Excited Photonic Matter produced earlier to run it. It leaves behind Dark Matter Residue, which you’ll then need in the Particle Accelerator. Like the Accelerator, the Encoder also consumes varying amounts of power and fluctuates even more.
Key items produced:
- Superposition Oscillator
- Neural Quantum Processor
- AI Expansion Server
- Ficsonium Fuel Rod
- Alien Energy Matrix
- Energy Fragment
Conclusion: Master Satisfactory’s machines and production chains
From simple ore smelting to quantum physics, Satisfactory spans a broad spectrum of machinery. What starts simple and straightforward later becomes a complex web of multiple production lines that goes well beyond familiar physical principles. Use the Milestones and Space Elevator phases as guideposts to stay on track.
To unlock and experience all these machines yourself, rent one of our Satisfactory servers and play together with your friends. Support each other and bend the planet to your will!
More interesting articles
Satisfactory Space Elevator Phase 5 Guide: Recipes, Production, and Tips
Satisfactory Endgame: Plan Your Mega Factory and Optimal Layout
Satisfactory: Decor, Lighting, and Building Methods for a Beautiful Factory
Satisfactory MAM Guide: Research, Hard Drives & Best Recipes
Satisfactory Guide: Best Starting Area for Beginners and Pros