Sooner or later, your various production lines will be spread across the entire map. Transporting items only by conveyor belts or manually can take a lot of time. That’s where trains come in, which you can unlock in Tier 6 (Satisfactory Tier 6 Guide: Trains, Computers, Monorail, and Pipeline Mk. 2) . They’re used to carry large amounts of freight over long distances and run on a separate system. They can feel overwhelming at first, so we’ll go through all the components and some simple rail lines in detail. After that, you should be able to deploy your own trains and configure them to move items from A to B.
Satisfactory trains: Advantages for fast long‑distance transport
Trains can look complicated at first glance. But once you understand a few basics, they’re a real blessing for distant factories. They’re especially handy when you want to move things from one side of the map to the other. They work faster and more efficiently than vehicles like trucks, and conveyors can’t really compete either, even though you can stretch them quite far.
A big advantage is that trains only require power, not fuel. That makes them more flexible—you don’t have to keep an eye on refueling. By this tier, scaling your power supply shouldn’t be a problem.
Satisfactory rail line: Components from locomotive to signals
With Tier 6 you unlock the most important components for a rail system. Get familiar with them first to understand the basics and use them correctly later.
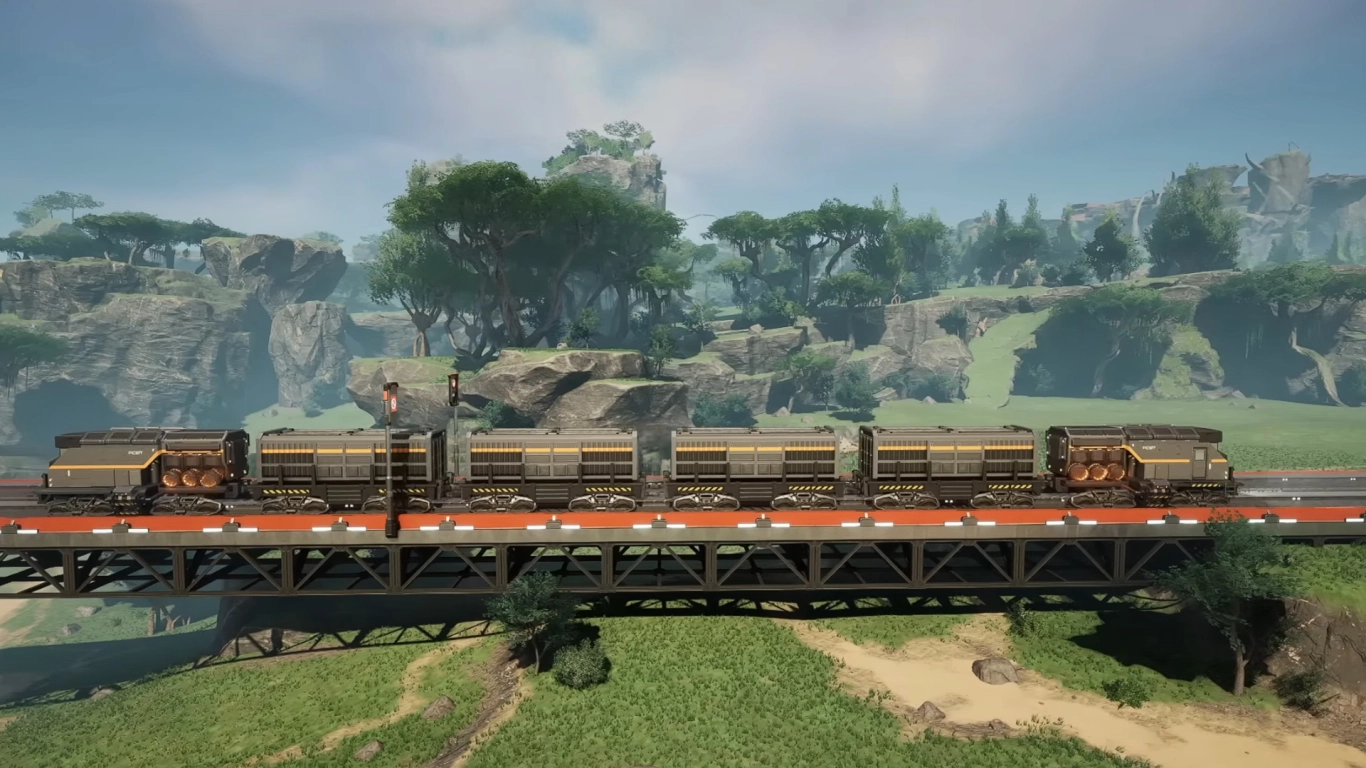
- Railway: The tracks your trains run on. Think of them as large conveyor belts.
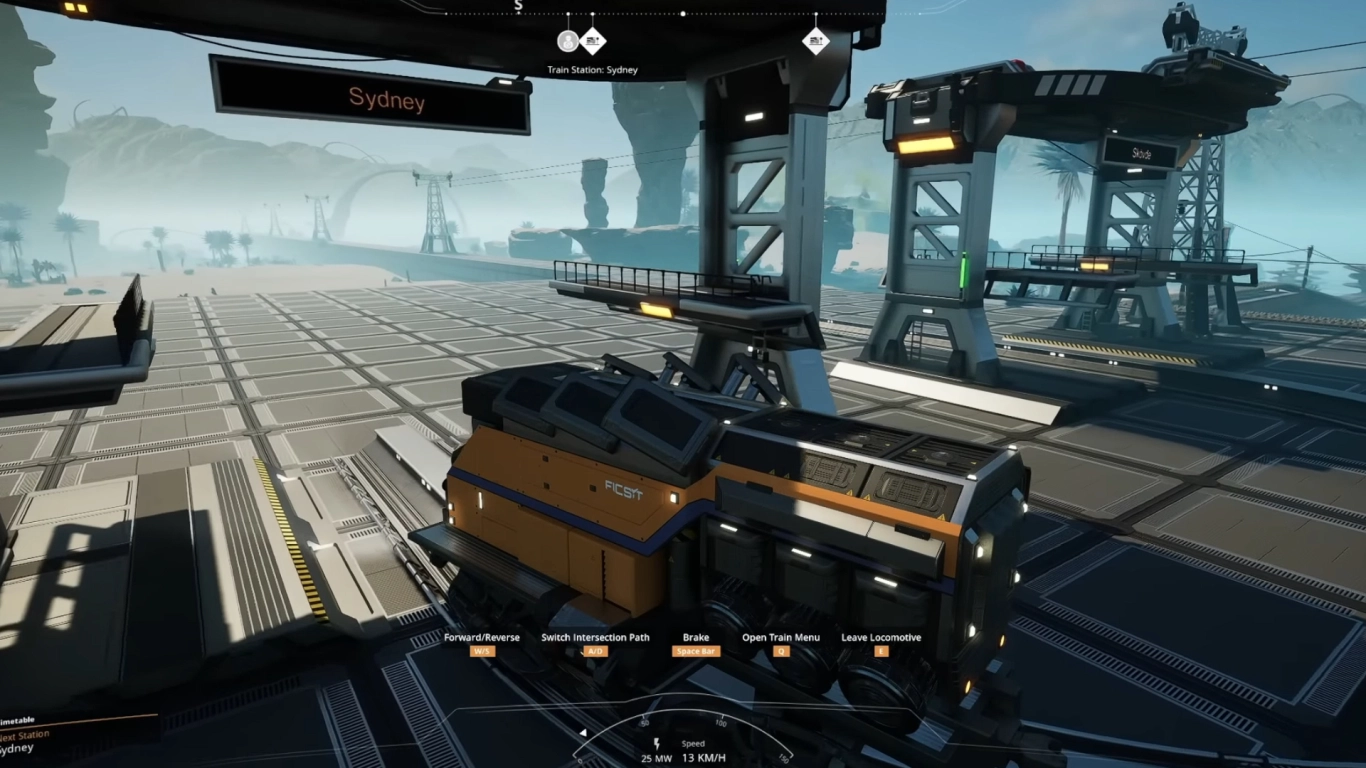
- Locomotive: The electric locomotive provides the power for the cars. One loco can pull up to four cars without slowing down. For more freight, you’ll need additional locos or separate trains.
- Freight car: Cars must be pulled by a locomotive and, depending on configuration, can transport solid, liquid, or gaseous items. They can be loaded and unloaded automatically.
- Train station: Stations are points where a train can stop. Attach a Freight Platform to load and unload cars. Stations also provide power for the entire rail network.
- Signals: Signals are the road signs for your trains. They prevent collisions.
Setting up Satisfactory trains: Transporting items and fluids
Once you understand and unlock the building blocks of trains in Satisfactory, you can start your first rail system. We’ll show you, step by step, how to get your cars from one station to another smoothly and without complications.
Laying tracks and building stations in Satisfactory
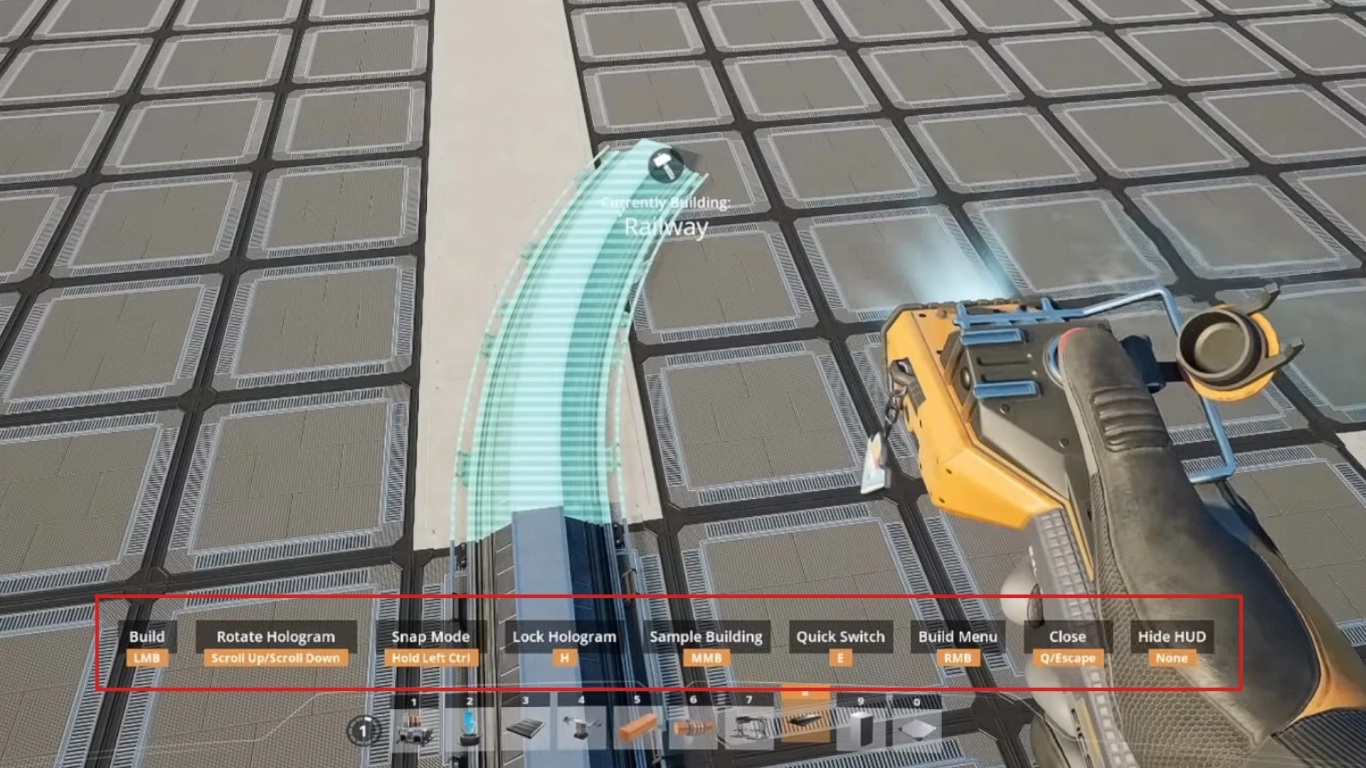
The first step is to lay tracks and place your stations. Focus on closed systems to begin with. We recommend either a loop or a back‑and‑forth line. For the latter you’ll need two locomotives, one at each end.
You can place tracks in segments of up to 100 meters. We recommend using foundations as a base so your line stays straight. You can also build up and down, but only with 2‑meter foundations. To lay clean tracks, use the on‑screen build hints at the bottom of the screen. For curves or irregular sections, build the start and end first, then snap them together automatically.
You should also place your stations where needed. In most cases, you’ll have one station for loading and one for unloading. Attach the appropriate Freight Platform to tie your resources into the rail network. Stations get their own names, and you can rename them to keep things organized.
Autopilot and schedule: Setting up automatic train routes
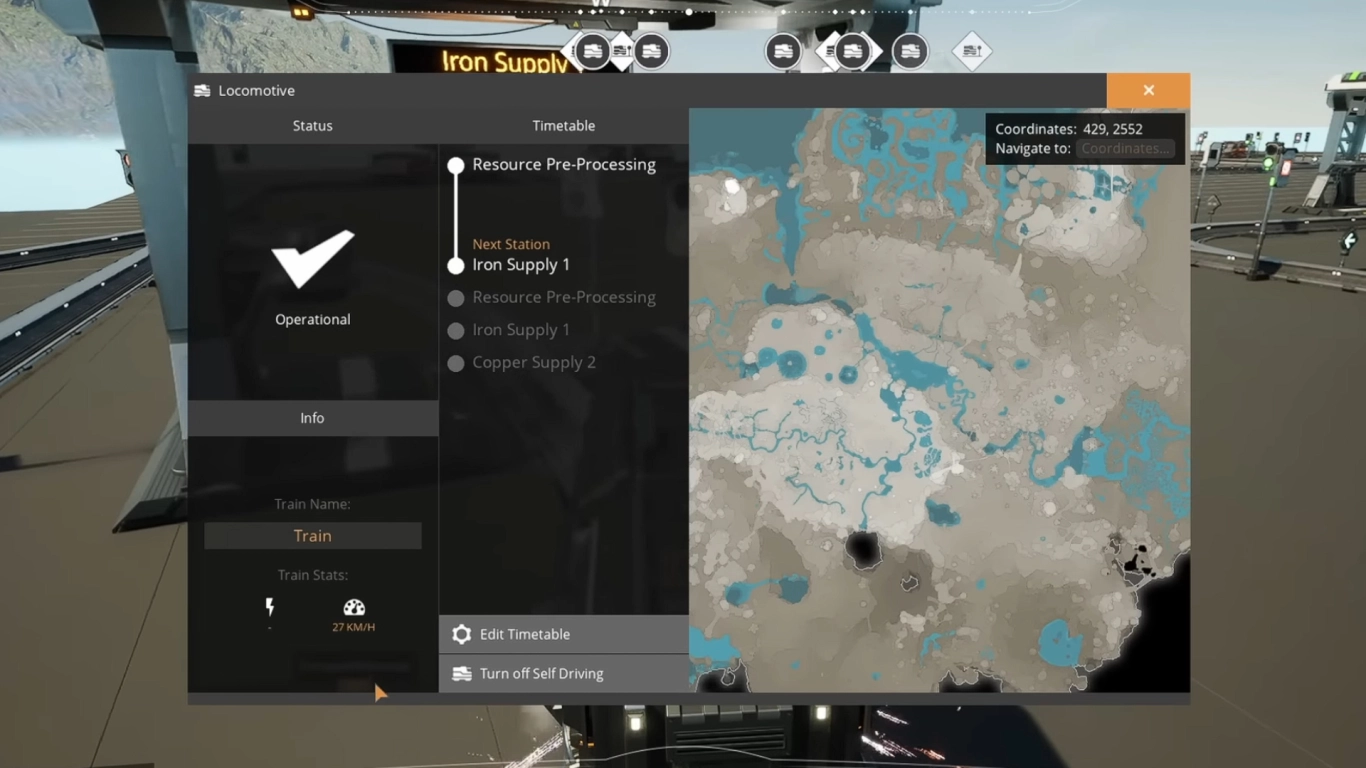
Once a line is finished, place a locomotive with the required number of cars on the tracks. Nothing will happen without input. You can drive the train yourself, but that’s inefficient. Instead, set up automatic routes, similar to trucks.
Open the train’s menu and configure the schedule. There you choose which stations the train should visit. They’re processed in order and then repeat. This is where clear station names help you find the right ones in the list. Trains only stop at stations listed in their schedule.
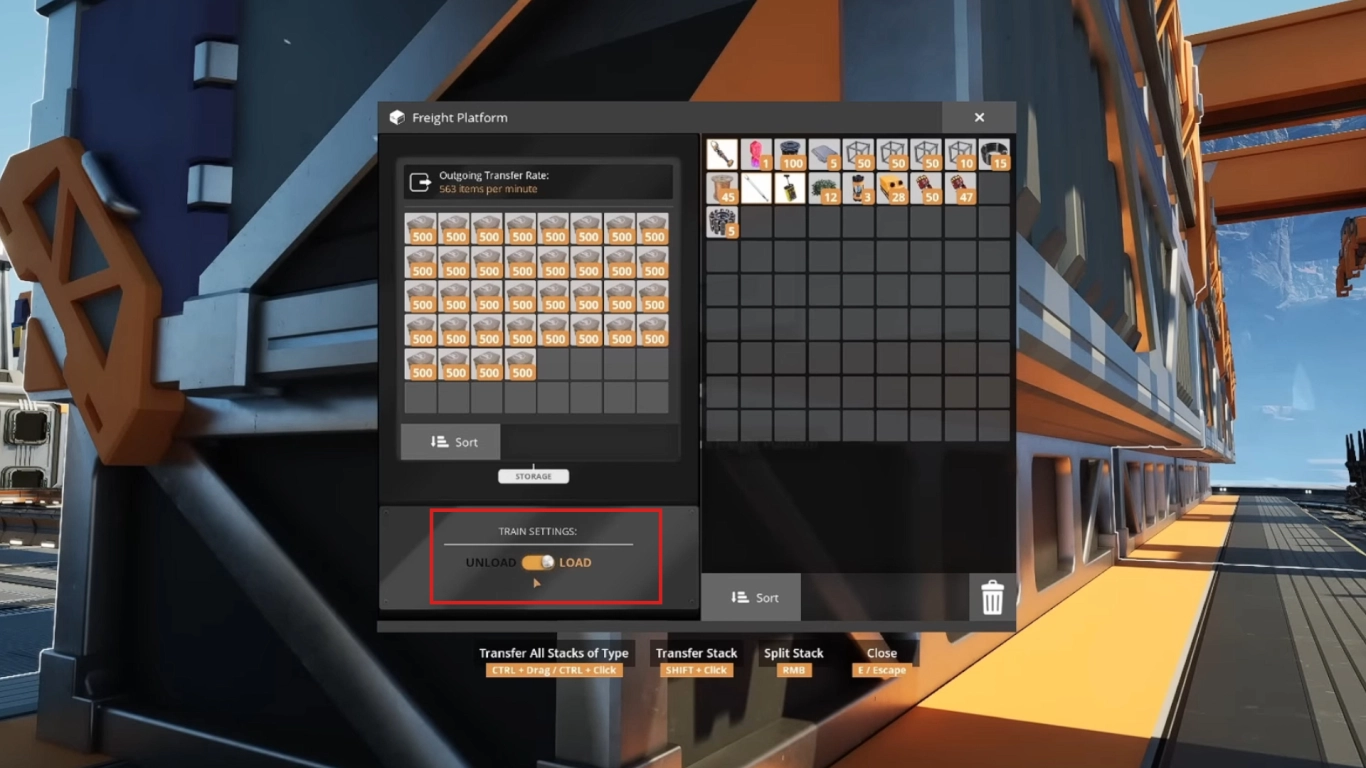
Once your schedule is set, switch the train to Autopilot. It will visit stations using the shortest available route. Then (or beforehand) configure what should happen at each Freight Platform. Open the platform’s menu and choose whether a stopping train should load or unload. After that, everything runs automatically as long as the train is on automatic.
Satisfactory signals: Using block signals and path signals correctly
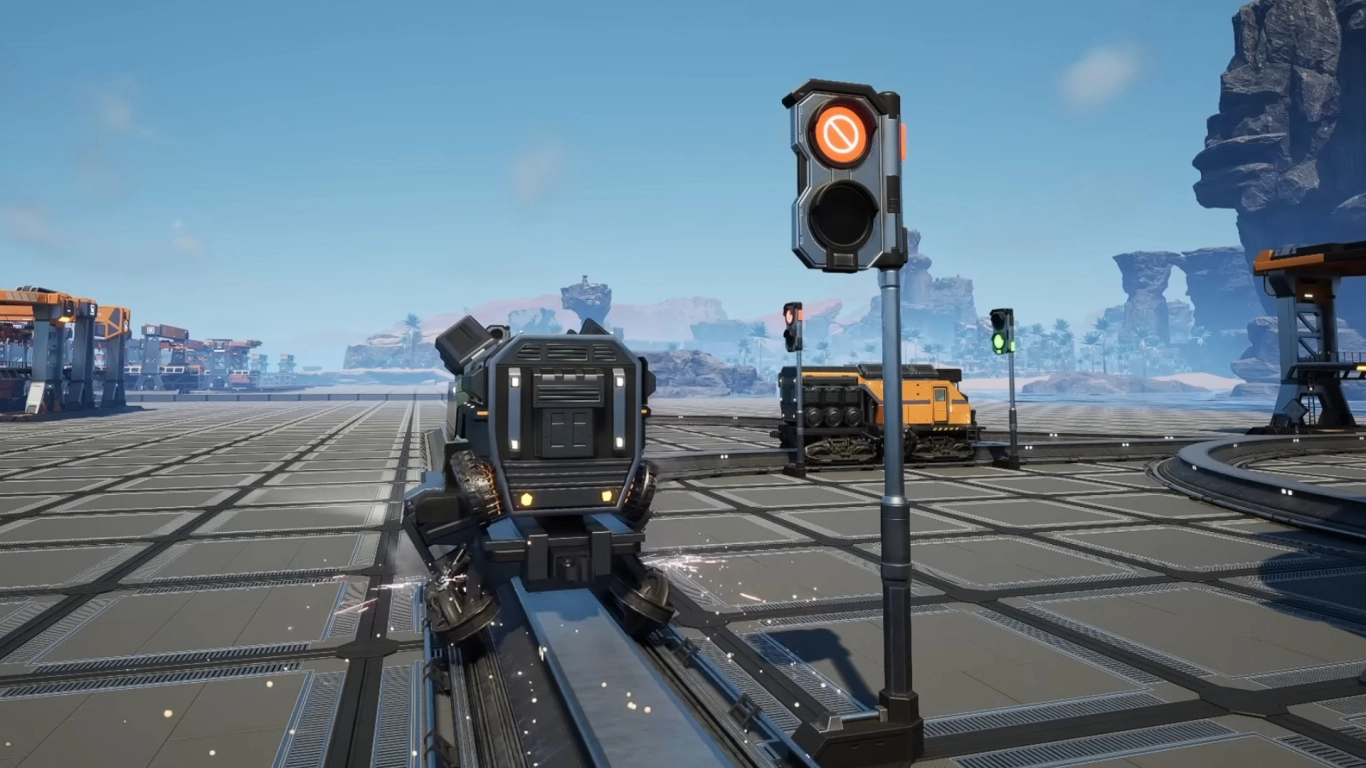
Signals are probably the most confusing part of the rail system. In short, you don’t need signals if you have only one train on a line. Signals simply ensure two or more trains don’t collide.
For systems with multiple trains, focus primarily on the Block Signal. It ensures the next track segment is clear before a train enters it. The length of your trains affects how full a block is. Block signals also act as one‑way gates, preventing trains from entering a block from the opposite direction. When placing signals, blocks are shown in different colors. You should always have at least one more block than trains so nothing gets stuck.
Path Signals are for genuinely complex systems where multiple lines and loops interconnect. They split a block into paths and grant them separately. Use them at intersections so trains can move with priority without blocking each other.
Conclusion: Satisfactory trains connect factories efficiently
Trains are one of the most important transport methods for items in Satisfactory. Since you can’t produce every component in one place and conveyors eventually come up short, rail lines are essential. While they can be overwhelming at first, simple routes are actually easy to build. As long as you keep systems separate, you won’t need to deal with complicated signaling.
To use trains effectively, rent one of our servers for Satisfactory and keep expanding your factory empire. It’s even more fun with friends, and everyone can take care of different sections of the network.