Satisfactory is a complex game to begin with, and many helpful features aren’t explained outright. These become especially important in the midgame as your factories grow and production chains get longer. That’s when it’s useful to streamline key steps. Some tricks boost productivity, others are simply convenient and help you gather and structure ideas. They can also improve your in‑game organization and reduce the need for external tools. Let’s look at the best tips so you can tap into Satisfactory’s full potential.
Use the Satisfactory To‑Do List and Notes effectively
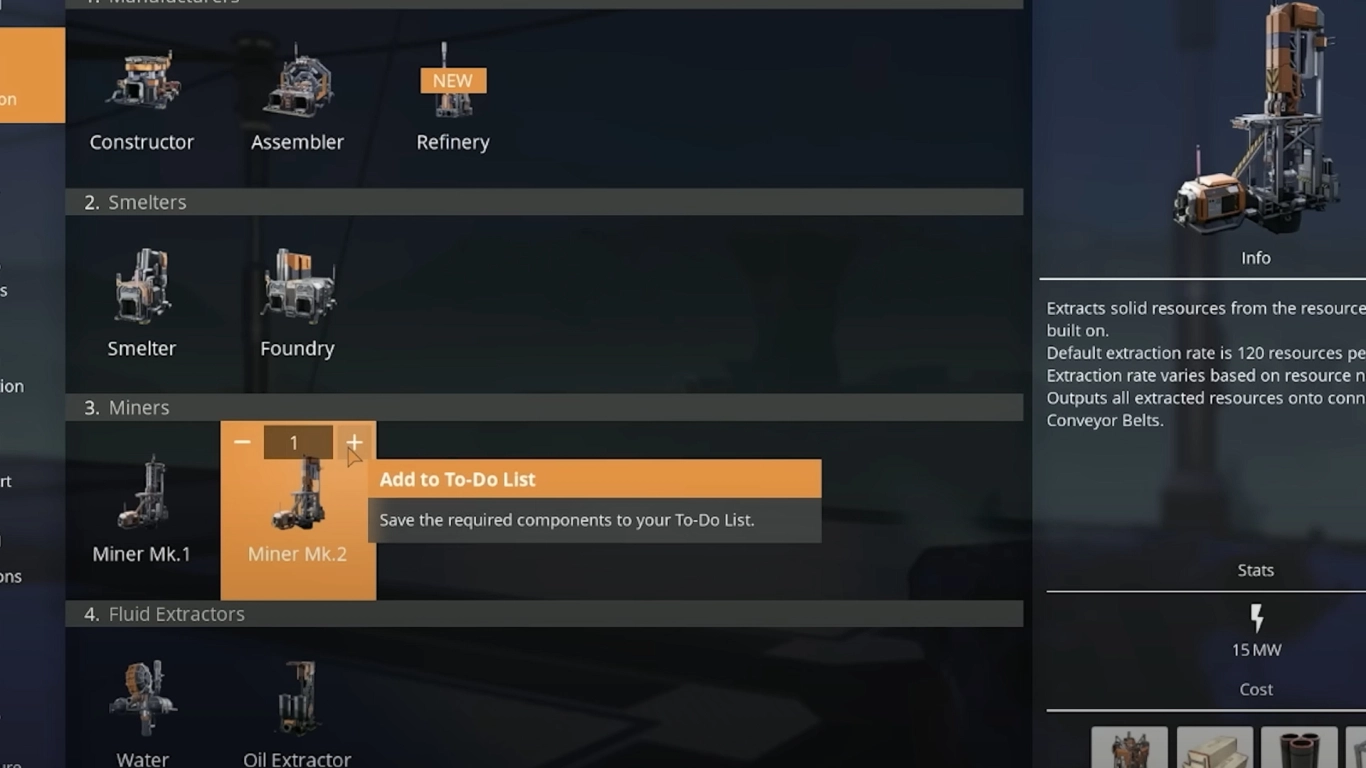
Like many games of its kind, Satisfactory is hard to play without a notepad. Whether you jot down ideas by hand or in a text app, you can complement that with a built‑in feature: the in‑game To‑Do List. Don’t overlook it.
You can add any items and buildings you need to this list. Add buildings from the Q menu by hovering the icon and pressing the + at the top edge. The required materials will then appear on the right, along with how many you already have. You can add items and recipes via the Codex or at the craft bench.
You can also enter custom text and even format it. That means bold text, checkbox lists, and colored text are all possible.
Copy Satisfactory recipes and machines in seconds
A simple trick many players miss: quick recipe copying. If you’re building several Assemblers for the same material, you can copy the settings from the first machine with Ctrl+C and paste them onto others with Ctrl+V. Very familiar for any PC user.
Even faster: use the middle mouse button. This lets you copy a building directly, including its settings, and it will be auto‑selected in the build menu. No more switching hotbars or opening menus — building speeds up a lot.
Turn the Satisfactory search bar into a calculator
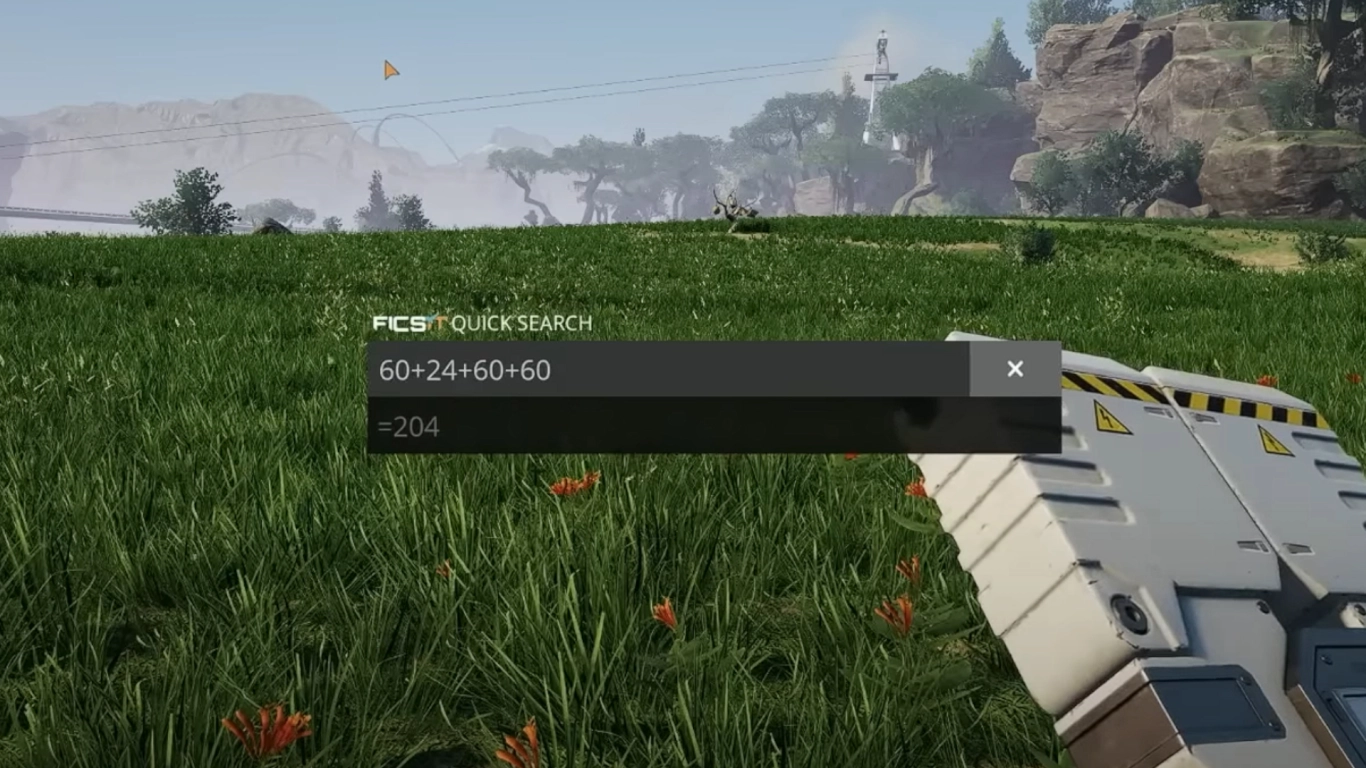
With so many items and buildings, it’s easy to lose track. The search bar (N) is extremely handy for finding things fast. But did you know it does more than process text? It also acts as a calculator and can evaluate simple formulas for you. That means you can work out resource needs without leaving the game.
Mobile power for Crash Sites: Biomass Burner blueprint
Crash Sites are a key source of Hard Drives, which unlock alternate recipes. Some pods only open when powered — and you usually don’t have a power grid in your pocket. Make this much easier with a blueprint.
Biomass Burners are your best option here. Pair them with Solid Biofuel and your temporary power setup is ready. You just need the materials with you, which shouldn’t be a problem with the Dimensional Depot. A nice bonus: for example, fuel can also be saved inside the blueprint, so power production can start immediately.
Pick Hard Drive recipes in Satisfactory strategically
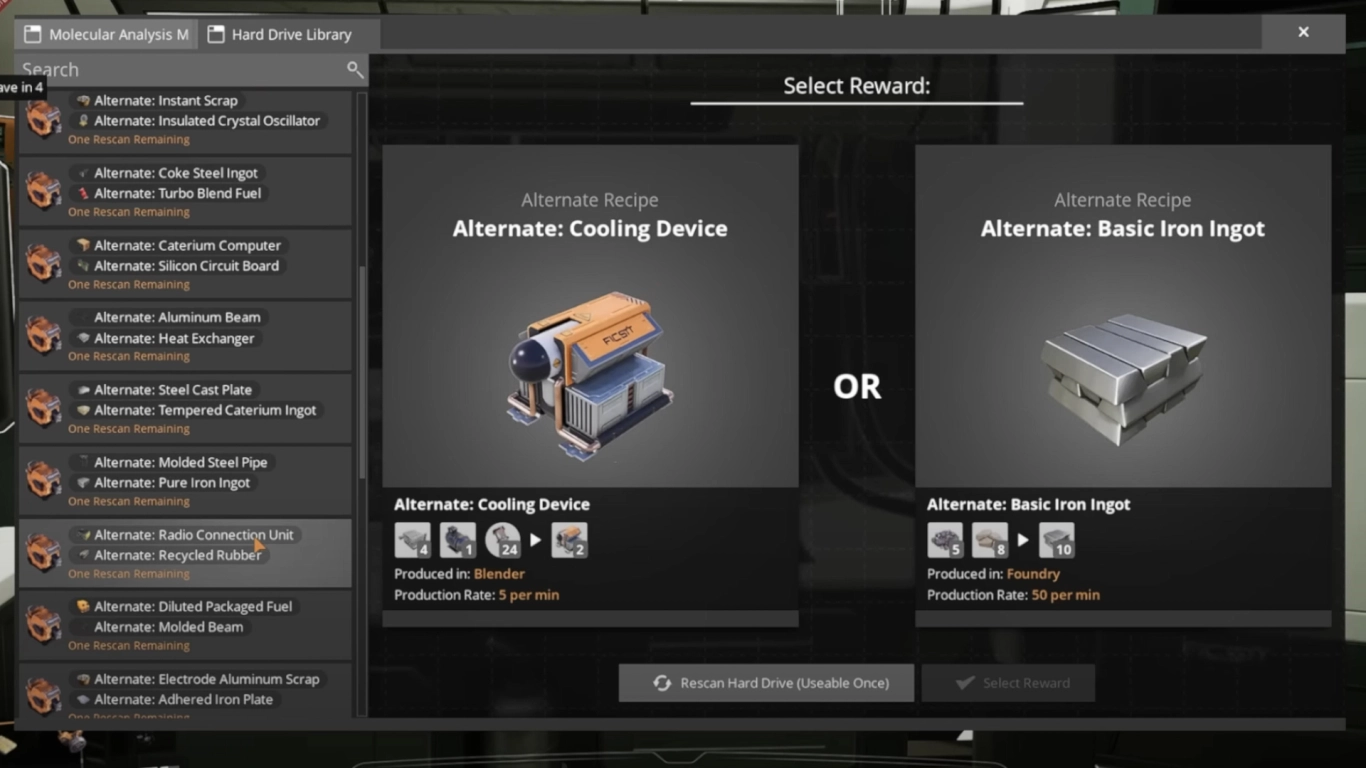
Speaking of Hard Drives, here’s a great tip: you don’t have to pick one of the alternate recipes right away — many players don’t realize this. The analysis takes ten minutes, and afterwards the offered choices are stored in the Hard Drive Library.
This has several benefits. First, those specific offers won’t be shown again, shrinking the pool of possible recipes. The same applies when you reroll with more drives. It also lets you choose recipes more strategically and keep your options flexible.
Dismantle factories fast: hotkeys, multi‑select, and filters
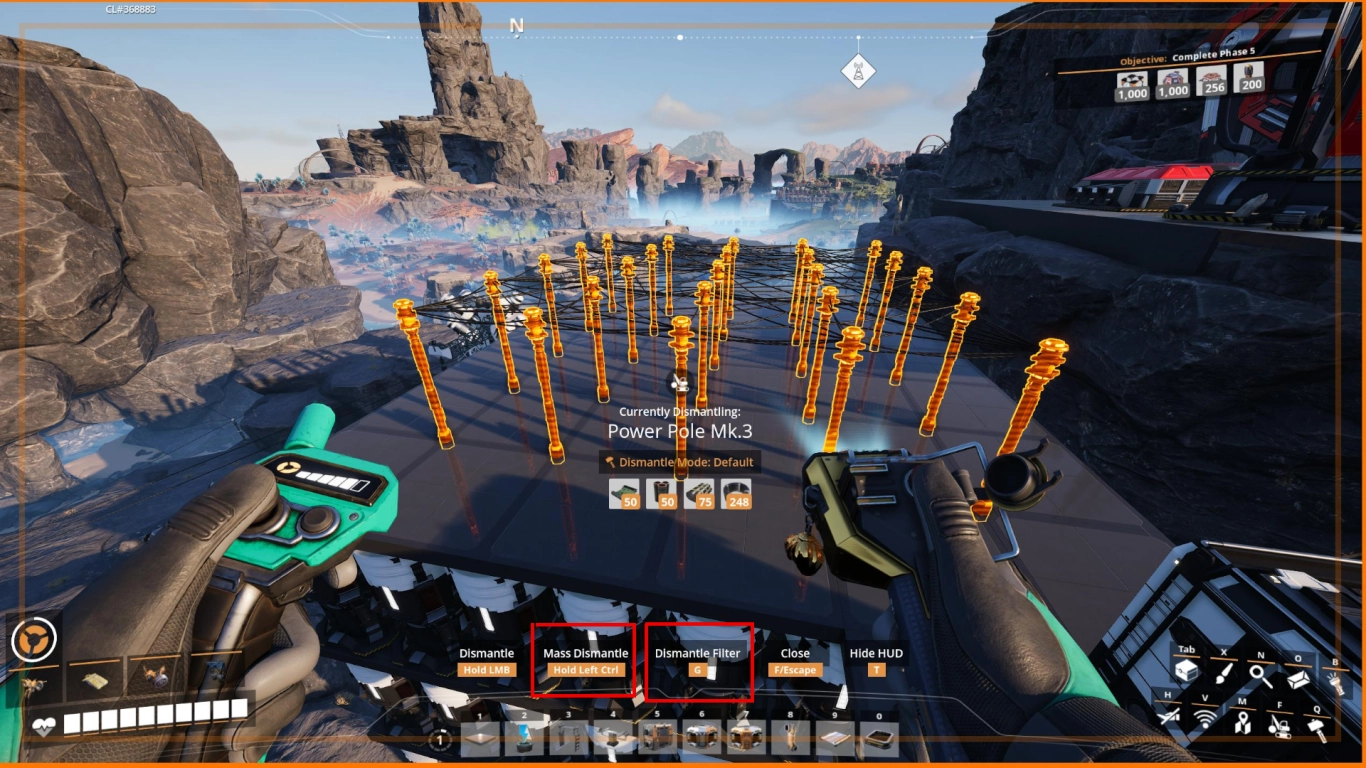
Sooner or later you’ll tear down parts of your factory. You get all resources back, but it can be time‑consuming. Use the hotkeys shown at the bottom of the screen. In dismantle mode, hold Ctrl to select multiple objects and delete them all at once. If you want to limit removal to certain objects, use the filter with G. This filter also appears in other build tools — for example, when painting several objects from the same family.
Satisfactory Photo Mode: explore with free camera and zoom

Photo Mode isn’t just a toy for creatives — it’s also a useful exploration tool. It gives you a kind of free camera with which you can scout your surroundings up to a certain range (about 150–160 meters), detached from your character. That helps you spot hidden items or enemies — very handy.
Also great is the zoom you get by adjusting the camera’s focal length in Photo Mode. You can see what lies hundreds of meters away without walking there. For exploration, Photo Mode hides some surprising features that go far beyond taking pictures.
Colors for organization: label pipelines and set standards
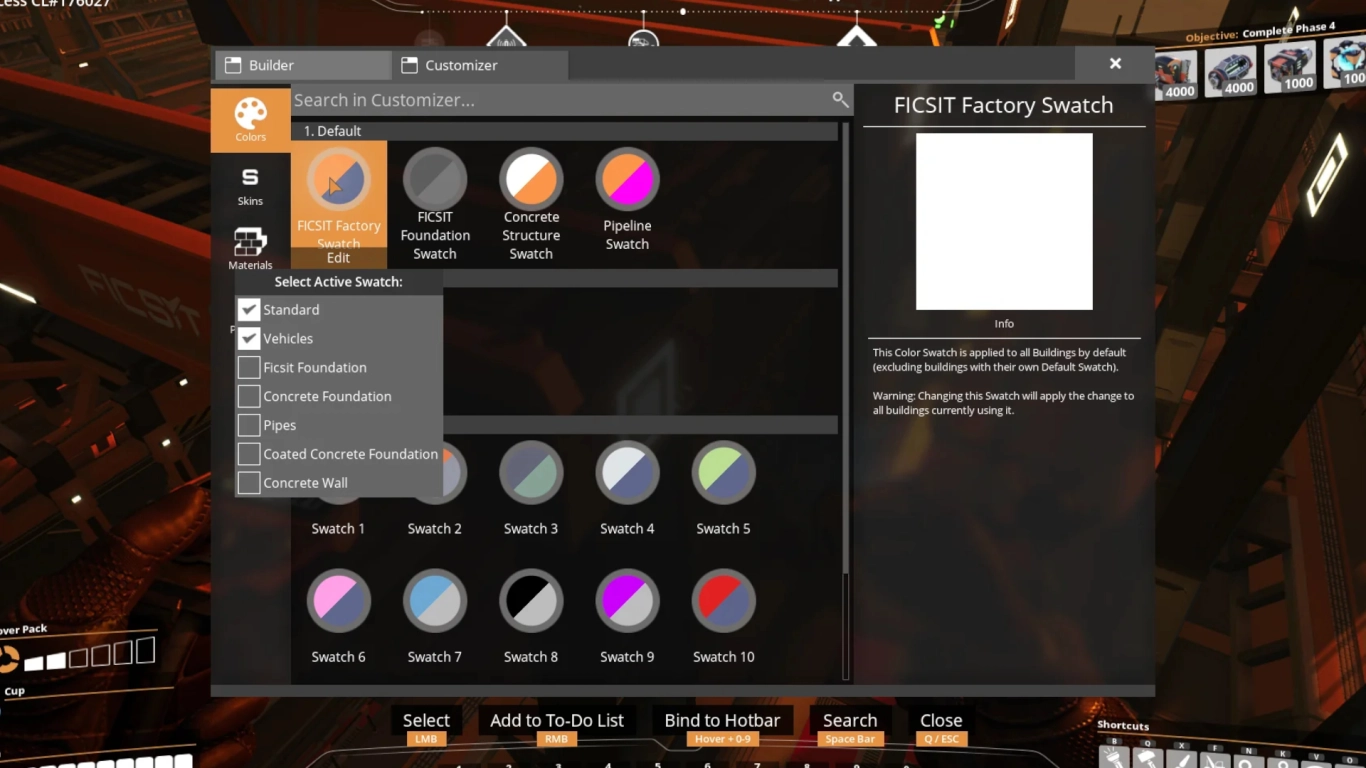
Finally, a few tips for painting your parts. You can unlock more swatches and create and save your own color patterns. That’s not only for looks — it’s also very useful for organization. For example, paint pipes in different colors: black for oil, blue for water, yellow for fuel.
You can also assign default color schemes so certain parts are always built with your preferred finish. Right‑click a swatch and use the context menu to choose which aspects the color should apply to.
Conclusion: Play Satisfactory more efficiently with organization and shortcuts
The deeper you go in Satisfactory, the more complex it gets. It’s important to stay organized and know the features that simplify your work. The game offers many shortcuts, but they aren’t always clearly communicated. And even when some appear in the key bindings, their value isn’t obvious. Hopefully, this guide helped you discover a few useful features.
Even better, share these tips with your friends. Rent your own Satisfactory server from us and show these functions to other players. You’ll work more efficiently — and maybe uncover even more hidden gems together.