In Satisfactory, the Tier 1 and Tier 2 milestones are the most important foundations for your first factory. They unlock almost all essential parts to produce a wide variety of resources. While we covered Tier 1 in a recent article, we’re jumping straight into the next step! You should tackle Tier 2 right away, as most resources are easy to gather and grant you key items to expand your production. At the same time, start keeping an eye on FICSIT’s Space Elevator, because you’ll need it soon.
Satisfactory Tier 2: Part Assembly with the Assembler
The Part Assembly milestone is arguably the most important here, as it lets you combine two materials and greatly expand your production options. You don’t have to unlock it first, but you should grab it fairly quickly.
Complete with:
- 200x Cable
- 200x Iron Rods
- 500x Screws
- 300x Iron Plates
This unlocks the Assembler so you can expand your base and prepare for upcoming milestones. You’ll also get recipes to use right away, including Reinforced Iron Plates, Modular Frames, and Rotors. You’ll also unlock Copper Sheets, which you’ll need more frequently in Tier 3.
We recommend setting up the following Assembler lines:
- Iron Plates + Screws = Reinforced Iron Plates
- Reinforced Iron Plates + Iron Rods = Modular Frames
- Iron Rods + Screws = Rotors
It’s worth checking the MAM for alternate recipes. For example, Alternate Screws can skip a step. For this guide, we’ll focus on the standard recipes to keep things straightforward.
Tip: Keep Screw production high — they’re a common bottleneck in Tier 2.
Satisfactory Tier 2: Obstacle Clearing with Chainsaw and Solid Biofuel
Do this milestone first if possible — you likely already have the materials, and it unlocks two powerful features: the Chainsaw and Solid Biofuel.
Complete with:
- 500x Screws
- 100x Cable
- 100x Concrete
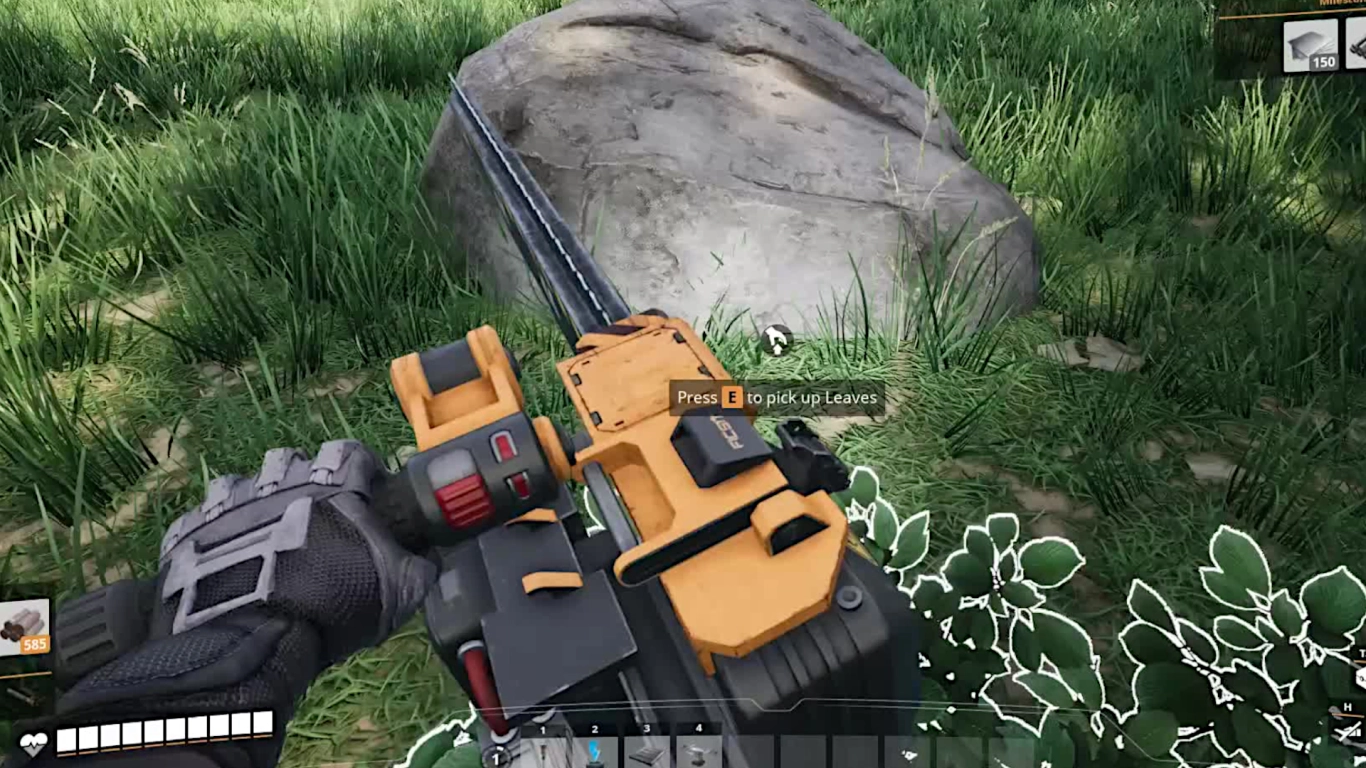
Craft the Chainsaw right after. It lets you clear much more flora to expand your factory while stockpiling biodegradable material. Use it on trees and it will clear everything in a small radius. Gather Wood and Leaves for the next step.
Now expand your power production. You can craft Solid Biofuel to generate more power with fewer materials. You still need to collect Leaves and Wood manually, but with two Constructors you can convert them to Biomass, then into Solid Biofuel. Feed that into your existing Biomass Burners.
Tip: Set up a small automation line: Leaves/Wood → Biomass → Solid Biofuel. This reduces manual refueling.
Satisfactory Tier 2: Optimize movement with Jump Pads
Unlock this if you want to move around your base or the map more efficiently. Jump Pads are very handy and should be part of your factory layout.
Complete with:
- 50x Rotors
- 300x Iron Plates
- 150x Cable
You’ll unlock both regular Jump Pads and U-Jelly Landing Pads. The latter cushion your falls but must be supplied with power. Install Jump Pads in your base if you’ve built multiple levels and want to move quickly from top to bottom.
Tip: Place U-Jelly Landing Pads at drop-offs and beneath tall work platforms to prevent fall damage.
Satisfactory Tier 2: AWESOME Sink & Shop — Resource Sink Bonus Program
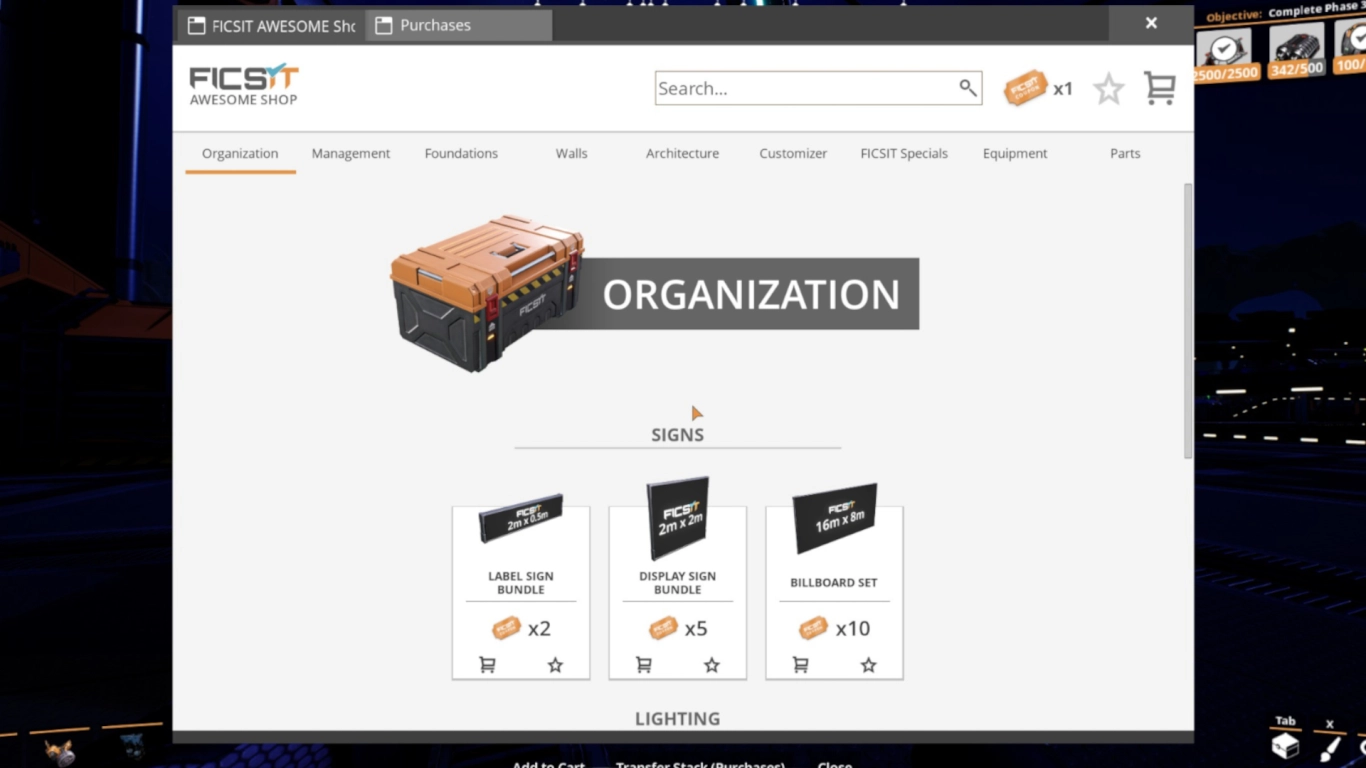
A costly but worthwhile upgrade is the Resource Sink Bonus Program. This unlocks the AWESOME Sink and its Shop so you can grab rare and useful items.
Complete with:
- 400x Concrete
- 500x Wire
- 200x Iron Rods
- 200x Iron Plates
The AWESOME Sink converts excess materials into Tickets, which you can redeem in the AWESOME Shop for lots of cool items. The machine consumes resources exponentially over time, so you’ll need to feed it more and more. While some items are purely decorative, many are genuinely useful, including Lamps, new Foundations, and various Walls to expand your base.
You’ll also unlock Customizer options for your Build Gun. Press X to activate this mode and give your buildings and machines a fresh coat of paint. You can unlock additional colors later from the AWESOME Shop. This helps you visually distinguish production lines and machines.
Tip: Excess Concrete, Iron Plates, and Wire are ideal early Sink items until your production scales up.
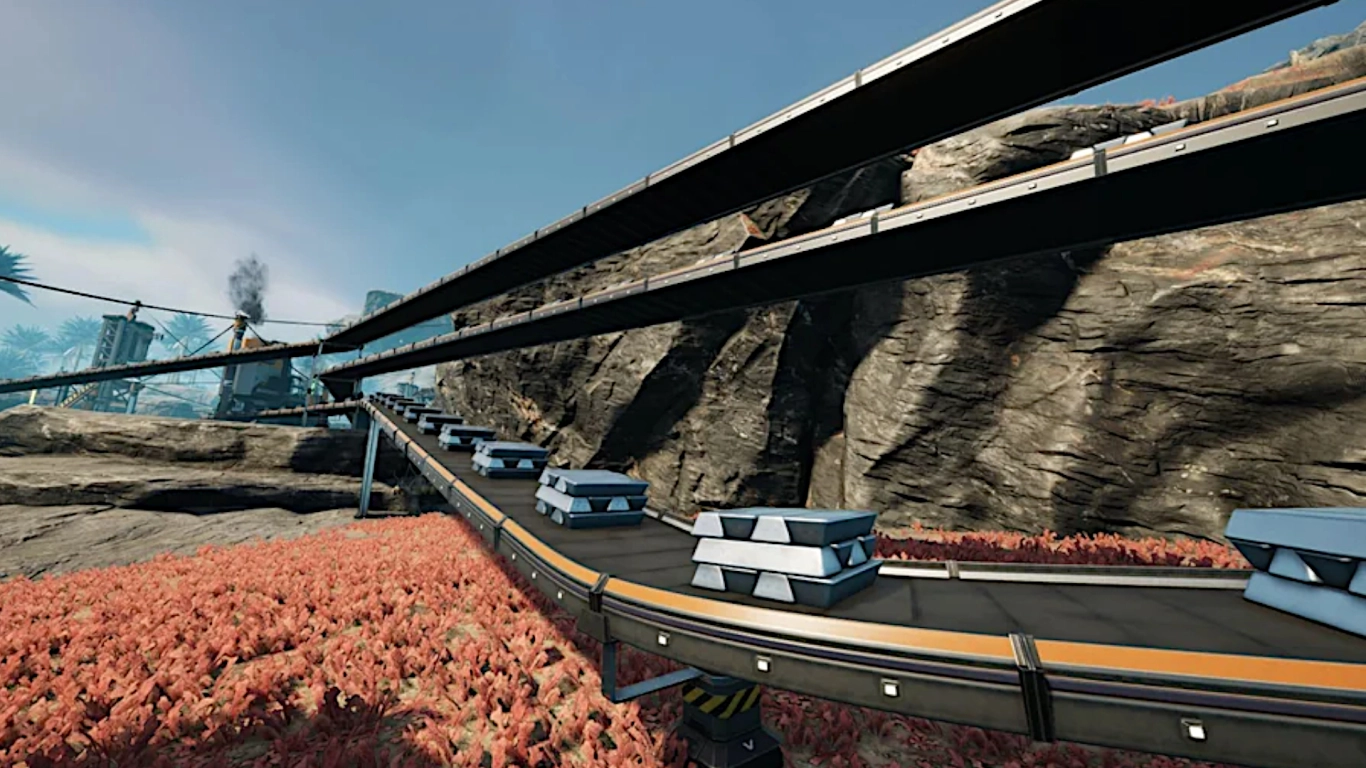
Satisfactory Tier 2: Logistics Mk.2 — faster conveyor belts
This fifth step gets back to expanding your factory and prepares you for the next milestones. You’ll upgrade and improve your conveyors.
Complete with:
- 50x Reinforced Iron Plates
- 200x Concrete
- 300x Iron Rods
- 300x Iron Plates
First, you’ll unlock Conveyor Belt Mk.2, which can transport 120 items per minute. This will significantly increase your material input. We recommend upgrading your belts gradually. You don’t have to rebuild them — simply upgrade in place.
You’ll also get Stackable Conveyor Poles, which are extremely handy for building upwards and expanding your factory. Ladders make climbing easier for navigation. The last recipe in this tier is the Conveyor Lift, which moves items between different floors without long belt runs. The game is signaling that you can and should build vertically.
Tip: Make sure your Miners and Splitters can handle the higher throughputs, or you’ll introduce new bottlenecks.
Satisfactory Tier 2: Launch the Space Elevator
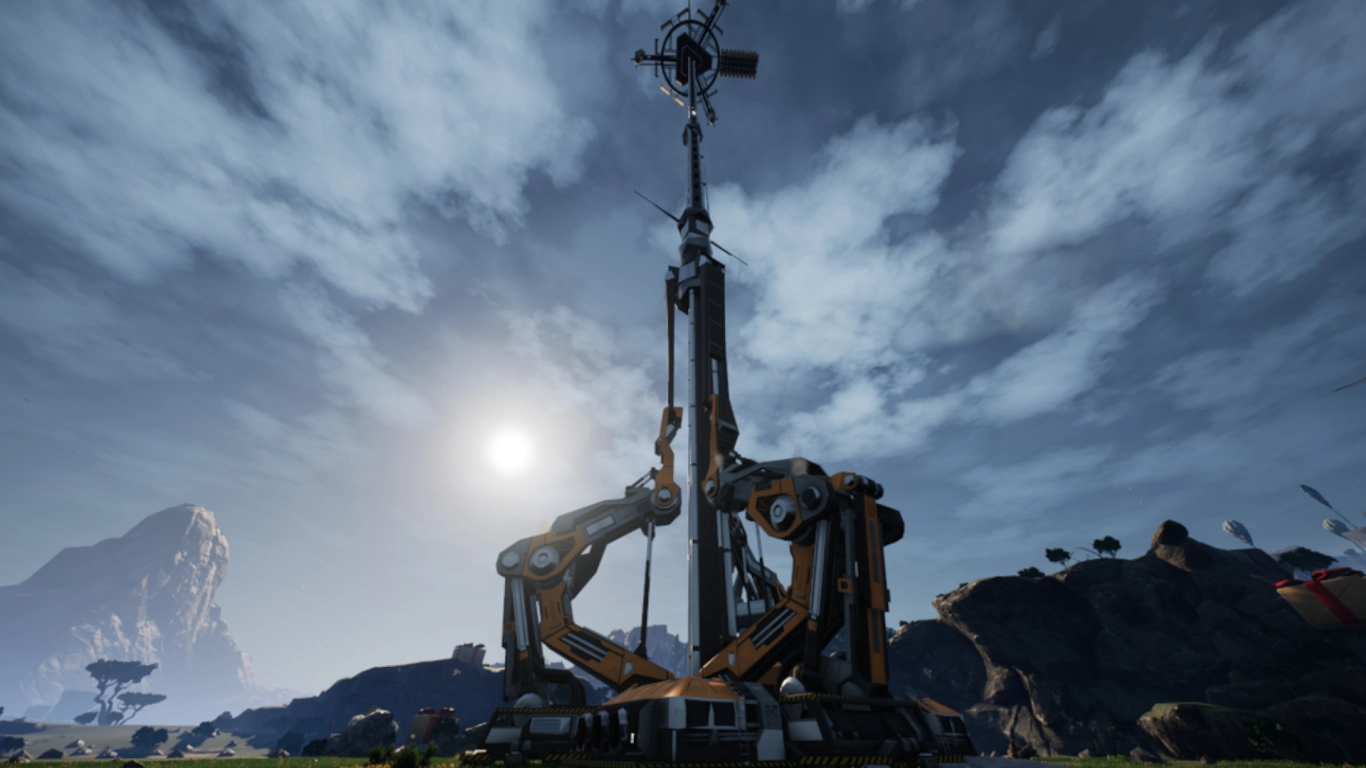
After finishing Tier 2, you’ll have many new options, but you can’t jump straight into Tier 3. The game first expects you to complete Phase 1 of the Space Elevator. It’s by far the largest building in the game, visible from almost anywhere on the map, so choose its location carefully. Of course, you can reposition it later.
Construction costs:
- 500x Concrete
- 250x Iron Plates
- 400x Iron Rods
- 1500x Wire
The Elevator focuses on items you must craft with the Assembler. Each phase then unlocks two new milestones. It’s important to keep an eye on whether you can complete the next phase.
For Tiers 3 and 4, you only need 50x Smart Plating, which is fairly simple. It’s produced from Reinforced Iron Plates and Rotors in the Assembler. It’s worth dedicating a small section of your factory to this, so you can unlock Tiers 3 and 4 quickly.
Tip: Buffer Storage Containers in front of the Space Elevator to prevent downtime and make deliveries smoother.
Conclusion: Clear Satisfactory Tier 2 quickly
Tier 2 unlocks many of the essential building blocks for your factory. We recommend completing these five steps as quickly as possible. Key components are the Assembler, the Chainsaw, and better ways to structure your conveyor belts. You should also get started on the Space Elevator to unlock higher tiers. Play together with friends and rent one of our Satisfactory servers for even more fun! This makes clearing the milestones much faster.
More interesting articles
Satisfactory Tier 3 Guide: Coal Power, Truck Transport, and Steel Production
Satisfactory Tier 1 Guide: Expanding Your Factory, Power & Logistics
Satisfactory Tier 4 Guide: Blueprints & Logistics Mk. 3