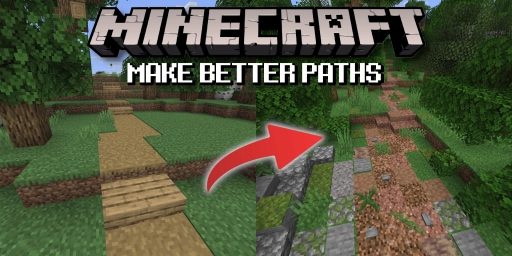
A Minecraft world should feel alive, and that can’t be achieved by builds alone. Often, it’s the small details that make a world truly believable. A key element is your network of paths and roads that lead between buildings. They aren’t just a means to an end—they can be a defining feature of your world in their own right. To get the most out of them, you’ll need to look beyond Minecraft’s default paths. In the end, roads and trails reflect your world and can do just as much storytelling as your builds. Here’s how to approach them.
1. Schritt: Standortwahl für Minecraft Wege und Pfade
First, decide exactly where your path will run. That could be between two other locations in your world, or simply a trail to nowhere in particular. The important thing is to think roughly about where the path would naturally go. Look at the terrain and consider how people would likely move through it. That will determine whether the path meanders through the landscape or becomes a straight, paved road. This logic applies to both fantasy and modern builds.
While you’re at it, you can mark small points along the roadside that might serve as set pieces or points of interest. Whether it’s a river crossing with a bridge or a ditch, keep these spots in mind for later.
2. Schritt: Stil und Art des Minecraft Weges festlegen
Next, decide what overall style your path should have. As mentioned in step one, this depends on the nearby builds. If those are medieval in style, align your path thematically with that. Modern skyscrapers call for a very different approach.
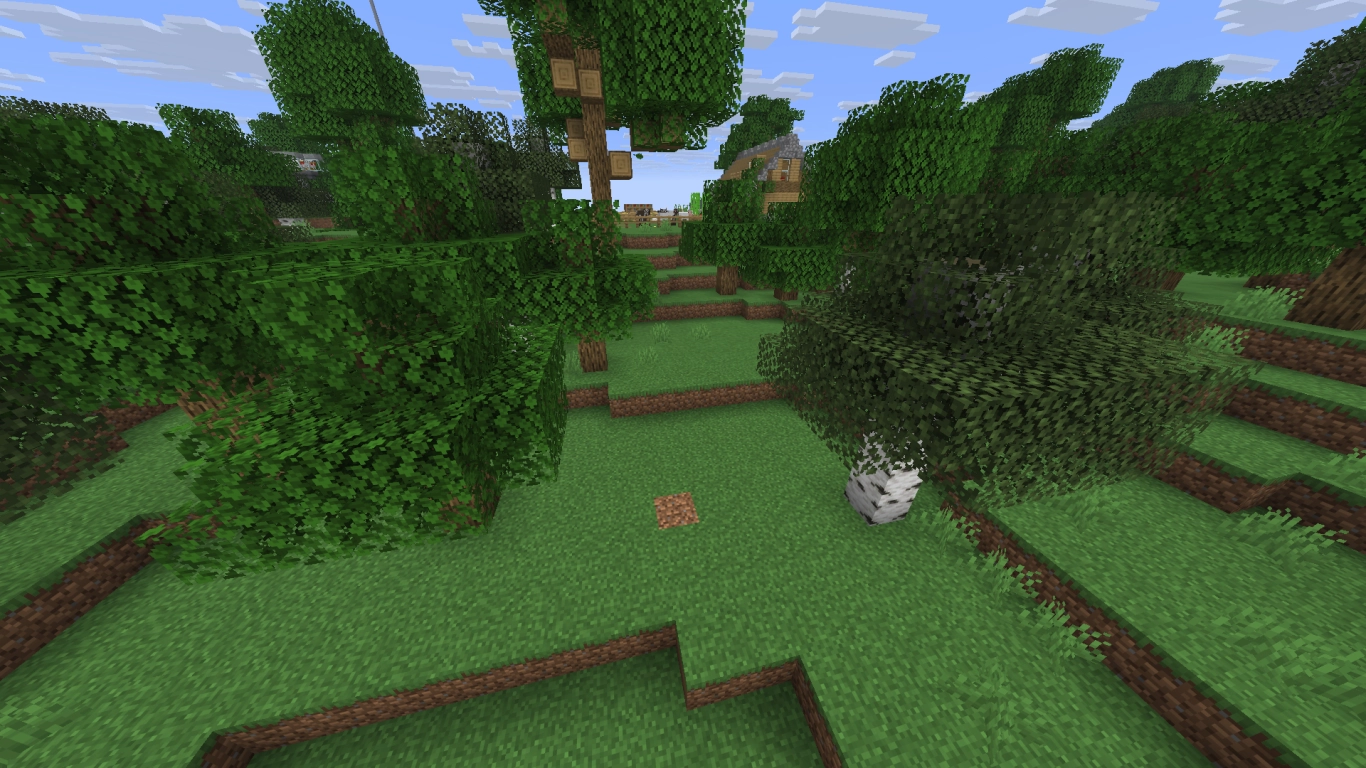
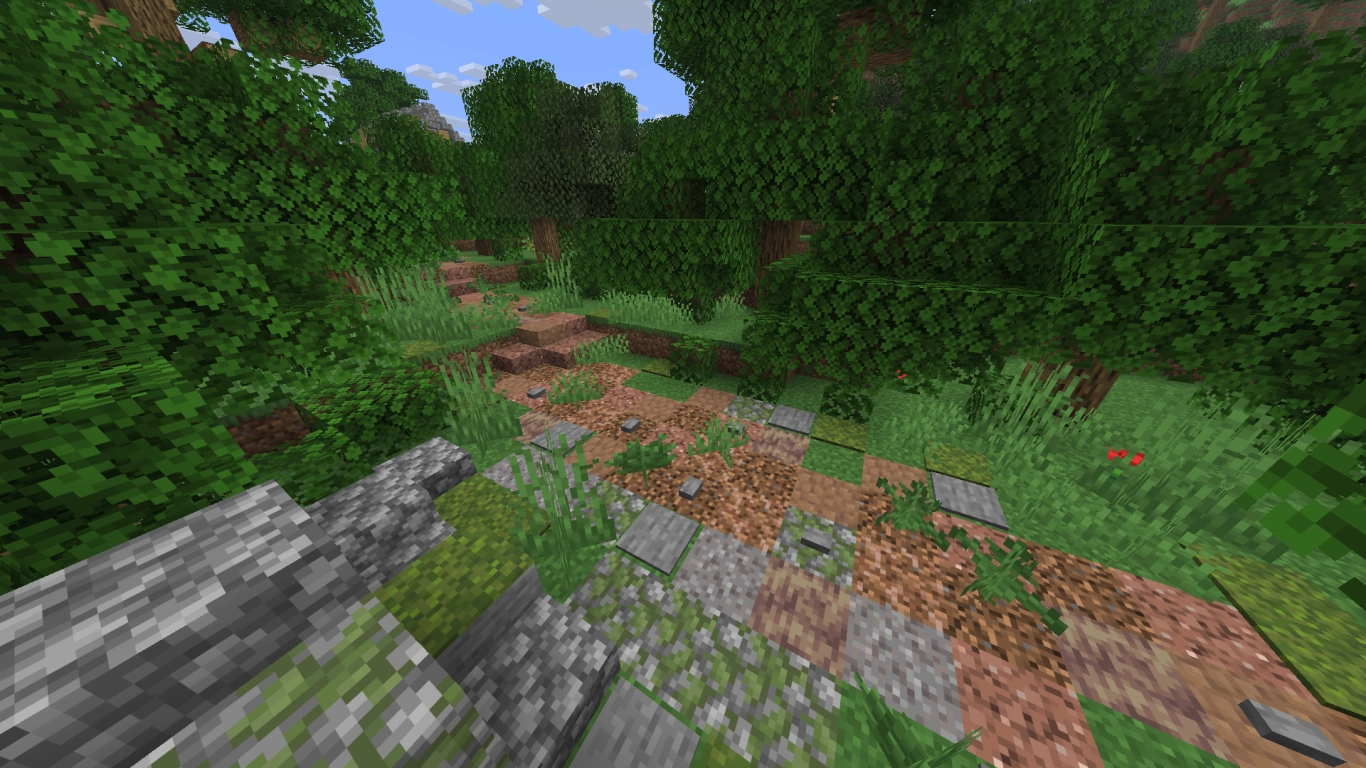
In our example, we chose a trampled forest path, which will end up fairly overgrown. We’re working with natural brown tones plus a bit of green. Depending on the terrain, you might have very different ideas—an icy trail in the mountains, a wide highway downtown, or a narrow alley in a village. Think about what purpose the path serves in your world, and choose a style accordingly. You can of course look online for inspiration!
3. Schritt: Farbpalette und Materialien für Minecraft Wege
Once you know where the path goes and what it should look like, gather the right materials. Minecraft paths look best when they’re made from more than one block type. Start by looking at your surroundings and noting which materials would realistically be available. For our forest path, that’s primarily dirt, which we convert to coarse dirt so it doesn’t grow over with grass.
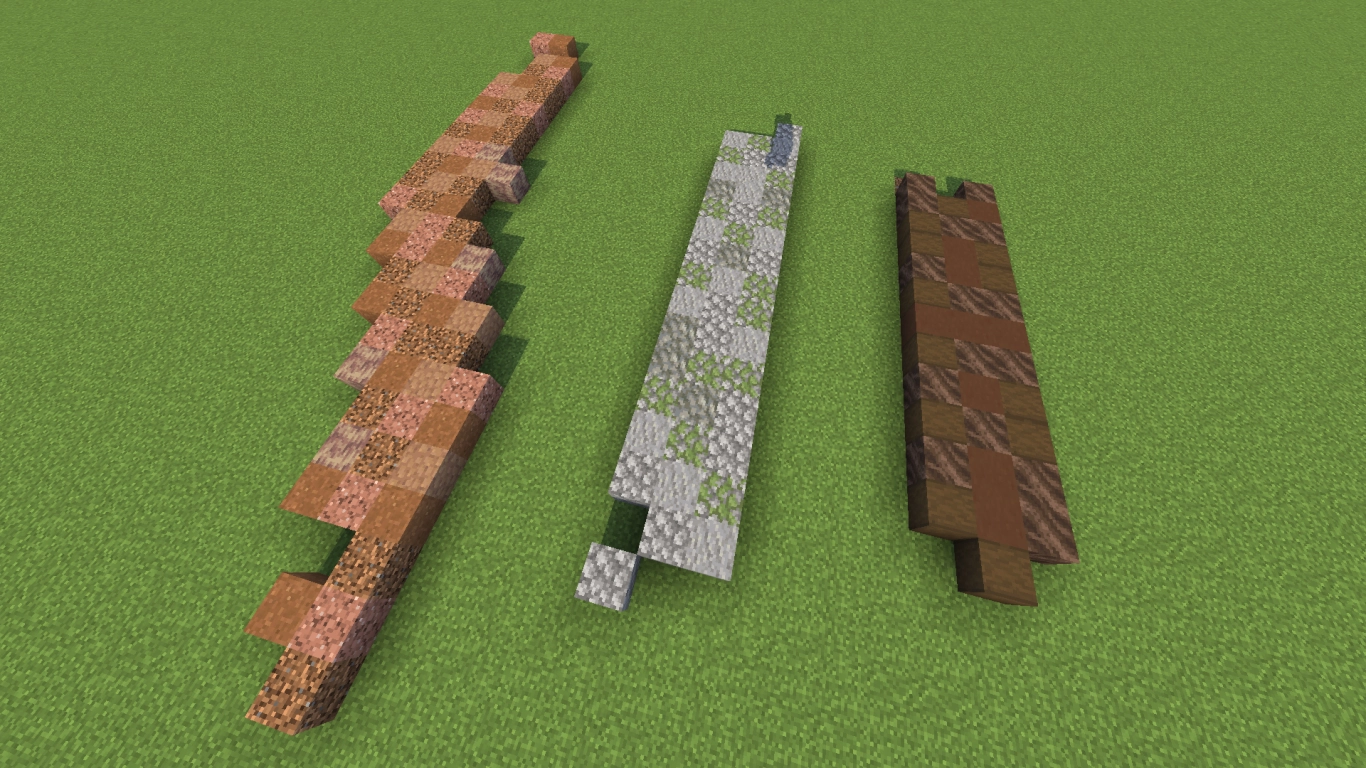
Then consider which other blocks match the palette. We’re leaning on brown and slightly reddish blocks to support the coarse dirt. A quick Creative-mode test helps to try combinations. Sites like Block Colors are also handy for searching by color.
Alongside coarse dirt, we’ve chosen rooted dirt from azaleas, granite, packed mud, and dripstone blocks. For spots where stone might poke through, we use mossy cobblestone and gravel.
Tip: Consider which blocks you can craft into slabs or stairs so your path flows smoothly when you change elevation.
4. Schritt: Grobe Pfadführung mit Hauptblock verlegen
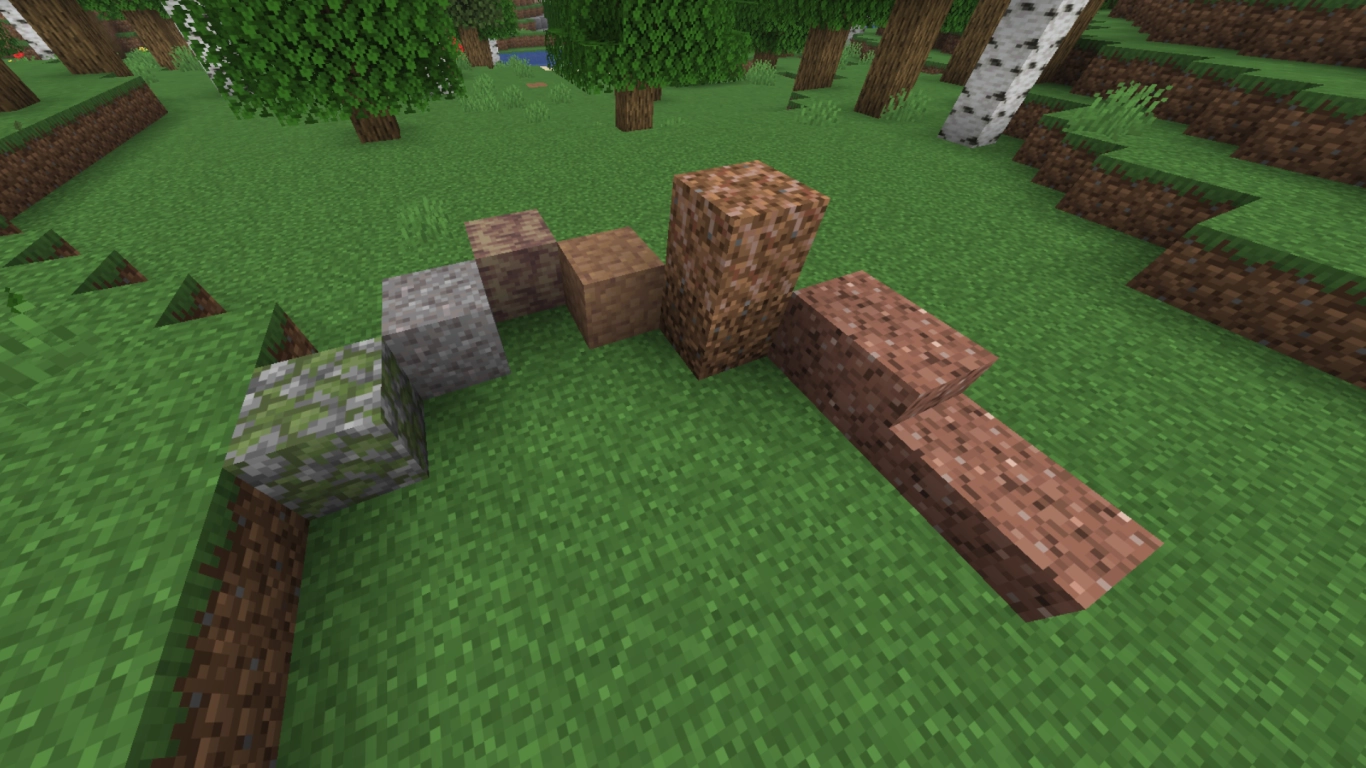
With your materials ready, start laying out the path. We recommend using just one block at first to create a rough guide. That way you can focus on the route without getting lost in details.
This step will look very different depending on your path type. Since we’re building an overgrown forest trail, we place coarse dirt somewhat randomly. We’ll blend it later with the other blocks to form a cohesive look. If you’re building a paved road, you’ll need to approach this with more structure.
5. Schritt: Detailarbeit – Texturen und Blöcke kombinieren
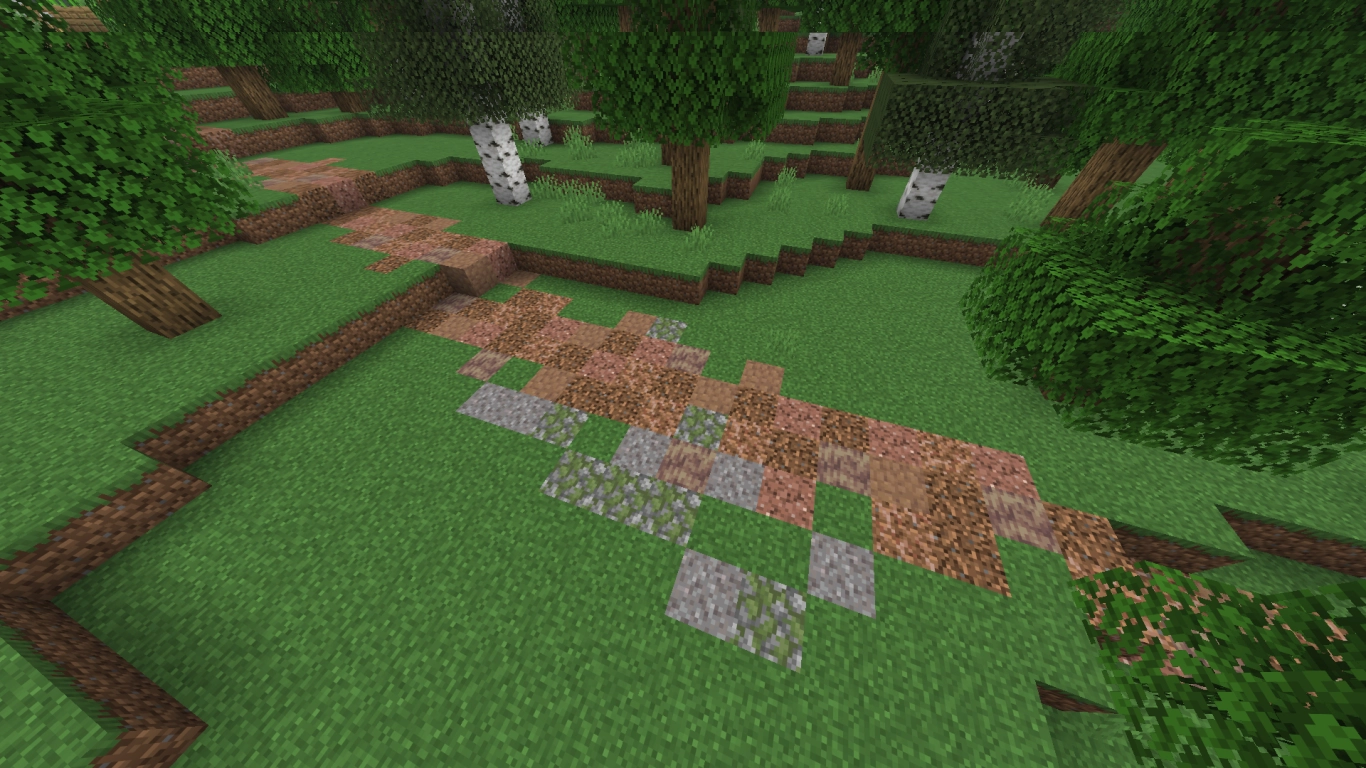
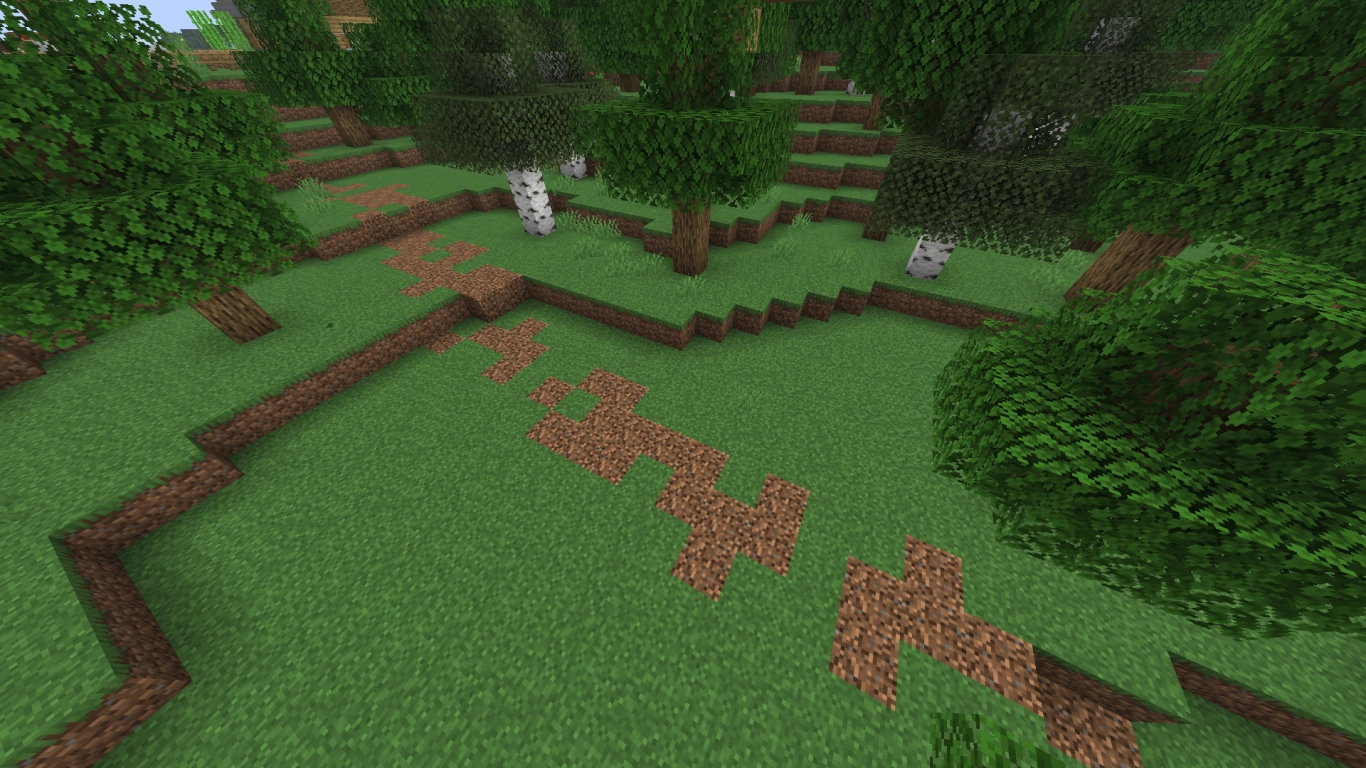
Once the rough path is down, start adding other blocks as color accents or patterns. It often helps to vary how frequently each block appears—but that’s up to you. For our forest path, we randomly cycle through blocks and try to ensure no two identical blocks are adjacent. This creates variety and a natural look. We save cobblestone and gravel for spots where we’ll place decorative stones later.
To keep the path easy to walk, we also use granite slabs to handle elevation changes. As mentioned in step 3, pick blocks you can slab or stair for smooth transitions—yours might be different.
6. Schritt: Dekoration, Natur und Beleuchtung ergänzen
The final step is where you can really let loose. Back in step 2 we suggested noting interesting spots along the path. Now you can dress them up and integrate them into the route. You can also add lighting or other features.
To finish our path, we thickened the surrounding forest. We placed grass and ferns directly on the trail to make it feel overgrown. Stone buttons or stone pressure plates work wonderfully as small rocks along the wayside. Decoration depends on your style and doesn’t have to feel random—this is the final polish for your path.
Fazit: Minecraft Wege, Pfade und Straßen verbinden deine Bauwerke
Paths, trails, and roads are an essential part of your Minecraft world and can give it tons of character. Don’t think of them as just a line between two structures, but as a standalone element in your world. You can do so much with them and tell a story without a single word. From broad city avenues to long-forgotten forest tracks, enrich your world with fitting paths.
If you want to try your hand at building a cohesive world, rent one of our Minecraft servers and invite a few friends! Then everyone can work on their own paths that eventually connect together.