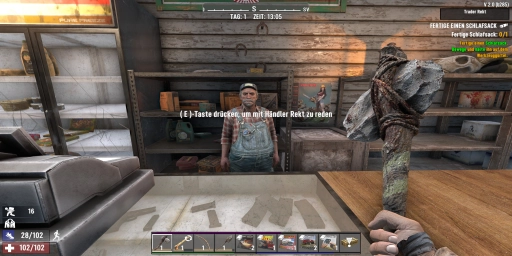
When you roam the wasteland in your first days of 7 Days to Die, you might think: “I’m completely alone out here.” But that’s not true. In the ruins are people who may not shake your hand, but at least bring a little humanity and structure to the chaos: the Traders.
Traders are the hubs of the world. They sell, buy, give you quests, and grant access to rare items. And in version 2.0 they matter more than ever. They’re not just filler, but practically a progress gauge.
This article explains everything about traders, their quirks, quests, and why reputation suddenly makes a real difference. By the end, you won’t see traders as just a “convenient shop,” but as a key to survival.
Traders in 7 Days to Die 2.0: The five traders and their strengths
There are five major traders in the game, each with their own personality and slightly different stock.
- Trader Joel – the “friendly” everyman, with a religious bend, offers a broad selection.
- Trader Jen – specialized in medicine and healing, often the best source for bandages, painkillers, and recipes.
- Trader Rekt – rude, but with very strong loot on offer.
- Trader Hugh – military type, focuses on armor, weapons, and combat gear.
- Trader Bob – mechanic type, great for vehicle parts, mods, and schematics.
In 2.0, their inventory is more varied, and the selection rotates regularly. Around each trader is a safe zone: inside the walls, zombies are blocked and weapons are disabled. Perfect for short breathers or sorting your inventory.
Quests in 7 Days to Die 2.0: Types, instancing, and progression
The biggest change in 2.0 is the revamped quests. They used to be nice extras. Today they’re practically mandatory if you want real progress.
Quest types at a glance:
- Fetch – Find a package and bring it back. Usually quick to finish.
- Clear – Kill all zombies in a specific building. Often punchy fights.
- Fetch & Clear – A combination of both. Takes longer, but worth it.
- Tier progression – The more quests you complete, the higher the tier level (1–6). Higher tiers mean tougher missions but better rewards.
- Special quests – e.g., Buried Supplies (dig up buried crates) or Special Jobs that send you to another trader.
The great part: Quests have more variety in 2.0. Buildings are instanced for quests (they reset when you start), so you’ll get fresh challenges again and again.
Quest rewards: Dukes, items, XP, and reputation

Quests are not just training—they bring concrete benefits:
- Dukes (in-game currency): Every quest earns you cash to reinvest in better gear.
- Items: Weapons, armor, mods, food, medicine—very valuable depending on tier and trader.
- XP: Your character levels faster when you run missions regularly.
- Reputation: Do a lot for a trader and you’ll be treated better.
With higher-tier quests, you gain access to more dangerous (but rewarding) buildings often out of reach for other players.
Reputation with traders: Prices, exclusive items, and bonus quests
In version 2.0, reputation finally matters. The more you do for a trader, the more they trust you. And that trust pays off:
- Better prices: Higher reputation = cheaper purchases, better payouts for sales.
- Exclusive items: Access to rare weapons, mods, or schematics.
- Bonus quests: Special assignments others never see.
- Story tidbits: With more rep, you learn more about trader personalities and backstories.
In short: You’re not just a “customer” — you become an ally when you prove yourself.
Strategies for the first week: Safe quests and Blood Moon planning
Especially for beginners, it’s important to play quests smart.
- Start with Fetch quests. They’re simple, pay well, and are less risky.
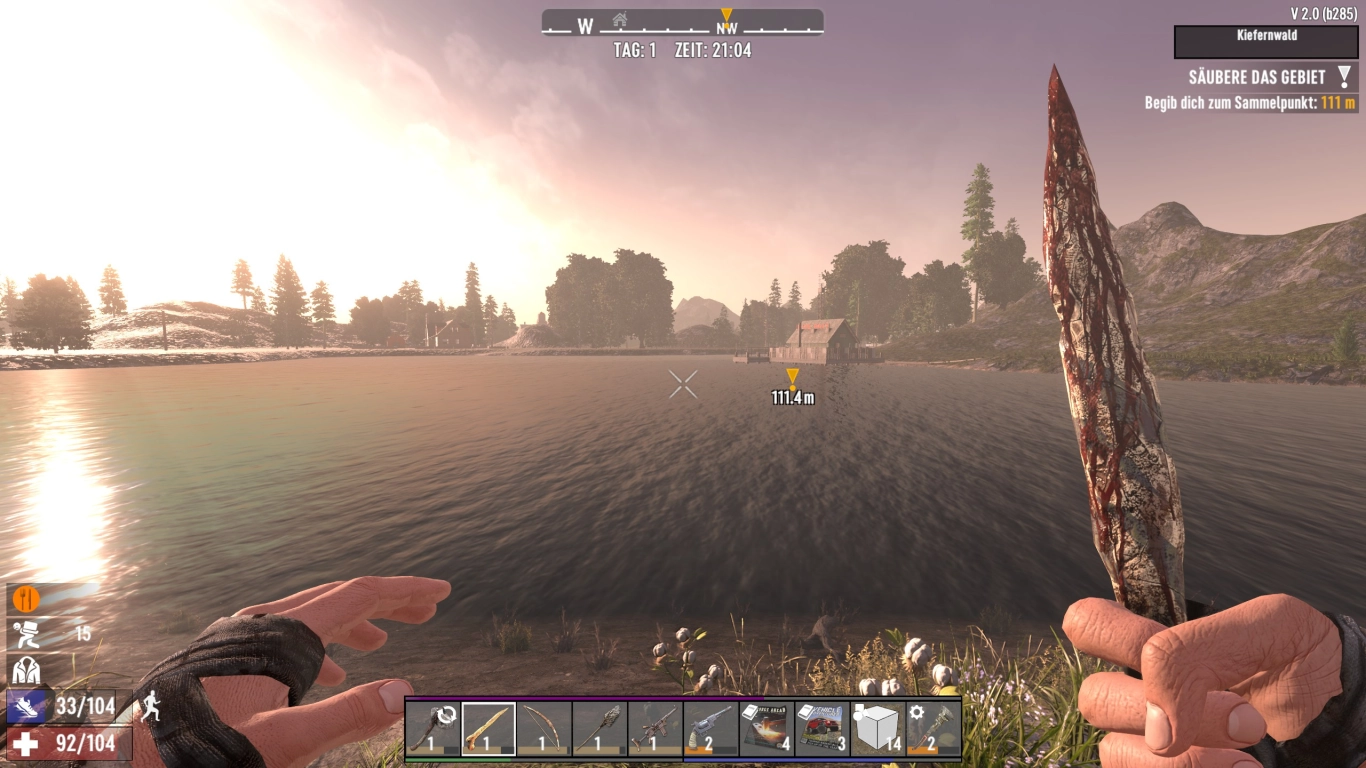
- Clear quests only in daytime. Zombies in buildings are ruthless at night.
- Loot everything twice. Quests reset a building on activation—so you can loot first, then start the quest and loot again.
- Horde planning. Don’t take long quests on day 7—be at your base in time.
Trader routes and opening hours: Trade and sell efficiently
One trader is good—several are better. Traders have different specializations and offers. If you’re mobile (mini bike or motorcycle), you should run trader routes:
- Traders have opening hours and kick you out when they close.
- Plan a loop where you visit 2–3 traders in a single day.
- Use the chance to sell excess loot.
- Watch for schematics—recipes for ammo or mods are essential.
Bonus: Traders reset their inventory regularly (e.g., every 3 days). With a fixed routine, you won’t miss a deal.
Multiplayer tips: Completing quests efficiently as a team
In multiplayer, quests really shine:
- Every player can accept the same quest—everyone benefits.
- Enemies scale, but the loot scales with it.
- Splitting roles helps: one pulls, one loots, one secures.
On a dedicated 7 Days to Die server this is especially convenient, because everyone’s progress stays in sync. No one has to fall behind—everyone benefits from quest progression.
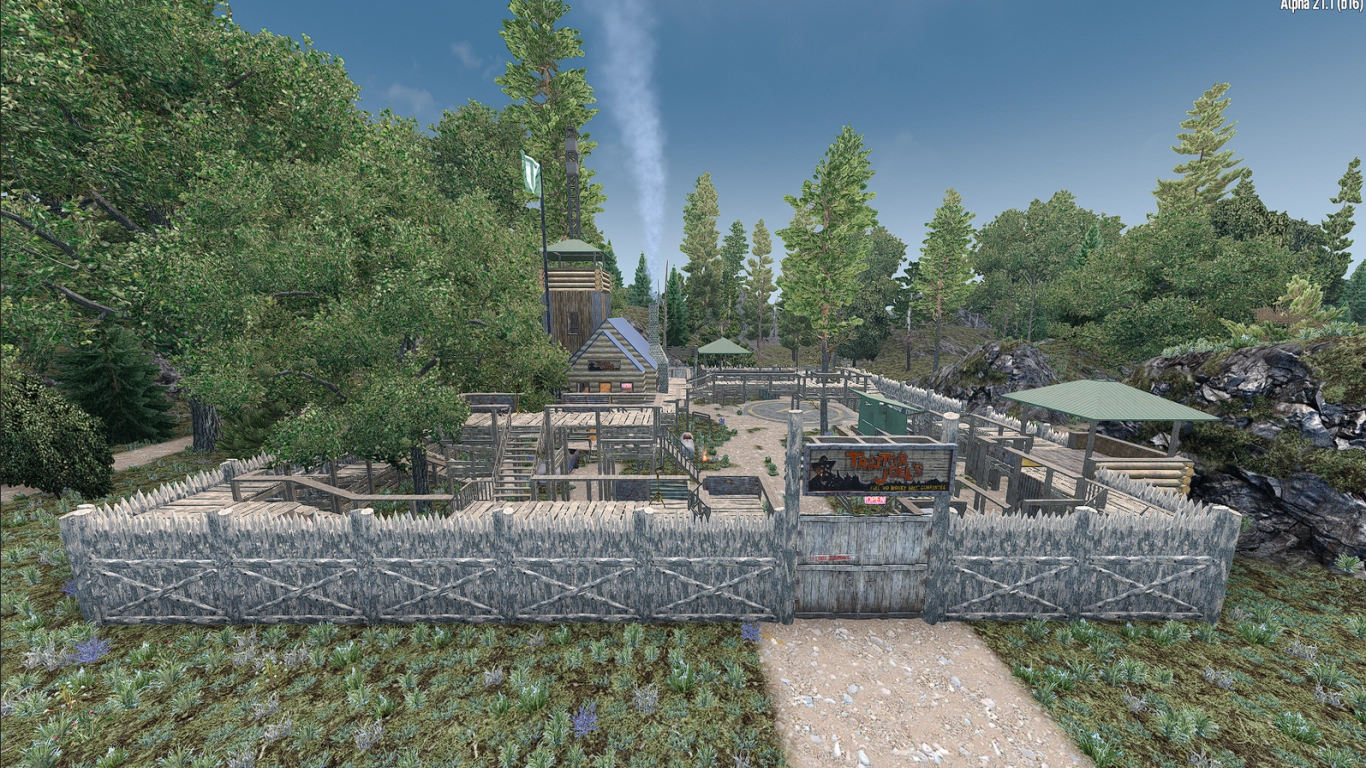
Trader bases as safe zones: Shelter, selling, and quest hubs
Every trader compound is essentially a small fortress. High walls, iron gates, safe zones. You can’t settle there permanently, but they make great stopovers:
- Protection during loot runs: If you barely make it out, flee to the trader zone—zombies won’t follow you inside.
- Selling point: Dump everything you don’t need at the shop.
- Quest hub: Especially handy when you’re chaining multiple quests in one area.
Some players even use trader bases as temporary Blood Moon shelter. Officially, that’s a no-go—creative folks still find ways.
Leveraging trader specializations: Medicine, ammo, vehicles
Each trader has strengths—use them deliberately.
- Need more meds? Visit Jen.
- Low on ammo? Rekt or Hugh deliver.
- Vehicle parts? Bob is your guy.
- A bit of everything? Joel often has a mixed stock.
That way you can quickly shore up weaknesses in your build or team.
Trader questline: From Tier 1 to Tier 6 with rising difficulty
With every completed quest you climb the trader ladder. At some point, your trader sends you to another trader (“Special Job”). That expands your map and opens new opportunities.
- Tier 1–2: Starter quests, simple POIs, quick rewards.
- Tier 3–4: More demanding buildings with more zombies and better loot.
- Tier 5: Large POIs (e.g., factories, hospitals). Tough nuts, but rewarding.
- Tier 6: Endgame content with the hardest enemies and best rewards.
This questline is a second guiding thread alongside the Blood Moon system. It gives you clear goals and constant rewards—ideal in an open survival world.
Endgame in 7 Days to Die 2.0: Why traders remain indispensable
Many games make traders irrelevant in the endgame—not so in 7 Days to Die 2.0.
- Rare schematics you’ll hardly find on your own.
- Ammo and explosives you desperately need late game.
- Quests still grant tons of XP and Dukes at high levels.
Even with a perfect base, vehicles, and top-tier weapons, traders remain your constant companion.
Reputation in detail: Concrete perks and thresholds
To make it tangible:
- At low reputation you pay markups (around +20%) for ammo, for example.
- At mid reputation, prices drop; plus small perks like a free bandage.
- At high reputation, the good crates open—schematics, special mods, or exclusive quests.
Building reputation takes time—but if you consistently work for a trader, it pays off massively in the long run.
Conclusion: Traders, quests, and reputation are your lifeline
In version 2.0, traders and quests finally carry the weight they deserve. They’re not just minor pit stops, but a distinct progression track. With reputation, better quests, and worthwhile rewards, they become the second heartbeat alongside the Blood Moon system.
Whether solo or with friends: A 7 Days to Die server gives you the freedom to leverage traders to the fullest. You’ll build faster, loot better, and survive longer.
More interesting articles
7 Days to Die Endgame Guide: Gear, Weapons & Builds
7 Days to Die Vehicles Guide 2.0: From Bicycle to Gyrocopter