Iron is one of the most valuable resources in Minecraft, as it is required for many different recipes. However, constantly mining underground is certainly not an option, as it will cost you a lot of time in the long run and can also become quite boring. Long-time Minecraft players have therefore taken advantage of a certain mechanic that ensures iron is produced completely automatically! This involves the iron golem, one of the most interesting mobs in Minecraft. We’ll show you how it works and how you can build your own little iron farm!
How do automatic iron farms work?
We have already talked about iron in our article on mining (Minecraft Mining Techniques: Efficiently Extract Resources) . And if you enjoy digging underground and searching for iron ores through cave tours or strip mining, you can still do that!
However, this can take some time, and you might not always have the desire or time for it. But sooner or later, you will run out of iron. What now? Minecraft has an interesting mechanic that works with villages and villagers. When they feel threatened or form a village, they spawn an iron golem. And this is the key to an automatic iron farm!
For the farm, we make use of this exact mechanic and ensure that new iron golems keep spawning and then get killed. Each time they die, they drop 3-5 iron ingots. And you don’t have to lift a finger!
Instructions for building a simple iron farm
This iron farm is not the most efficient variant, but one that you can build very early in the game. Additionally, it works in Peaceful mode, and you don’t need to use any Redstone. So, it is universal and perfect for every player, regardless of experience.
List of materials
- one stack of walls of any kind
- building blocks
- 5 beds
- 5 slabs
- 5 villagers (or 2 villagers + food)
- torches
- water bucket
- lava bucket
- 3 signs
- shovel
- 4 hoppers
- chests
Space for villagers
Choose a suitable location where you want to build an iron farm. Not far from your base is a good idea, preferably a flat area. Dig a hole with the dimensions 3x5 blocks and make it 4 blocks deep. This is where your villagers will live and establish their own village.
Place the five beds in a row in the dug hole. Fill the free space with slabs so that no monsters or iron golems can spawn there. Also, place some torches.
Now you just need to get five villagers into the hole, which is probably the most challenging task. But with some tricks, it becomes easier, as you only need two villagers that can breed. You can bring them from a nearby village using a boat and take them to their new home. Give them food, preferably carrots or potatoes, and wait a few days until they have filled all 5 beds with villagers.
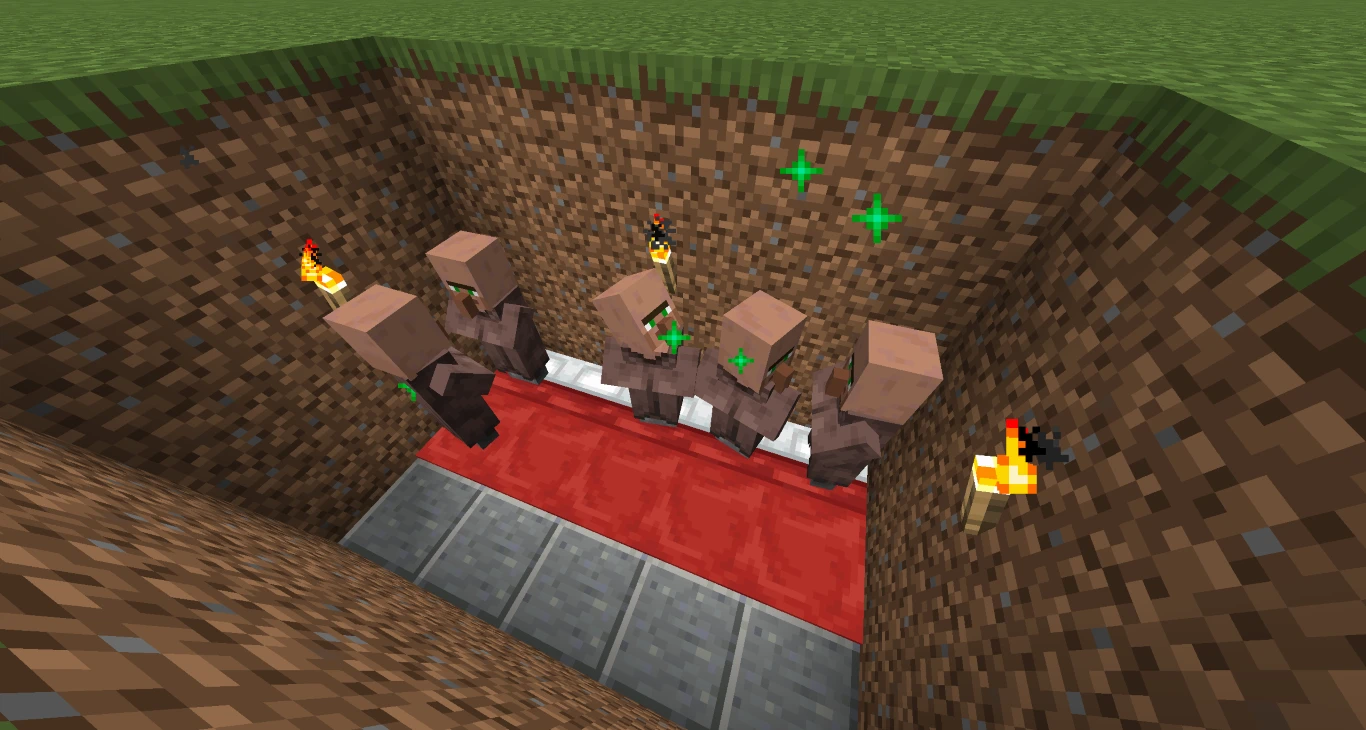
This small community now serves as an independent village and quickly notices that it does not have an iron golem. Therefore, they will create one.
Completing the iron farm
You can finish the rest of the farm in just a few minutes. First, close the hole with the villagers, leaving one corner open. Place your four hoppers and your chest, where the iron will be collected later, in this corner.
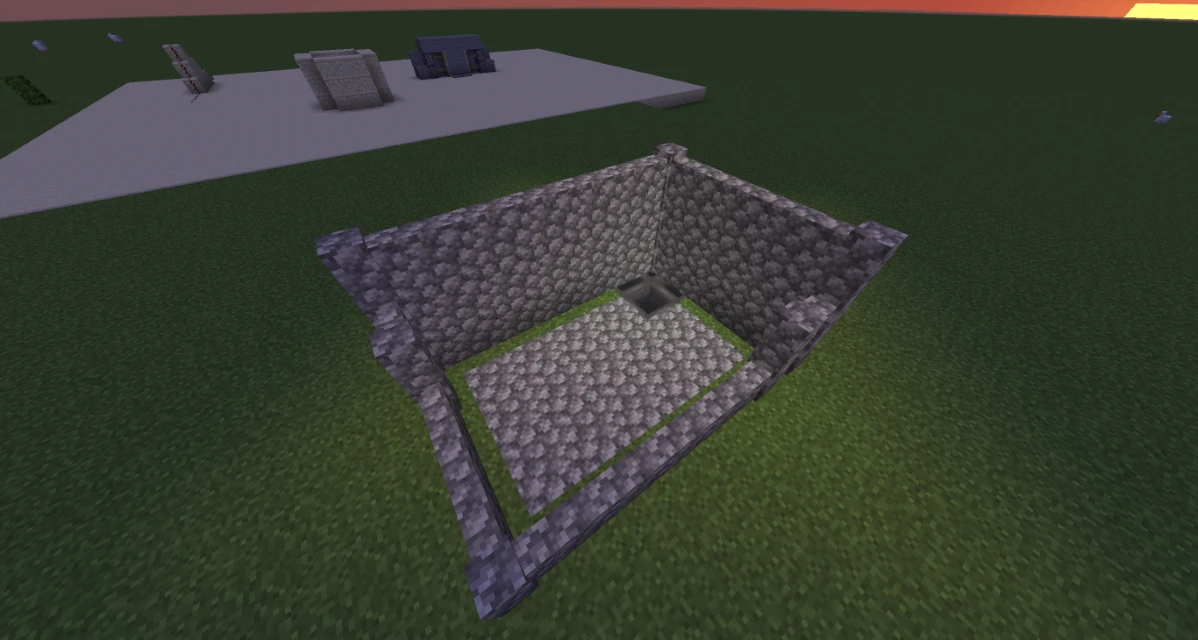
Surround the 3x5 field with walls so that the golem spawns inside it later. At the corner where the chest is, raise the wall to a height of 3 blocks. On the other two sides, a height of 1 block is sufficient so that you can always watch the iron golems spawn.
Collecting iron
Now you need the water and lava buckets, as well as the signs. The lava is needed to kill the iron golem. Place the signs above the corner with the hoppers so that the lava is held there. Our picture should help you with this.
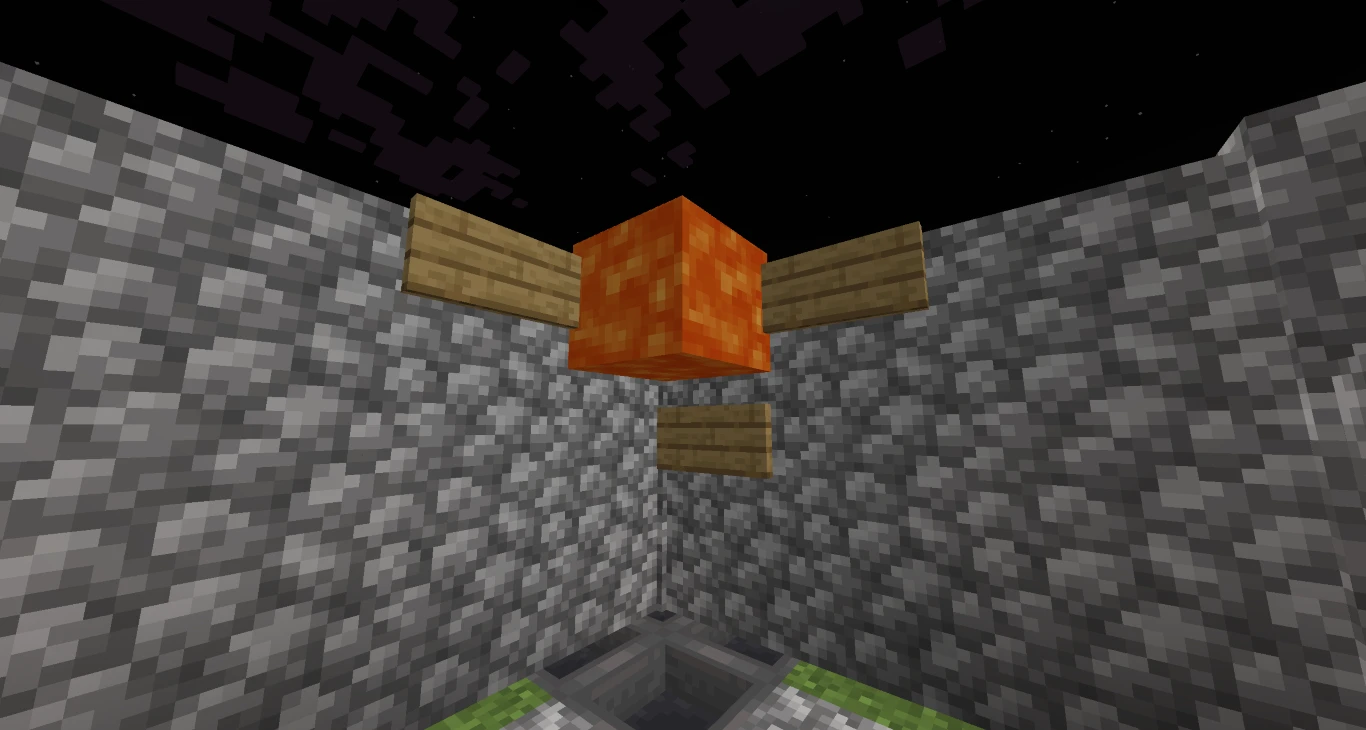
Place the water in the opposite corner so that the flow pushes the golem directly into the lava.
The finishing touch
The farm is essentially complete, but you need to ensure that the iron golem spawns in the designated area. To do this, you need to secure a 19x21 block rectangle around the farm. The best way to do this is to convert the ground with a shovel into paths, as monsters and iron golems cannot spawn there. Measure 7x7 from opposite corners, as shown in our picture.
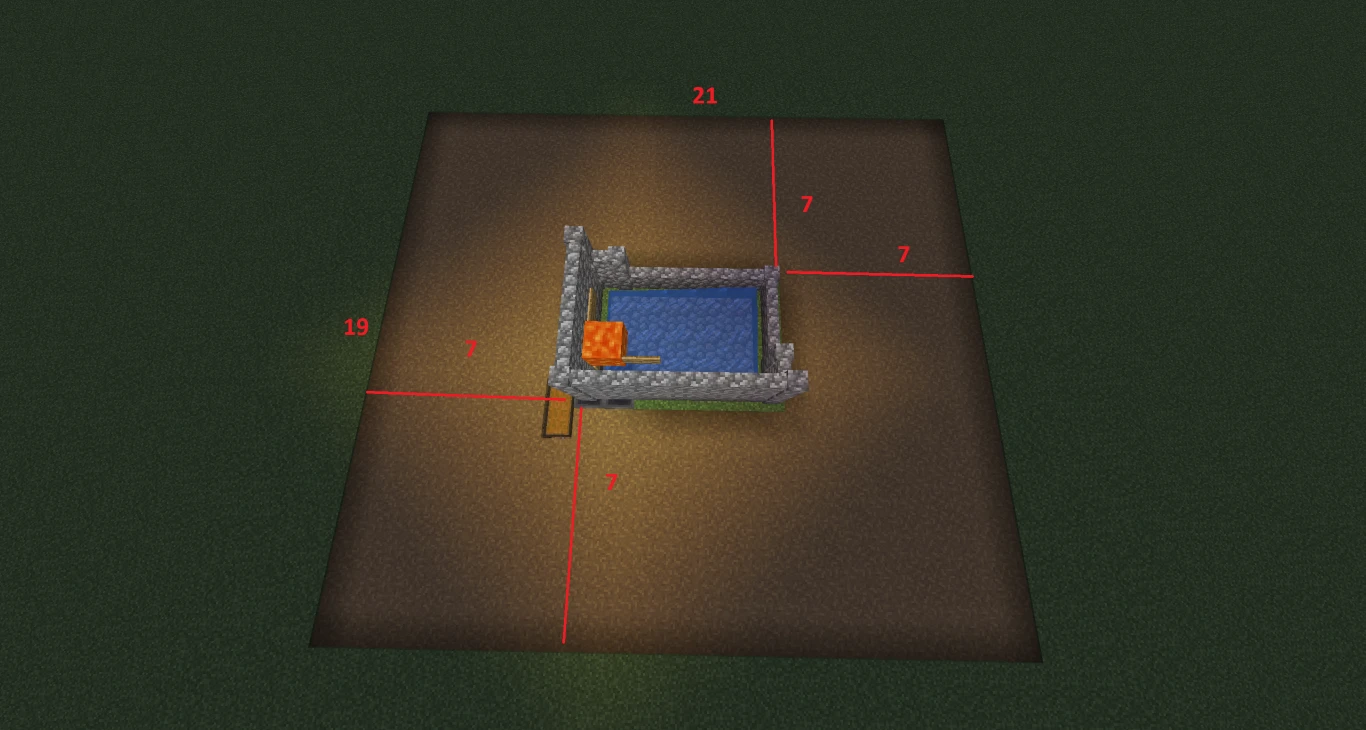
After that, you need to wait a night for all the villagers to claim their beds. The next day, a golem should spawn! About 3-5 golems spawn per day, which is not a lot, but more than enough over a longer period.
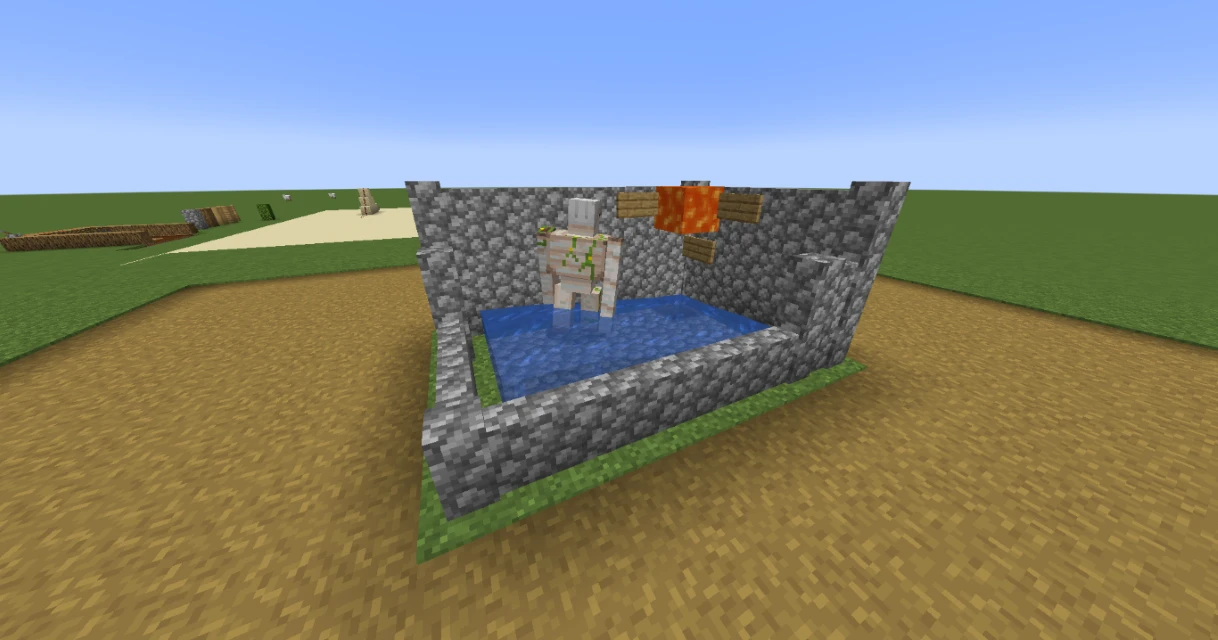
Improving the farm for more iron
This farm alone will produce quite a bit of iron without you having to do anything. And for most game worlds, this should be more than sufficient. Additionally, the described farm works in Peaceful mode, so you don’t have to deal with monsters.
Villagers produce significantly more iron golems when they are scared and alarmed. Other iron farm designs therefore use a zombie that the villagers can see, causing them to produce more golems out of fear. The zombie must either be able to hold an item or be named with a name tag. It must stay within the villagers’ sight but not attack them. However, as mentioned, this is not necessary unless you need a large amount of iron.
What to do with the poppies?
You may have noticed that iron golems not only drop iron ingots but also flowers. This is a reference to the Japanese anime film “Castle in the Sky,” where the large robot in the film also carries a red flower.
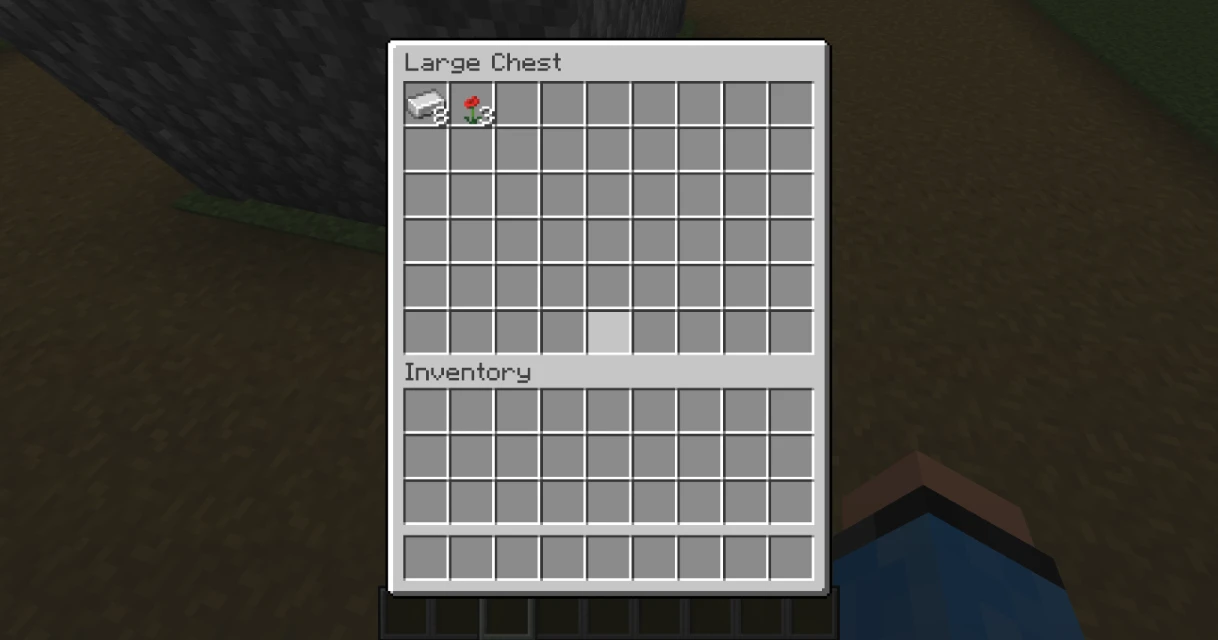
You can use these either as red dye or direct them into a composter with a hopper. There, they will be converted into valuable bone meal.
Conclusion
An iron farm is now part of the basic equipment of every Minecraft world! And the best part is that our design also works in Peaceful mode! Sooner or later, you will probably have more iron than you actually need. The farm works completely automatically and runs in the background while you do other things. Don’t want to search for iron anymore? Build an iron farm on your own server and share the wealth with your friends. Rent your Minecraft server and get started!
More interesting articles
Build a Minecraft Monster Trap: Automatically Gain Endless Resources
Build an Automatic Potion Brewer in Minecraft: Guide & Tips
Building a Minecraft XP Farm: Quickly and Easily Reach Level 30
Build an Automatic Blaze Farm: Endless Blaze Rods and Experience Points

