Resource packs (formerly texture packs) let you customise Minecraft’s visuals to your liking. There are, of course, plenty of wonderful packs to download online, but perhaps you’d like to try assembling one yourself. It can be a rewarding long-term project, though you can also tweak just a single texture and leave everything else as is. Either way, you’ll need to get to grips with creating a resource pack. So today we’re giving you a complete step-by-step guide to add your own textures to the game.
Preparation: Software and settings for your Minecraft resource pack
Our tutorial refers to Windows 11 and the tools available there. You can, however, follow the same process on other operating systems.
First, download and change a few important things to make life easier later on. Enable file extensions in File Explorer (View → Show → File name extensions). This helps you distinguish and rename files later. You’ll also want WinRAR (or 7-Zip), as it works better than Microsoft’s built-in zip tool. All other required tools, such as a text editor, should already be installed.
To edit the textures themselves, you’ll need an image editor. Choose a program you’re comfortable with. We recommend GIMP as it’s free and easy to use. For more detailed work, Aseprite is a great choice, as it’s purpose-built for pixel art.
Create a template: Extract the original Minecraft assets

To create a texture pack, you’ll need a template to work from. There are several approaches, such as downloading an online template. But that isn’t necessary if you take a quick look through Minecraft’s files. You can pull the assets directly from the game.
Create a Minecraft resource pack template:
- Navigate to the “.minecraft” folder (under %appdata%), then to “versions”. Choose the version you want, in our case 1.21.11. Copy the .jar file to a separate location to work on it.
- Rename the file from .jar to .zip (you’ll need file extensions enabled, as described). Confirm the warning. Then extract the file; you can delete the original version.
- In this folder, delete all folders and files except “assets”. That’s where the important files live.
- From “assets”, go to “minecraft” and delete all folders there except “textures”. As the name suggests, you’ll find all textures there, organised into subfolders.
Edit textures: Create your own Minecraft textures
You now have a template to edit the textures. Click through the remaining folders and look for the things you want to change. In “block” you’ll find all blocks, in “item” all items, and so on. If you want to edit every asset, it’ll take quite some time. You can also just adjust individual files.
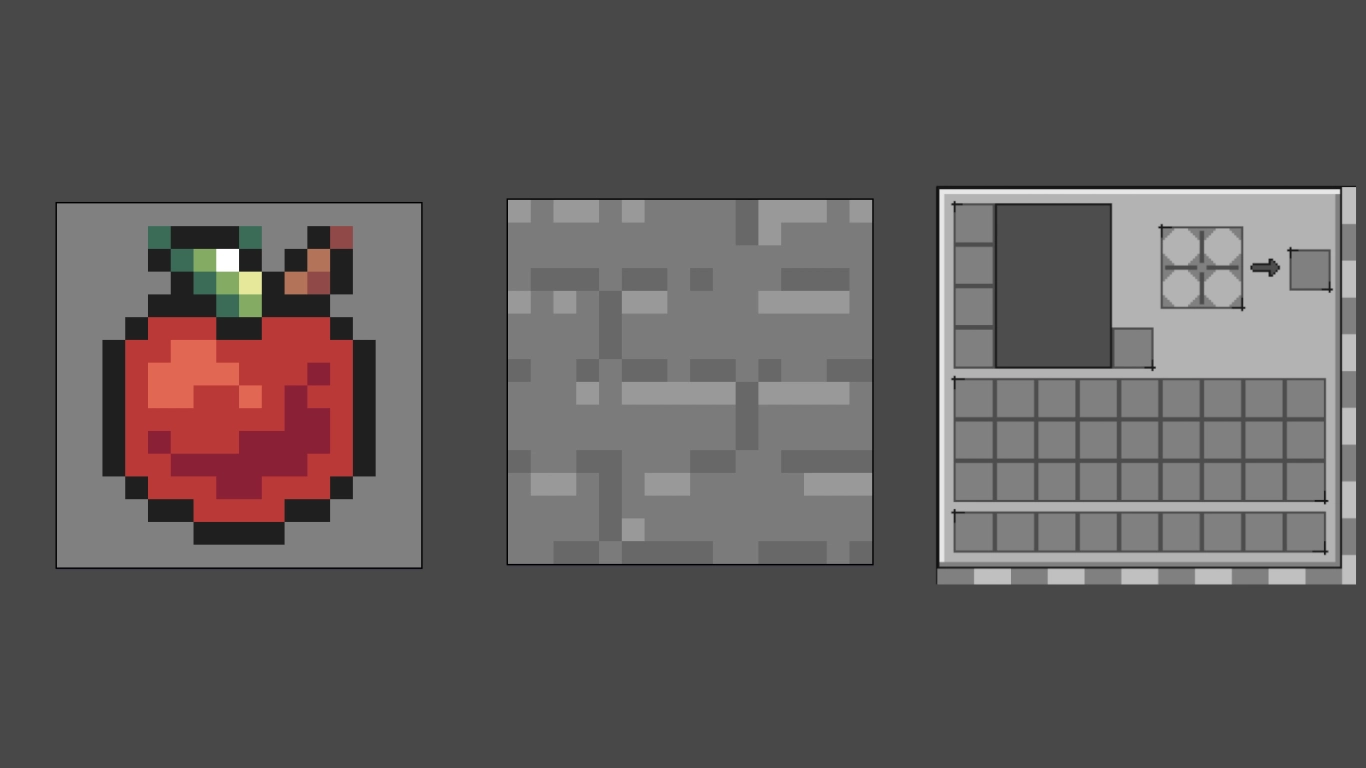
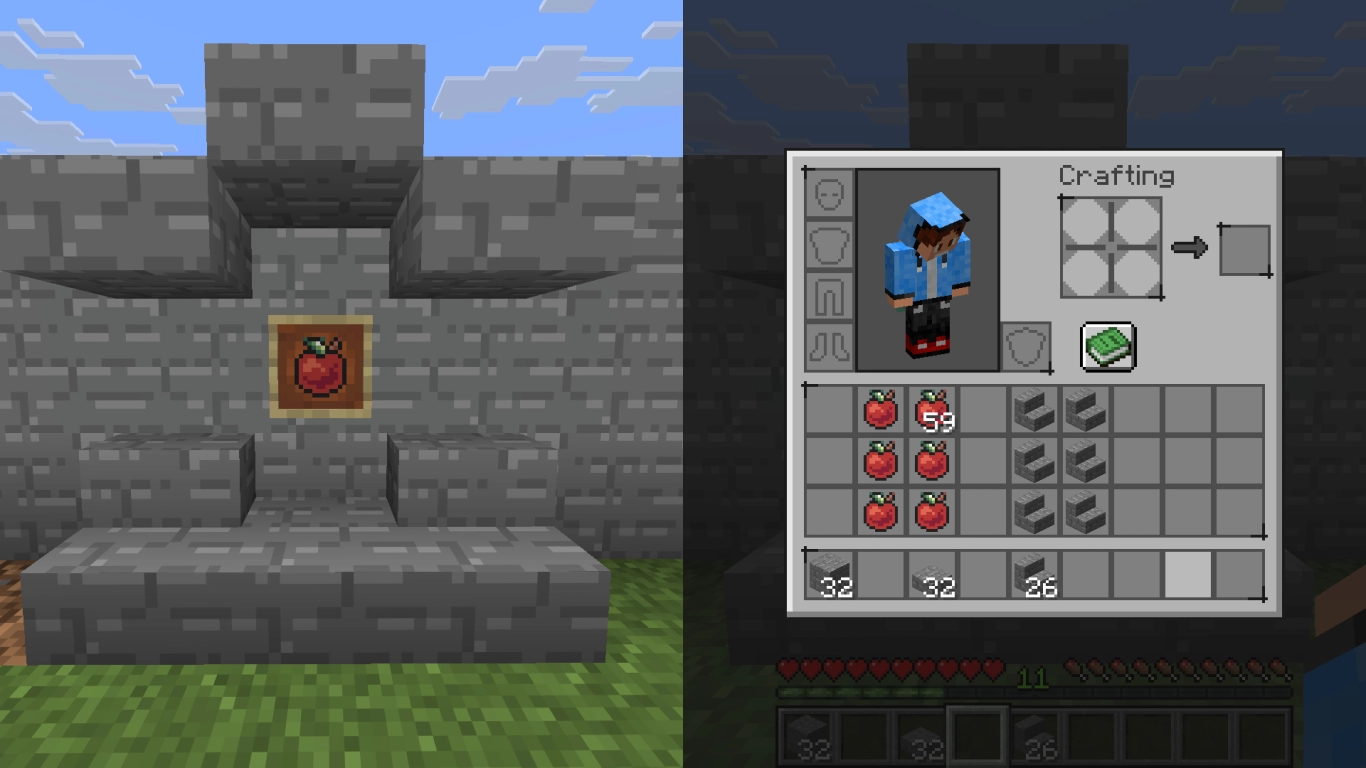
We chose these textures as a demonstration:
- apple.png in “item”
- stone.png in “block”
- inventory.png in “gui” → “container”
Now edit the files in the image editor of your choice. Note that Minecraft’s standard textures are 16x16 pixels. That isn’t much space, but it can spark creativity. Some other assets, such as the inventory, use different sizes. Work within the given constraints and use the original file as a base to trace over. It’s best not to change the actual dimensions.
After creating your textures, save or overwrite the original file. Do not rename the original files, or the game will no longer recognise them. The texture itself is, of course, meant to be changed.
Finally, you can delete everything you haven’t edited. Default assets don’t need to be overwritten. In-game, you can stack packs and even combine them.
Create pack.mcmeta and pack.png correctly
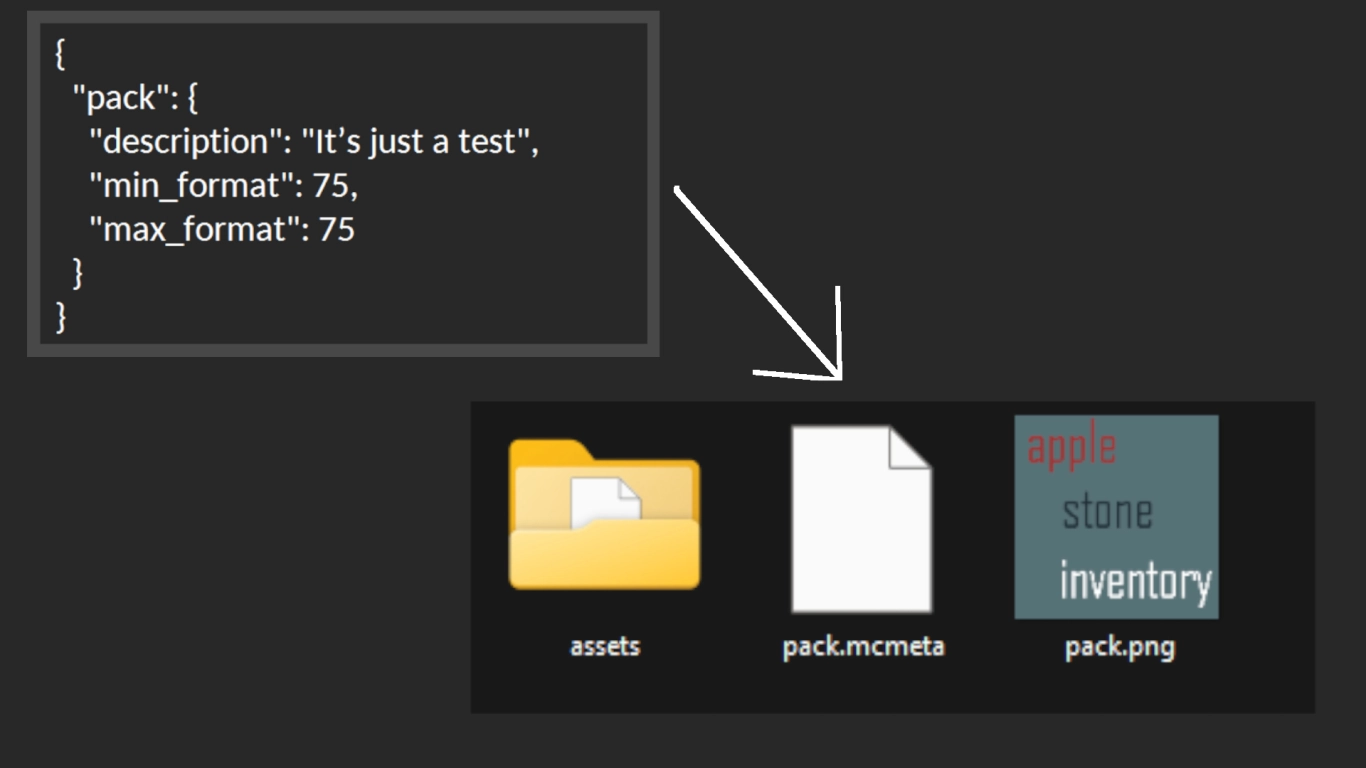
Once you’ve adjusted all the textures you want, you’ll need to create two more files. To do this, go back out of the assets folder and first create a text file that you name “pack”. Paste the following content into this text file and adjust it afterwards:
{
  "pack": {
    "description": "desc",
    "min_format": 75,
    "max_format": 75
  }
}
A few aspects can be changed here, starting with the number. Check the Minecraft Wiki under Pack format in the lower table to see which number applies to your Minecraft version. For 1.21.11 it’s 75, so change this number accordingly for both values. Also replace “desc” with a description of your choice, in our case “It’s just a test”. Save the changes. Then rename the .txt to .mcmeta to get the correct file type, i.e. pack.mcmeta.
The second file is optional, but you should create it anyway. This is the image for your resource pack, which should be named “pack.png”. It’s important that the image is square. We recommend 128x128 pixels.
Installation: Activate the resource pack in Minecraft
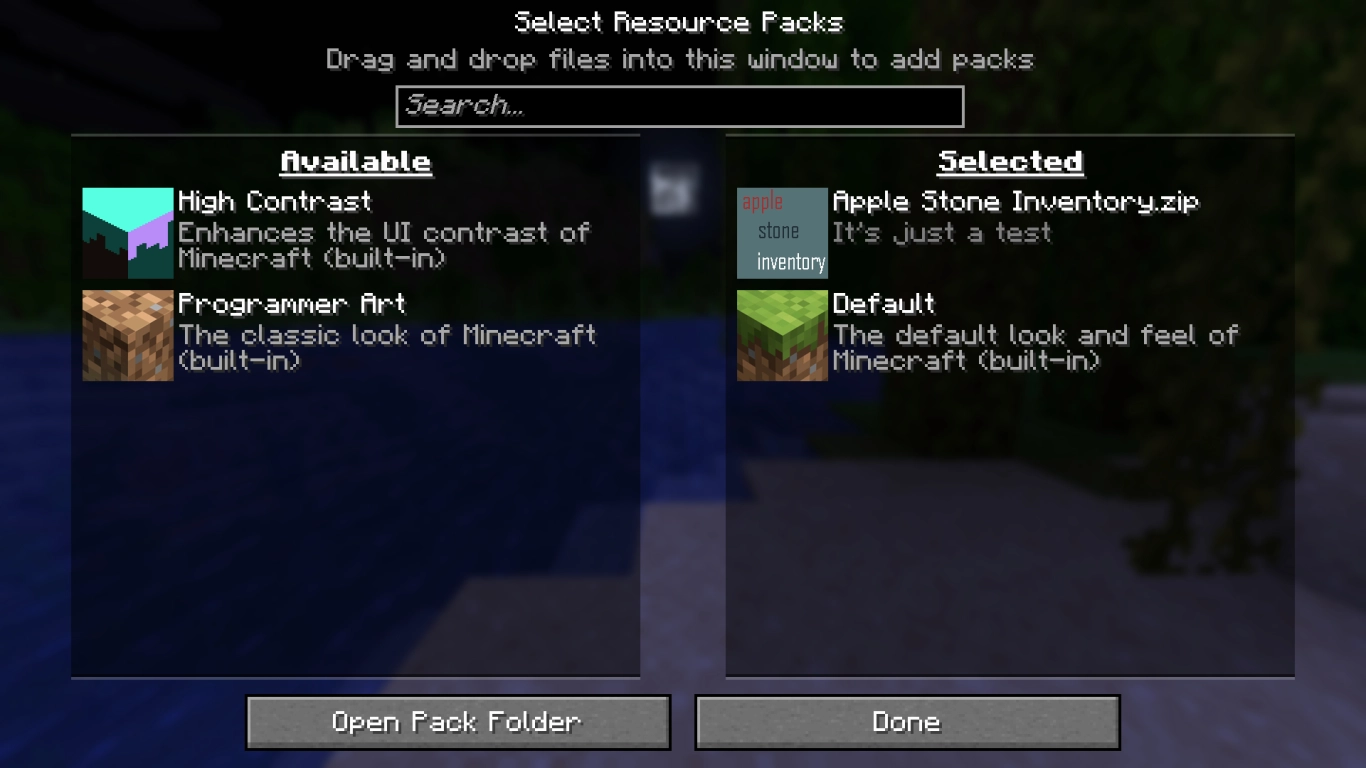
You’ve completed all the key steps so far, but now you still need to bring the resource pack into Minecraft. Select assets, pack.mcmeta and pack.png and compress these into a .zip file. At the same time, you can also give your texture pack a name. Your file is now ready.
Launch Minecraft and, in Options, go to Resource Packs. There you can open the corresponding folder and drag in your finished pack. If everything works, it should be displayed. Your textures will now appear in-game, and you can continue to tweak them later.
You can also upload the resource pack or share it with other players if you like. Or, time permitting, you can change even more assets.
Conclusion: Create your own Minecraft resource pack
Creating your own resource pack for Minecraft can be a real challenge, but it’s perfect for tailoring the game to your taste. We recommend it for advanced PC users or pixel art enthusiasts who want to experiment. As long as you follow our tutorial, nothing should go wrong.
You can also use the texture pack on your own Minecraft server, which you can rent from us with ease: use it on your own Minecraft server. Design a pack together with friends and share it between you for a unique gameplay experience!