Just like its predecessor The Forest, Sons of the Forest hides a number of secrets that reward long-term players and permanent island residents with cool gadgets. One of these is the rare artefact, which you must first assemble from seven smaller parts. It’s intended for players who have not only explored the entire map, but have also finished the story and want to remain on the island. It’s well worth it, though, because its functions are genuinely useful if you plan to keep playing. With our guide, you’ll not only find and assemble all seven parts, you’ll also learn to master the artefact itself!
Artefact parts in Sons of the Forest: All locations on the map
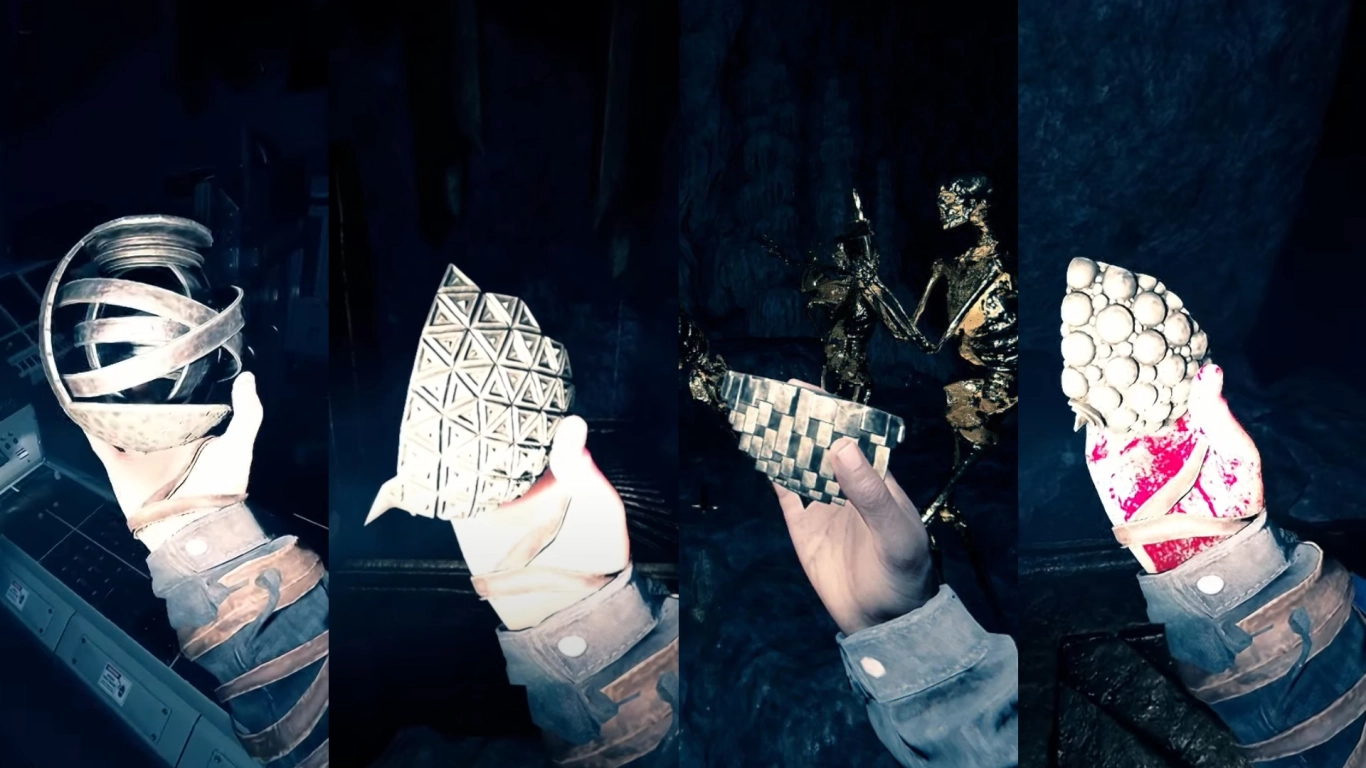
To craft the artefact, you first need to find the right parts. You may have come across some of them during your cave adventures, but a few are much harder to locate than others. You must complete the story for the final piece — more on that in the next section.
Location 1: Northern beach cave – Stun Gun and artefact part
This artefact part is quite easy to find and you may already have it in your inventory. If not, head back to the cave on the northern beach where you can also find the rebreather. Keep to the right and follow the cave deeper down. There you’ll find not only the Stun Gun, but also the artefact part. You’ll recognise it immediately as it lies on a golden altar, and your character picks it up with a unique animation.
Location 2: Zipline cave – Rope Gun area
Next, return to the cave where you found the Rope Gun (Zipline Gun). This artefact part is also hard to miss if you’ve fully explored the cave. Follow the ropes further down and keep to the right-hand side to find the artefact shortly after. Once you spot hanging skeletons and golden adornments on the walls, you’re on the right track!
Location 3: Ancient Armour cave – Western entrance (Part 1)
The next two artefact parts are both in the cave where you can also find the Ancient Armour. This cave runs clear across the middle of the map, beneath the large mountain. There are several entrances and it’s the longest and largest cave in the entire game.
Find the first part by entering via the west side of the mountain, at the lake made up of two circles. The cave is fairly linear, so there’s not much you can do wrong. Dive through a few sections and slide down deeper until you spot more gold markings. When you reach a large chamber filled with gold, keep following the faint light. Eventually, you’ll come to a crashed spacecraft. The part is in the pilot’s hand, just like the Ancient Armour.
Location 4: Ancient Armour cave – Further section (Part 2)
Once you’ve found the first part in this cave, take the spiral stairs up from the spacecraft and continue along the cave, climbing a few ropes. Again, it’s hard to go wrong — the path is linear and leads you to the artefact part. Golden decorations once more point the way. Look for a narrow stone path. The artefact is set into the floor in a square of gold.
Location 5: Pickaxe cave – Solafite and artefact part
You’ll find the cave with the pickaxe and Solafite below the golf course, at the lower of the two small ponds connected by a stream. A rope lets you descend into the cave. Follow the waterfall to the right and swim through a few sections. Now and then you’ll need to break through wooden planks, but you should soon recognise the characteristic golden beams. The artefact is once again set into the ground, bordered by gold.
Location 6: North-eastern beach – Hidden fisherman’s hut
Walk along the beach to the east of the golf course until you see a sort of fisherman’s hut with two armchairs. Inside, you’ll find a hidden entrance to the cave with the last artefact part you can obtain before finishing the game. Follow the cellar vault, which is blocked by wooden boards. Eventually, you’ll encounter golden crosses and skeletons guiding your way. The artefact is just one rope down, on an altar surrounded by gilded skeletons.
Location 7: Final artefact after the ending – Choose to stay on the island
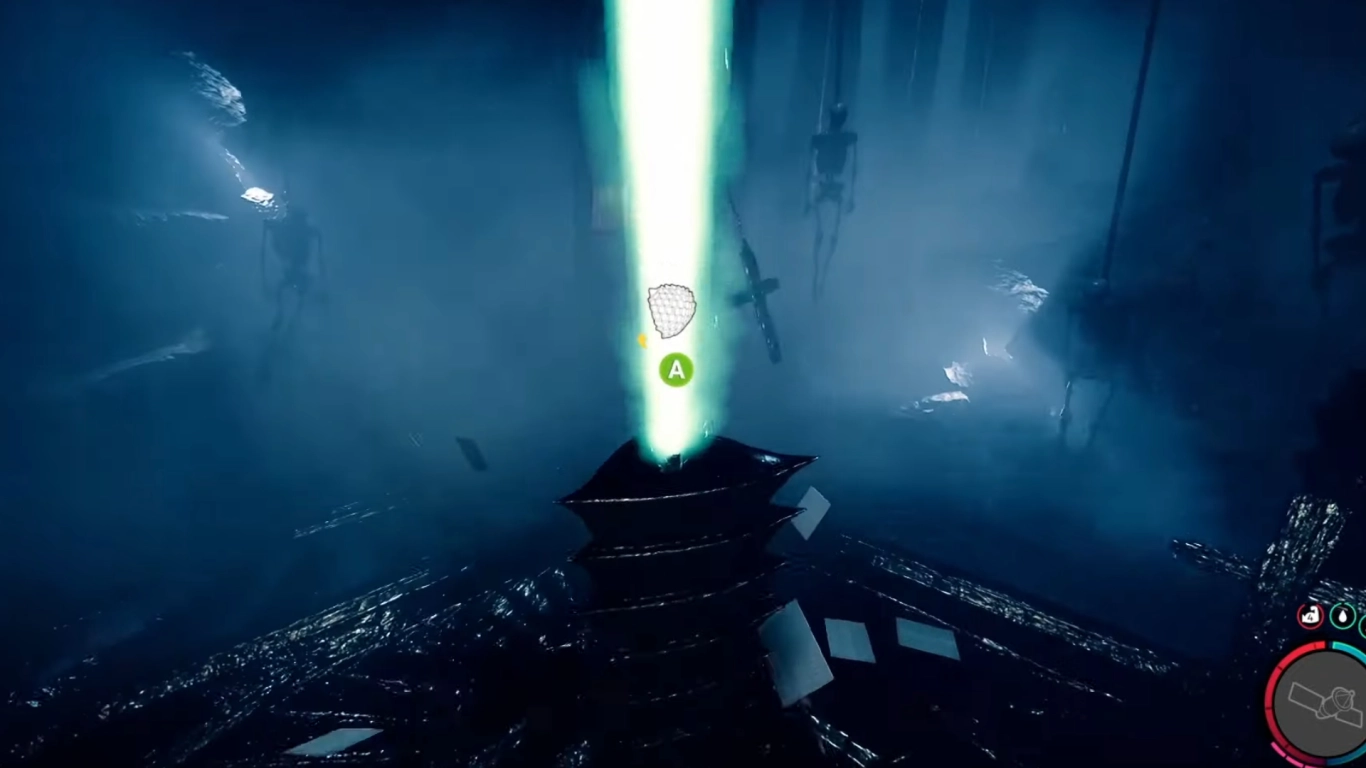
After the final boss fight, you can decide whether to stay on the island or leave. Pick up your rucksack and stay. You’ll then see beams of light in the sky pointing you to the final artefact. The entrance to this cave is on the east side, not far from the cave with the pickaxe. It simply spirals downwards. Smash through a few planks and at the bottom you’ll find the last artefact part.
Using the artefact in Sons of the Forest: Functions, modes, and Solafite charge
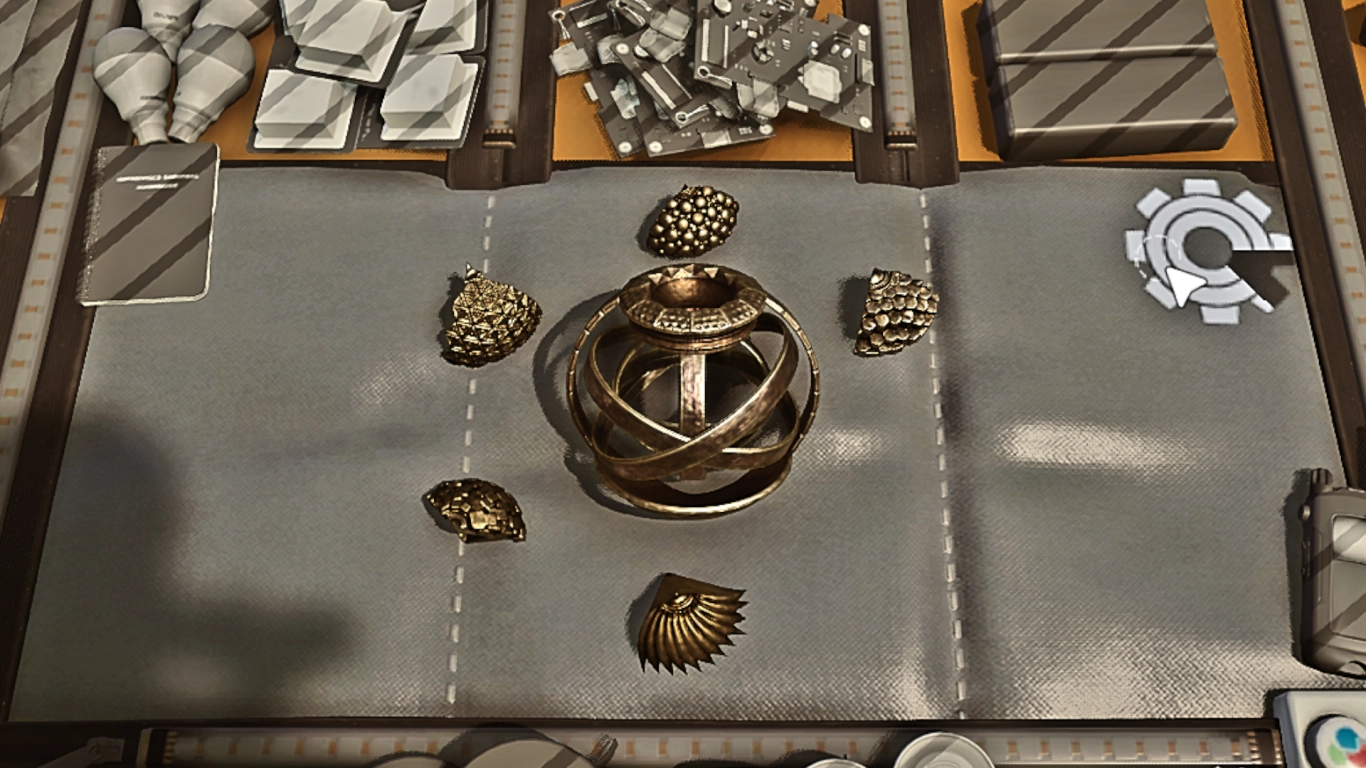
Once you’ve found all seven parts, you can assemble them in your inventory. The artefact is now ready to use! You’ll need to charge it with Solafite ore to operate it. You can see the current charge by the red bars that appear when you’re holding it. When you look at the ground with the artefact equipped, you can switch modes and unlock different uses.
In essence, you can use the artefact for four functions:
- Gild objects: When the artefact “spreads its wings” and a blue beam appears, you can gild buildings and furniture. They don’t just look fantastic — they also withstand far more damage.
- Teleport: First activate the teleporter with the blue beam, then switch the artefact to sphere mode and teleport back to the teleporter. This works anywhere on the map, including caves and bunkers. Each use costs one Solafite.
- Attraction Shrine: Use the artefact to activate this structure to lure cannibals and mutants to you. While active, it generates Solafite. It’s a risk, but the rewards are plentiful.
- Defence Shrine: Build this shrine to actively repel enemies. In addition to the artefact, you need 6× Solafite ore to power it. Each piece is consumed after 3:20 minutes, giving you 20 minutes of protection.
Practical tips for efficient artefact use
- Save Solafite for Teleport jumps and critical moments in caves.
- Mark bases and key points with teleport options before diving deep into caves.
- Use Gilding selectively on load-bearing walls, doors, and defensive structures to toughen your base.
- Activate the Defence Shrine ahead of major attacks; combine it with traps for maximum safety.
Conclusion
Sons of the Forest is well worth playing even (or especially) after you’ve finished the story. That’s when you gain access to brilliant tools like the artefact! This golden sphere can teleport you across the entire map, summon or deter enemies, and even produce Solafite for you. And if you want to upgrade your base, use its ability to gild furniture and walls.
Rent a Sons of the Forest server from us and hunt for the artefact parts together with your friends. Afterwards, you can build your base in peace with newfound power and become the rulers of the island!
More interesting articles
Sons of the Forest: All 16 Blueprints – Locations & Uses
Sons of the Forest: Story walkthrough with bunkers, keycards & bosses
Sons of the Forest: 8 pro tips for long-term survival
Sons of the Forest Enemies: Locations, Weaknesses & Best Tactics
Sons of the Forest: Building System Guide – Blueprints, Free Build, Base Building