Satisfactory can overwhelm new players quickly, as the game throws a lot of systems at you to work with. But you have all the time in the world to try them out and get comfortable. Some mechanics aren’t even explained by the game, yet you should definitely use them. It’s also not always obvious what to focus on first. So we’ve put together the best tips for beginners, giving you a clear path so you know exactly what’s next. Don’t worry, you can’t miss anything and you should always play the way you enjoy.
Use the Satisfactory hotbar efficiently: quick access and shortcuts
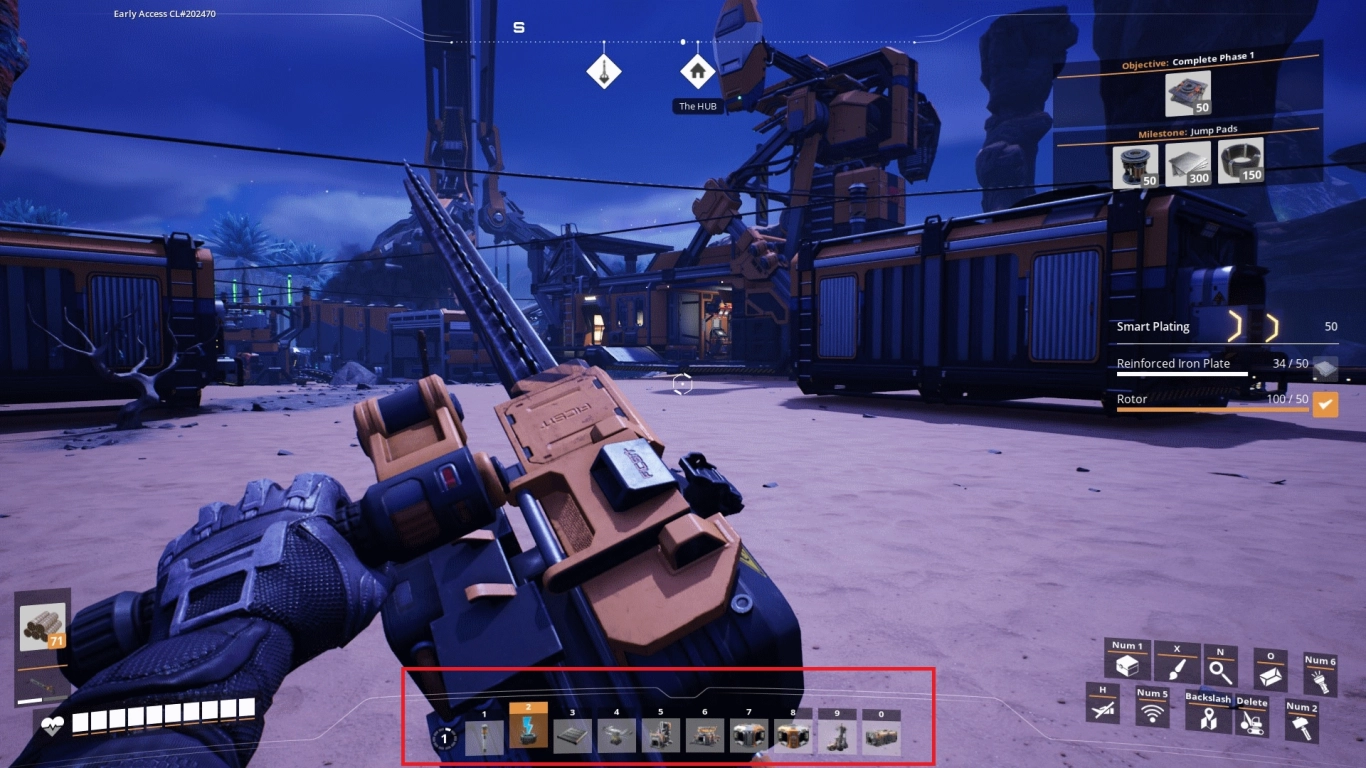 To avoid opening the build menu over and over, start using the hotbar at the bottom of the screen as early as possible. Open the build menu and hover your mouse over the building you want on the bar. Then press a key from 1–0 and the corresponding hologram will be assigned.
You can have up to 10 hotbars, which is extremely handy in a complex game like Satisfactory. Create themed bars (e.g. Logistics, Production, Power, Construction) and switch between them with Alt+mouse wheel. This lets you build entire sections of your factory without detours.
Another handy inventory trick: use the middle mouse button to pick the building you’re currently looking at.
Early power in Satisfactory: automate biomass and use solid biofuel
 A steady supply of power is something you should handle right from the start. Always pick up leaves and wood you find in the world. At the beginning, you only have the Biomass Burner, and you should make extensive use of it.
Once you’ve unlocked Biomass by finishing Tier 0 (Satisfactory Beginner's Guide: Tier 0, the HUB & Automation) , you should automate its production (e.g. a constructor chain: leaves/wood → biomass). This cuts down on manual crafting. With Tier 2 you unlock solid biofuel, which you can produce automatically from biomass – far more efficient and longer-lasting.
Pro tip: Always keep a buffered stock and refuel burners in good time to avoid power outages.
Building straight in Satisfactory: automate iron plates and concrete for foundations
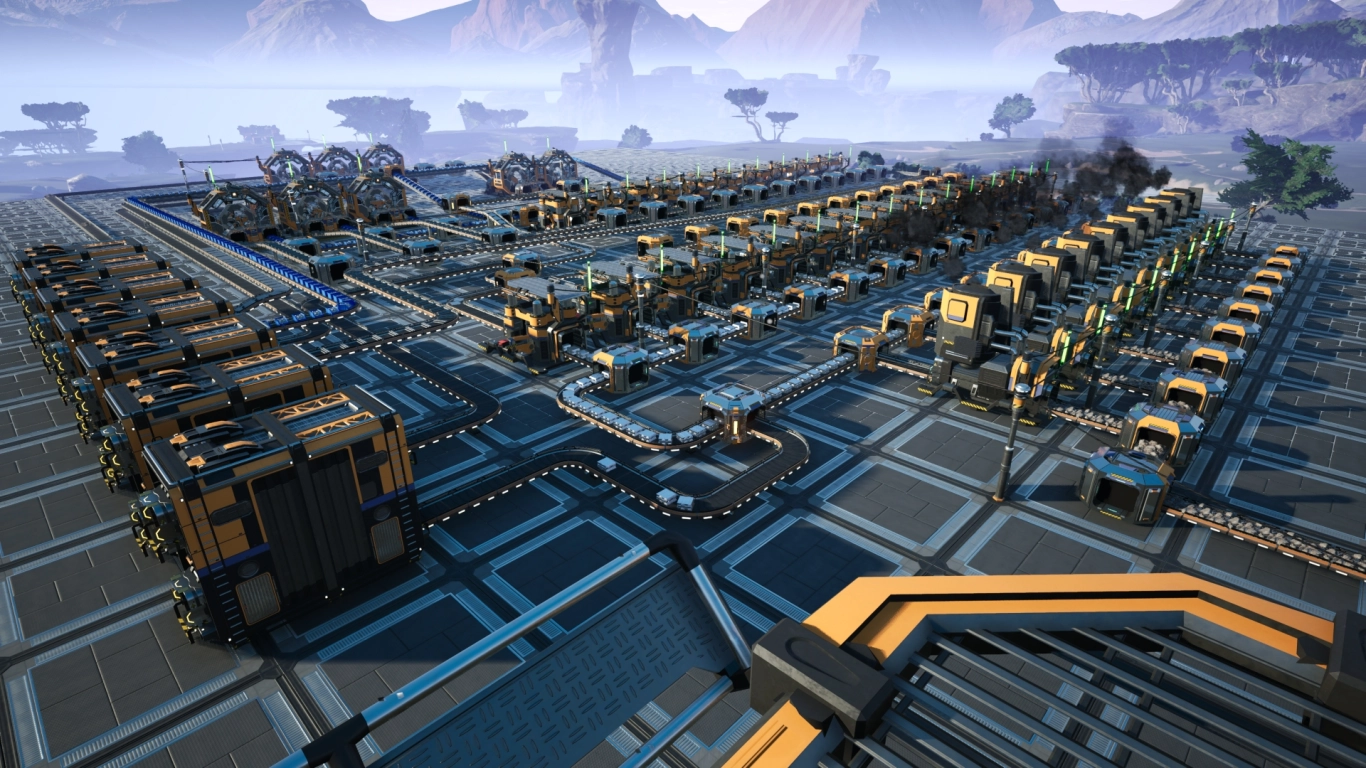 There are flat spots on the map, but building isn’t always neat. Use foundations early to keep everything on one level. You unlock them with the first milestone in Tier 1 and craft them from iron plates and concrete. You’ll need foundations throughout the entire game – automate both resources as soon as possible.
You’ll unlock more foundation variants later via items from the AWESOME Shop (see tip 6). Uniform levels also make belt heights, machine spacing and tidy logistics much easier.
Power management in Satisfactory: plan production, consumption and buffers
As mentioned, electricity is one of your most important resources early on. To keep it from running out, always keep an eye on how much power you produce and how much you consume. A few rules of thumb:
- A Constructor uses about 4 MW
- A Miner Mk.1 uses about 5 MW
This helps you estimate how much you need to produce. The power graph in any generator shows production, usage and headroom. Later, with Tier 4, you unlock Power Storage to handle peak loads more smoothly. Early on, aim for a constant surplus to prevent blackouts.
Map and markers: quickly find resources and your base in Satisfactory
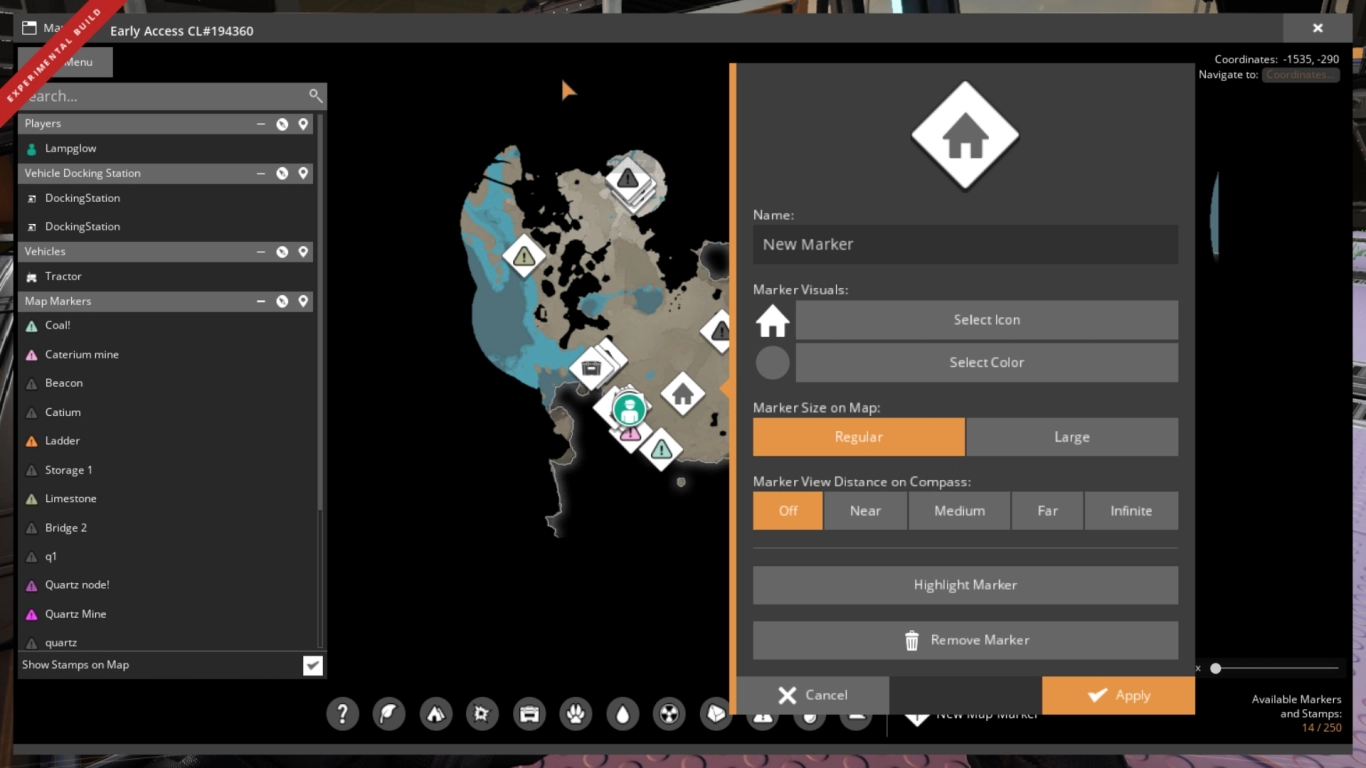 The map is huge and begs to be explored – but it’s easy to get lost. Use markers to note important spots: resource nodes, dropped crates, outposts or bottlenecks in your production.
You don’t always need to open the map: in-game, hold Alt and mark the spot you’re looking at with a right-click and a suitable icon. You’ll find your way back faster and plan more efficiently.
AWESOME Sink and FICSIT Coupons: put surpluses to work in Satisfactory
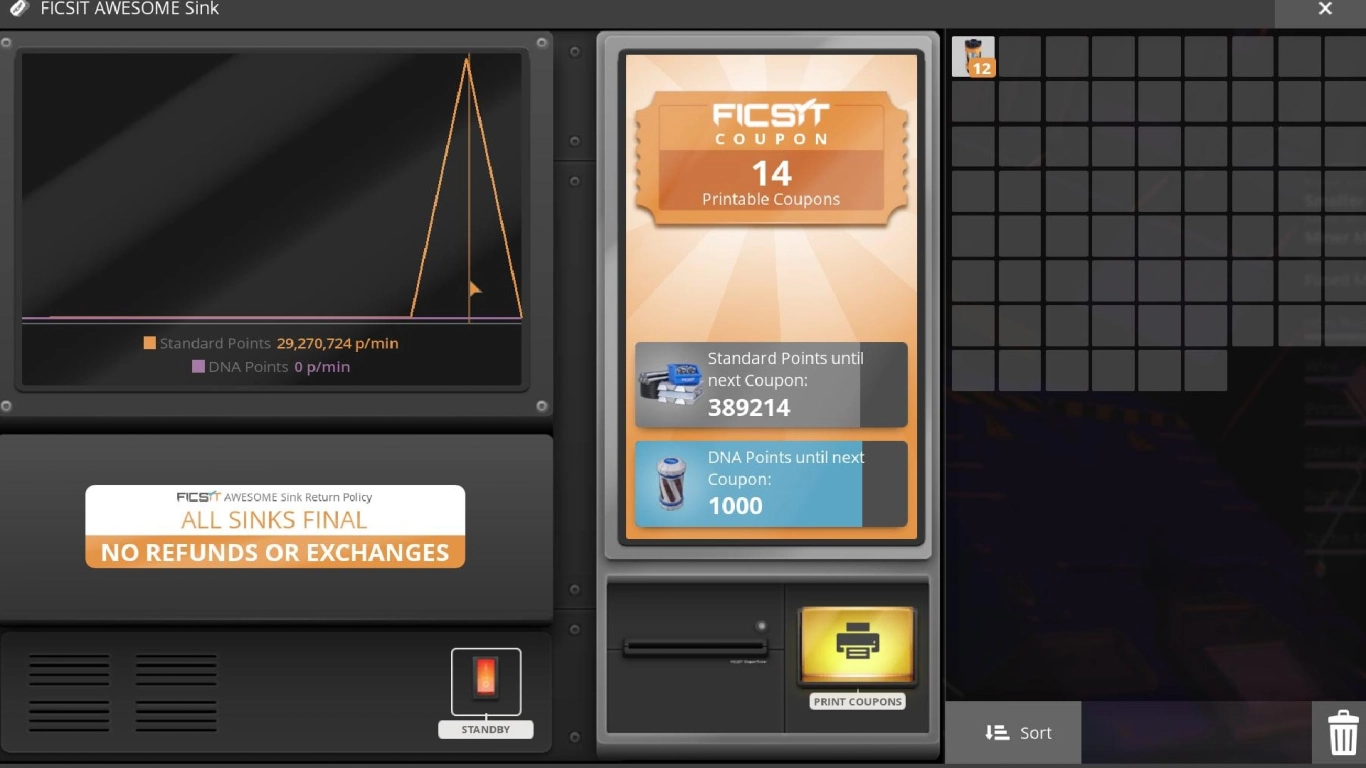 With Tier 2 you unlock the AWESOME Sink – an essential building for using up surpluses. It eats almost any item and, after a certain number of points, gives you a FICSIT Coupon to spend in the AWESOME Shop.
Early on, surplus items like concrete, cable or quartz are worthwhile. Keep in mind: the more often you sink the same item, the less efficient it becomes. Use coupons to buy useful things like additional foundation variants (see tip 3), ladders, new conveyor belts or pipes. The earlier you start, the quicker your comfort and build quality grow.
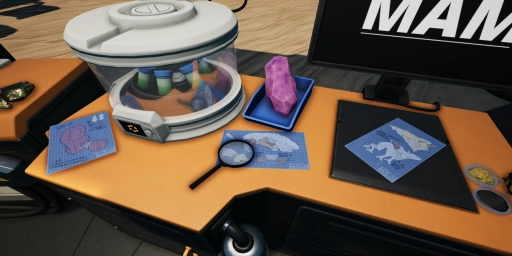
MAM research in Satisfactory: scanner upgrades, parachute and inventory slots
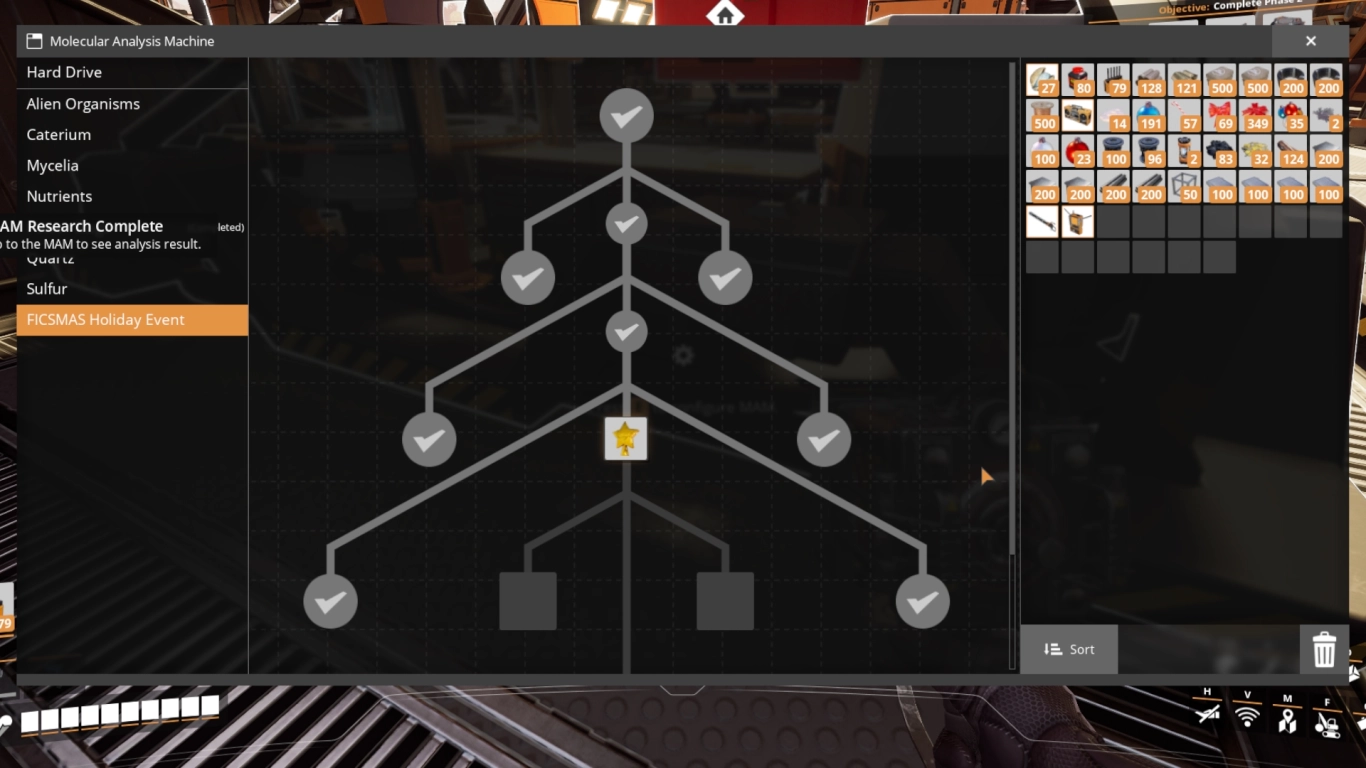 At the end of Tier 1 you unlock the Molecular Analysis Machine (MAM). Alongside milestones, it provides additional research trees that grant new recipes, equipment and scanner functions. The categories are more specialised and often require new resources.
Don’t neglect the MAM – it holds extremely strong rewards: the parachute, extra inventory slots, alternate recipes and scanner upgrades for rare resources, to name a few. Explore actively, gather samples and keep your research running continuously.
Playstyle and motivation: enjoy Satisfactory stress-free
Despite all that, remember Satisfactory is a sandbox. If it starts to feel like work, take a break, explore the map, find new nodes or build a decorative project. There are no limits and you can take as long as you like. You can’t play “wrong” – carve your own path.
Conclusion: Satisfactory beginner tips for a strong start
For the start, remember above all: use shortcuts deliberately, plan your power ahead, build cleanly with foundations, mark the map, start using the AWESOME Sink early and research in the MAM regularly. This keeps you on top of things and moves you step by step towards your dream factory. And if you don’t want to play alone, rent one of our Satisfactory servers and play with your friends. That way, everyone can focus on the tasks they enjoy most.
More interesting articles
Satisfactory guide: best starting area for beginners and veterans
Satisfactory Combat System: Weapons, Monsters & Tips
Exploring Satisfactory: Gear, combat system and resources
Satisfactory Tier 1 Guide: Expanding your factory, power & logistics
Satisfactory tips: 8 pro tricks for organisation, planning and shortcuts