Minecraft’s procedurally generated worlds are already quite impressive after the Caves & Cliffs update, but as a player, you can do so much more. That’s why terraforming projects are incredibly popular, as you can break down every block in the world and create something new. Whether for purely natural projects, further builds, or simply to beautify your world, you can do whatever you want. However, terraforming is not easy and often takes many days, weeks, or even months. Proper planning is crucial to avoid losing track and to achieve a great result in the end.
Definition and Importance of Terraforming
Terraforming describes the process of altering a landscape. This is not only related to Minecraft, but is also used in the real world. For example, the term is also used in relation to space travel and the exploration of other planets, to make them more similar to Earth (Latin “terra”).
Specifically in Minecraft, this means working with natural resources and shaping landscapes as you desire. You can enhance specific areas or completely tear them down and rebuild. Your creativity has no limits here!
Geographical Basics and Essential Tools for Minecraft Terraforming
First and foremost, it’s important to have an idea of how you want your world to look in the end. You should find images that match your desired landscape and use them as templates or inspiration. Of course, you can also use your own photos! Pay attention to aspects like climate zones, elevation differences, and other geographical features. You can also create entire fantasy worlds, but they should be cohesive and logically structured in terms of landscapes.
If you plan to build in survival mode, you’ll need to have the right tools at hand. Therefore, large-scale projects are more suitable for later when all these resources are available.
Shovel and Pickaxe: To remove natural resources. Both tools should have the maximum enchantments “Efficiency” and “Unbreaking.” “Mending” is also useful!
Beacon: Use a beacon to instantly mine many of the resources. (Building a Minecraft Beacon: All Effects & Materials Explained!)
Scaffolding: You should also use scaffolding made from bamboo to reach difficult spots.
Ghast: The new happy Ghast can be a help in such projects, as it can serve as a flying platform for building tall mountains.
Terraforming is, of course, also possible in creative mode, or you can use mods to make the process easier. WorldEdit and Axiom are just two examples of mods that are perfect for this! These are worthwhile for particularly large and time-consuming projects. Minecraft itself also offers several commands that allow you to copy, delete, or replace blocks.
Detailed Guide to Terraforming in Minecraft
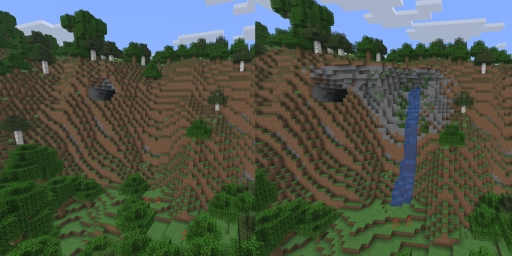
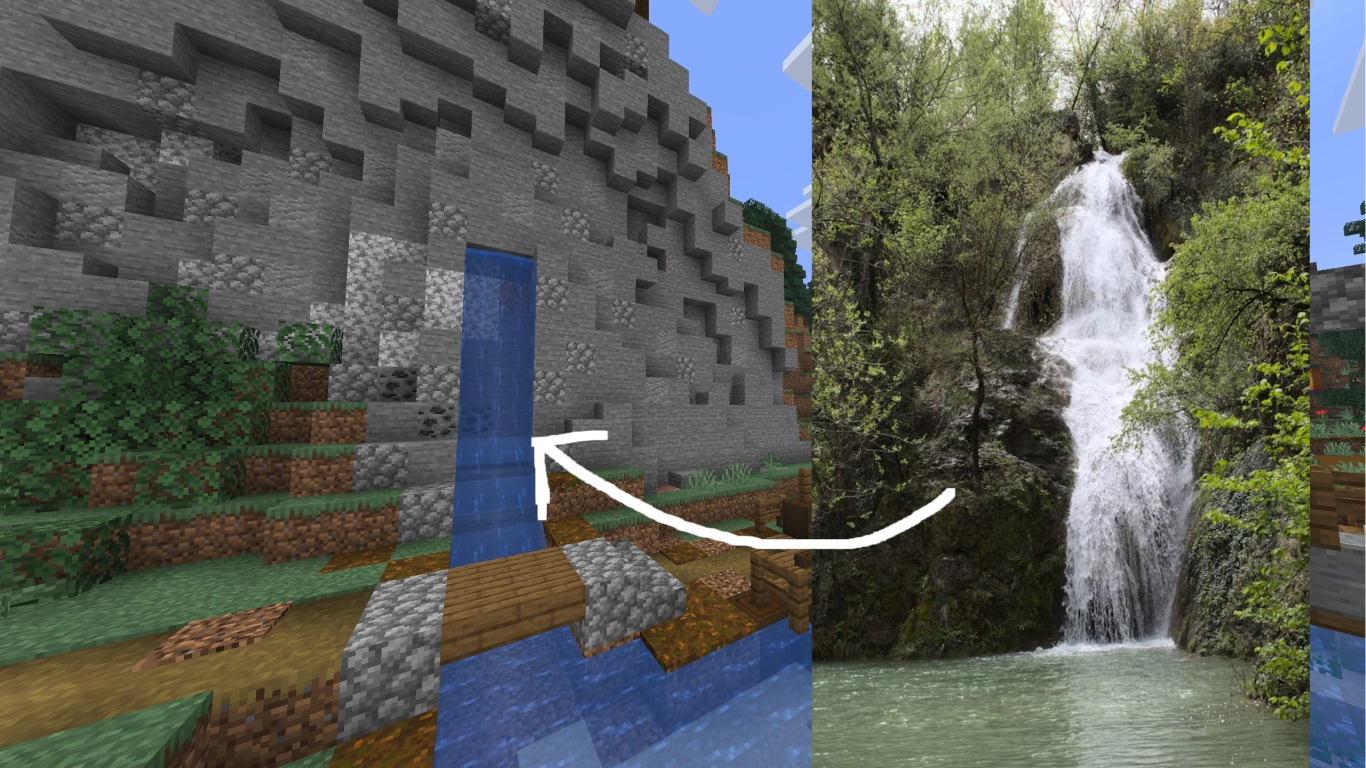
Before you start terraforming, you should have a vision of your end goal and find a suitable location. The better the Minecraft terrain already matches your idea, the less work you have ahead of you. Use a map tool or go on exploration tours yourself to find the right spot and bring your project to life. In our tutorial, we’ll show you how we integrated a waterfall into a mountain.
1. Start with Scaffolding and Rough Plans
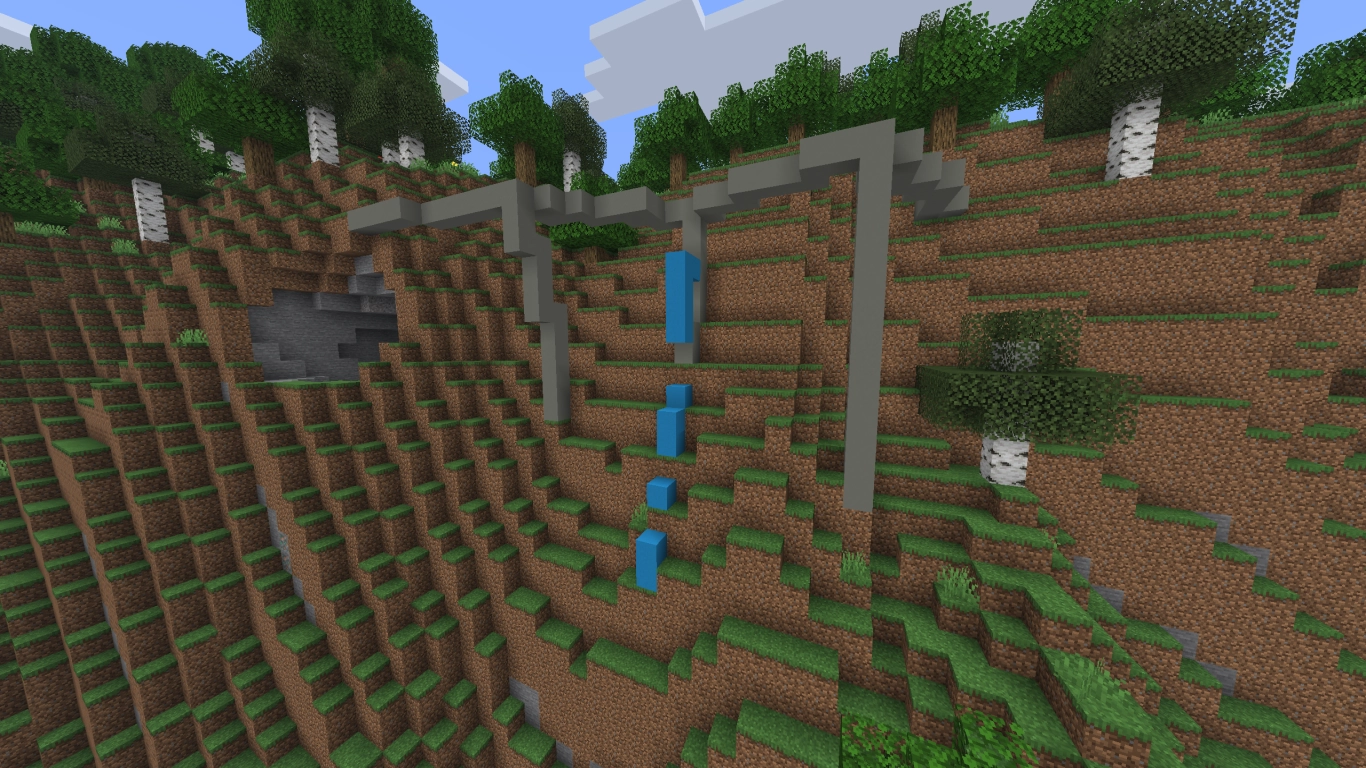
First, you should set some rough guidelines for where you want to place or remove certain shapes. Create a kind of scaffold by marking the largest outlines with easily recognizable blocks. This will give you a reference point later on, and you’ll have an idea of the scale of the terraforming. If you need to remove a lot of resources, now is the right time to do so.
Depending on your vision, this first step can look very different. However, it’s essential that you can recognize the general shape of your project. You’re essentially sketching a blueprint for what you want to build later.
2. Plan “Points of Interest”
At the same time, you should also think about interesting locations. If you plan to build a village later, mark where exactly the buildings will go and how they’ll fit into the landscape. Also, mark natural elements accordingly, such as rivers, custom trees, or artificially created ponds.
You can always make changes at the end, but you should always have a direction in mind. Paths and trails are also a wonderful way to organically plan your landscapes.
3. Calculate Distances

Terraforming can take an extremely long time, especially if your ideas are large-scale. A massive mountain doesn’t build itself, so you should break it down into smaller steps. Once you have the scaffold, you can assess the scale. Is it too small or too large? How long does it take to walk from one end to the other?
As in real life, nature can have vastly different effects. Try to align all the features of your new landscape so that nothing seems out of place.
4. Fill the Land
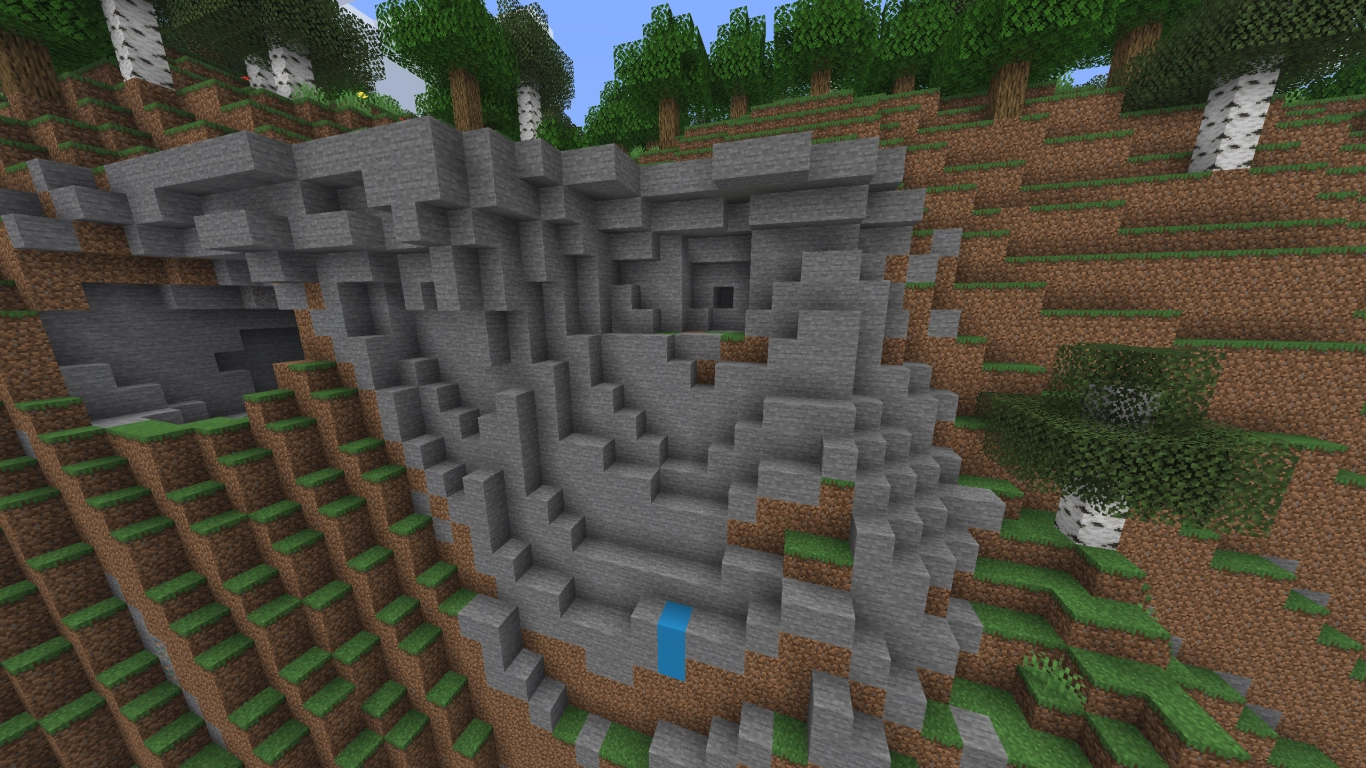
Now comes perhaps the most labor-intensive step, as you need to fill in all your ideas, scaffolding, and rough shapes. This can take a long time, and you’ll need a lot of materials. Therefore, ensure you have a way to gather dirt, stone, and other resources in advance. For large projects, you’ll need several thousand blocks, which takes a lot of time.
5. Detail Work

Especially in Minecraft, it’s worth starting with full blocks and then focusing on details later. As the guide clearly shows, we work from large to small or simple to complex. You should first get a good feel for the landscape itself before diving into detail work.
Once the terraforming is roughly completed, you can start adding decorative elements. Work with different blocks to add more texture. Large areas can be broken up this way. Use natural blocks to add the finishing touch.
Conclusion
With terraforming, you can shape your Minecraft world exactly how you want. You have plenty of blocks at your disposal to bring your ideas to life. It may take some time, but in the end, it’s always worth it to create your own landscapes. You can rent your own Minecraft server with us and take on such a project with your friends! The more people working on it, the faster it goes.