A Minecraft world should feel alive—and that can’t be achieved with buildings alone. It’s often the small details that make a world truly believable. A key element is your network of paths and trails linking structures together. They aren’t just a means to an end; they can also stand on their own as defining features of your world. To get the most out of them, you’ll want to think beyond Minecraft’s default paths. In the end, roads and trails reflect your world and can deliver powerful storytelling just like your builds. Here’s how to approach it.
Step 1: Choosing the location for Minecraft paths and trails
First, decide exactly where your path will run. That might be between two other locations in your world, or simply a trail to nowhere. What matters is sketching out where the path would naturally go. Study the terrain and imagine how people would travel through it. That determines whether your trail meanders through the landscape or becomes a straight, paved road. This logic applies to both fantasy and modern builds.
While you plan, go ahead and mark small points along the route that could serve as set pieces or points of interest. Maybe it’s a river crossing with a bridge or a ditch—note these spots for later.
Step 2: Decide on the style and type of Minecraft path
Next, determine what style your path should follow. As mentioned in step one, this largely depends on nearby builds. If they’re medieval in style, you should lean into that theme. A district of modern skyscrapers, however, calls for a completely different approach.
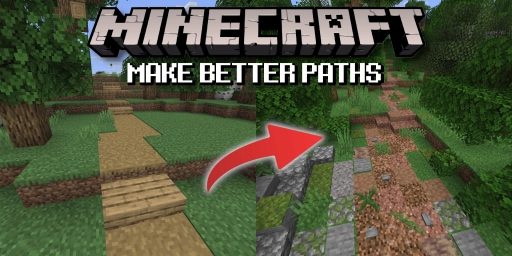
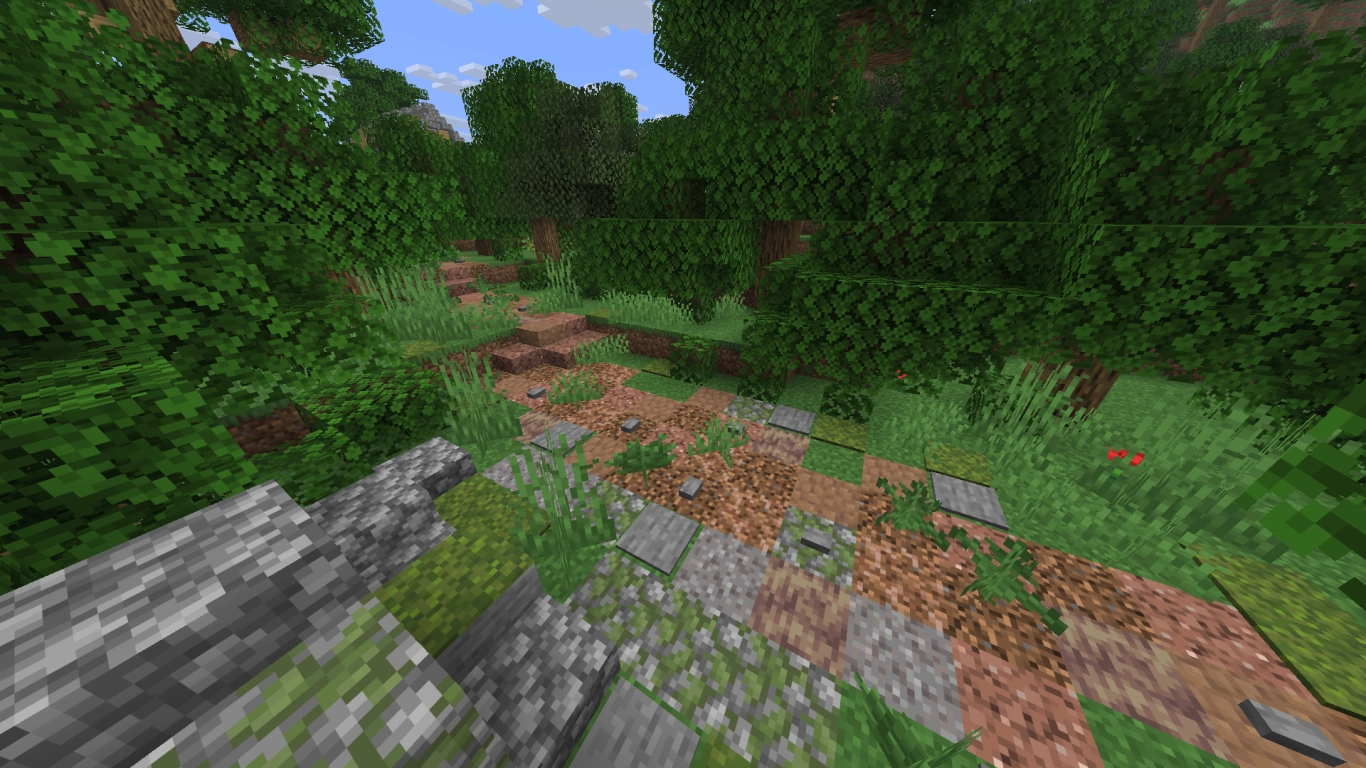
In our example, we chose a trampled forest trail, so it ends up fairly overgrown. We’re working with natural brown tones plus some green. Depending on the terrain, you could explore very different ideas—an icy mountain path, a wide highway through a city center, or a narrow alley in a village. Think about how the path is used in your world and choose a style accordingly. You can always search online for inspiration.
Step 3: Color palette and materials for Minecraft paths
Once you know the route and overall look, it’s time to gather materials. Paths in Minecraft look best when they’re made from more than one resource. Start by looking at your surroundings to see which materials would logically be available. For our forest trail, that’s primarily dirt, which we convert to coarse dirt so it doesn’t grow over with grass.
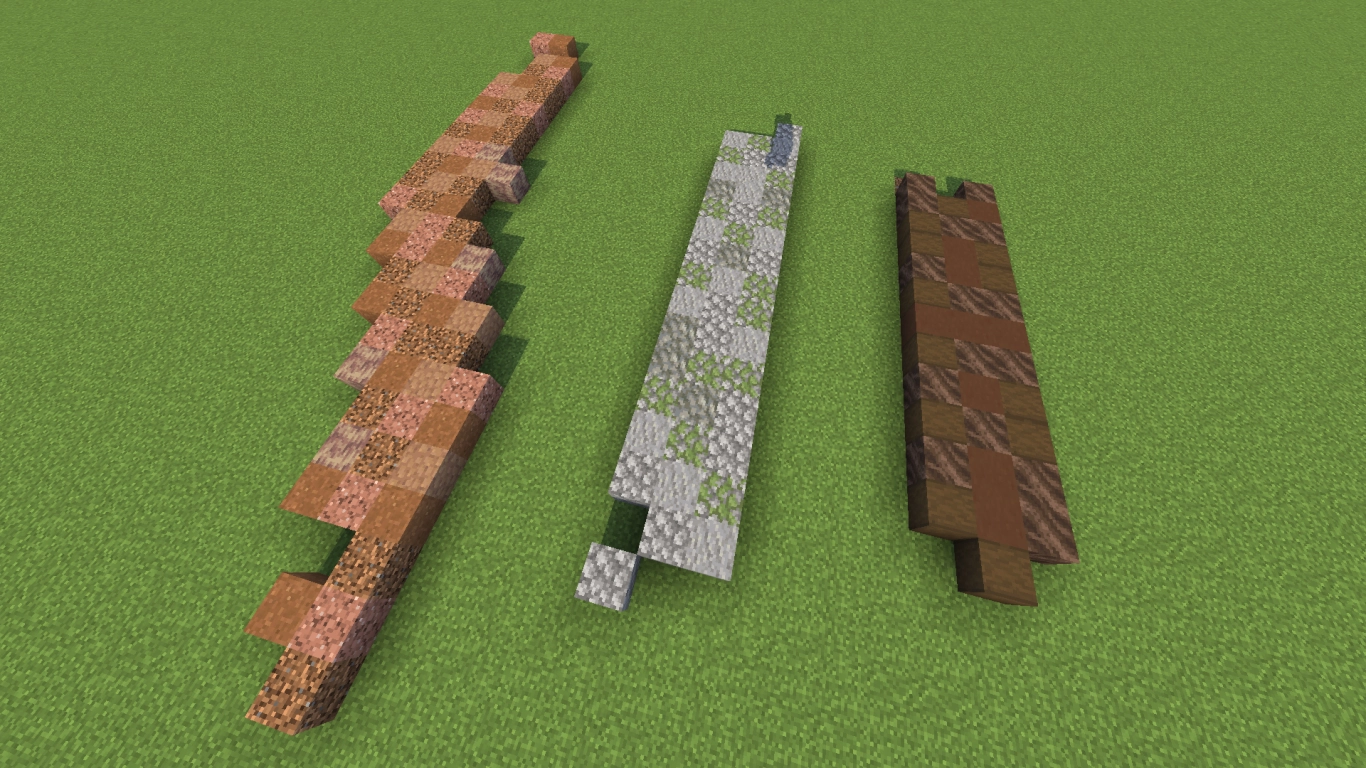
Then consider which other blocks complement the palette. We’re leaning on brown and slightly reddish blocks to support the coarse dirt. A quick trip to Creative mode can help you test combinations. Sites like Block Colors are also handy for searching by hue.
Alongside coarse dirt, we chose rooted dirt from azaleas, granite, packed mud, and dripstone blocks. To suggest spots where stone breaks through the soil, we use mossy cobblestone and gravel.
Tip: Consider which blocks you can craft into slabs or stairs so your path flows smoothly when you change elevation.
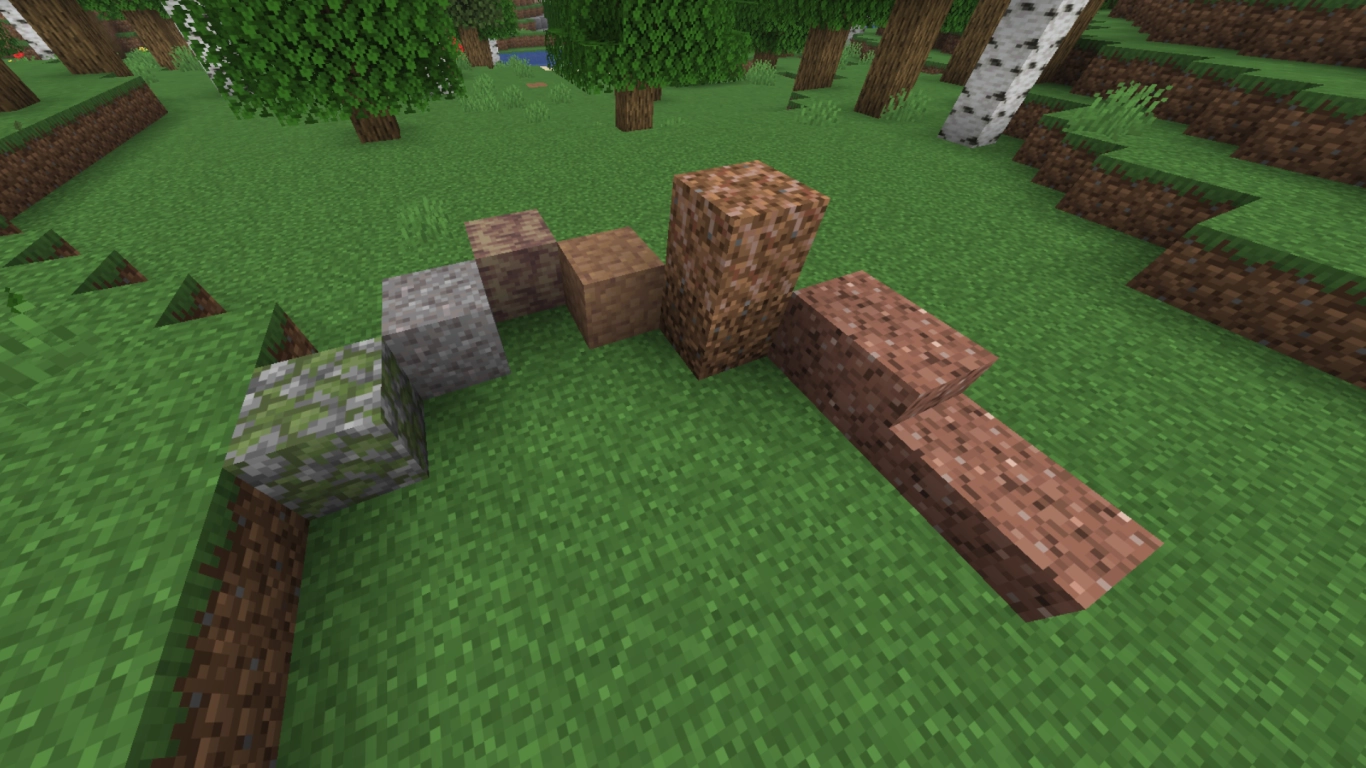
Step 4: Lay a rough route with a primary block
With materials ready, start laying your trail. We recommend using just one block at first to establish a rough guide. That lets you focus on the shape and flow without getting lost in details.
This step will vary based on the type of path. Since we’re building an overgrown forest trail, we place coarse dirt somewhat randomly. Later, we’ll weave in other blocks to create a cohesive look. If you’re building a paved road, you’ll naturally want more structure from the start.
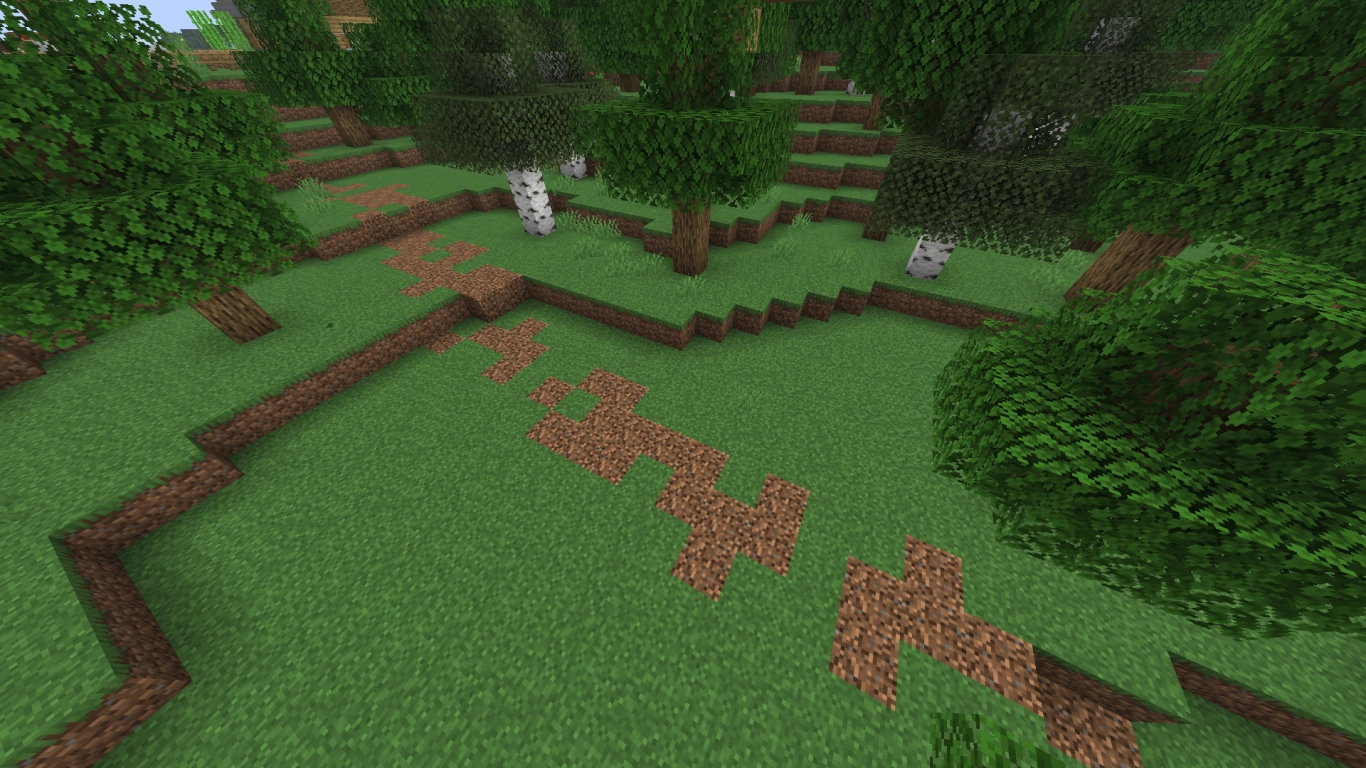
Step 5: Detail work—mixing textures and blocks
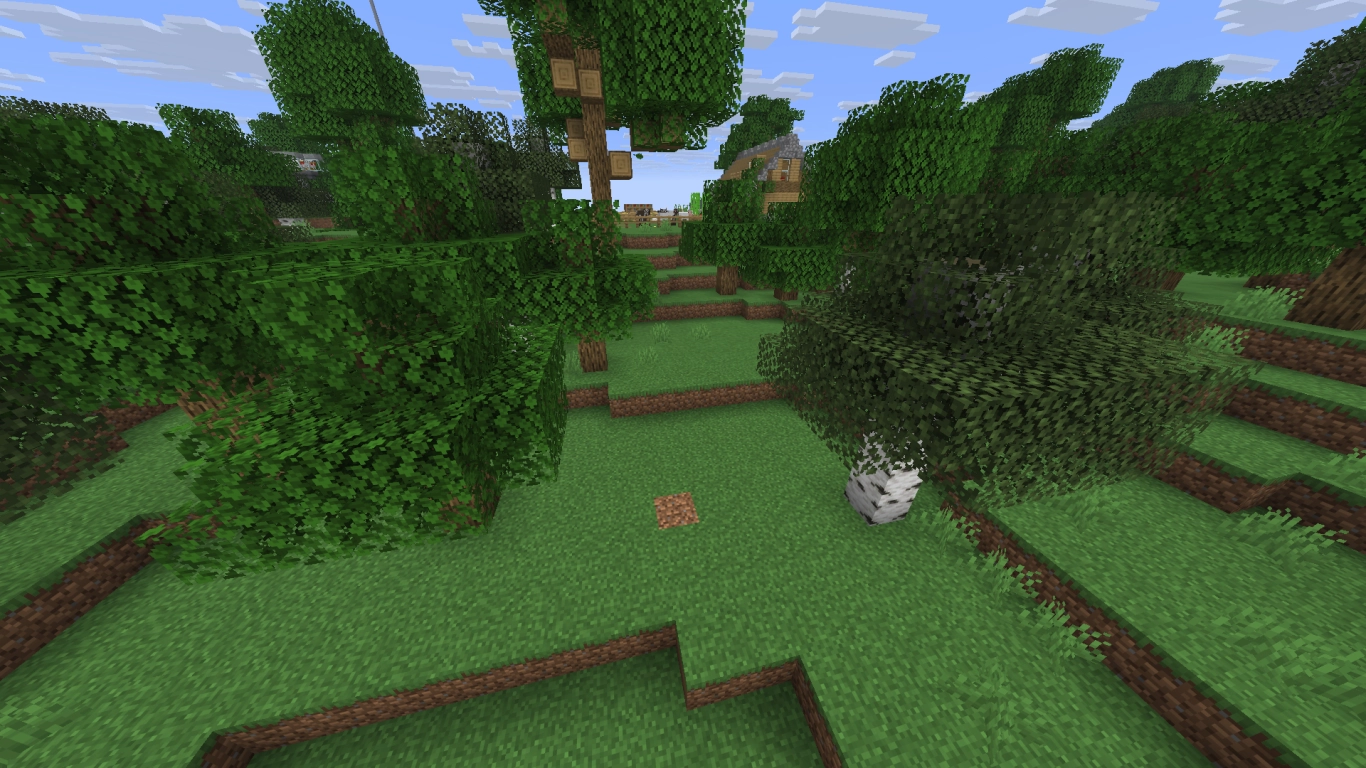
With the general route set, start adding other blocks as color accents or patterns for your roads. It can help to vary their frequency, but that’s up to you. For our forest trail, we randomize the blocks and try to avoid placing identical blocks side by side. This creates variety and a natural look. We set aside cobblestone and gravel for areas where we’ll later add decorative stones.
To keep the path easy to walk, we also use granite slabs to smooth elevation changes. As noted in step 3, pick a few blocks you can use this way—your path might call for different ones.
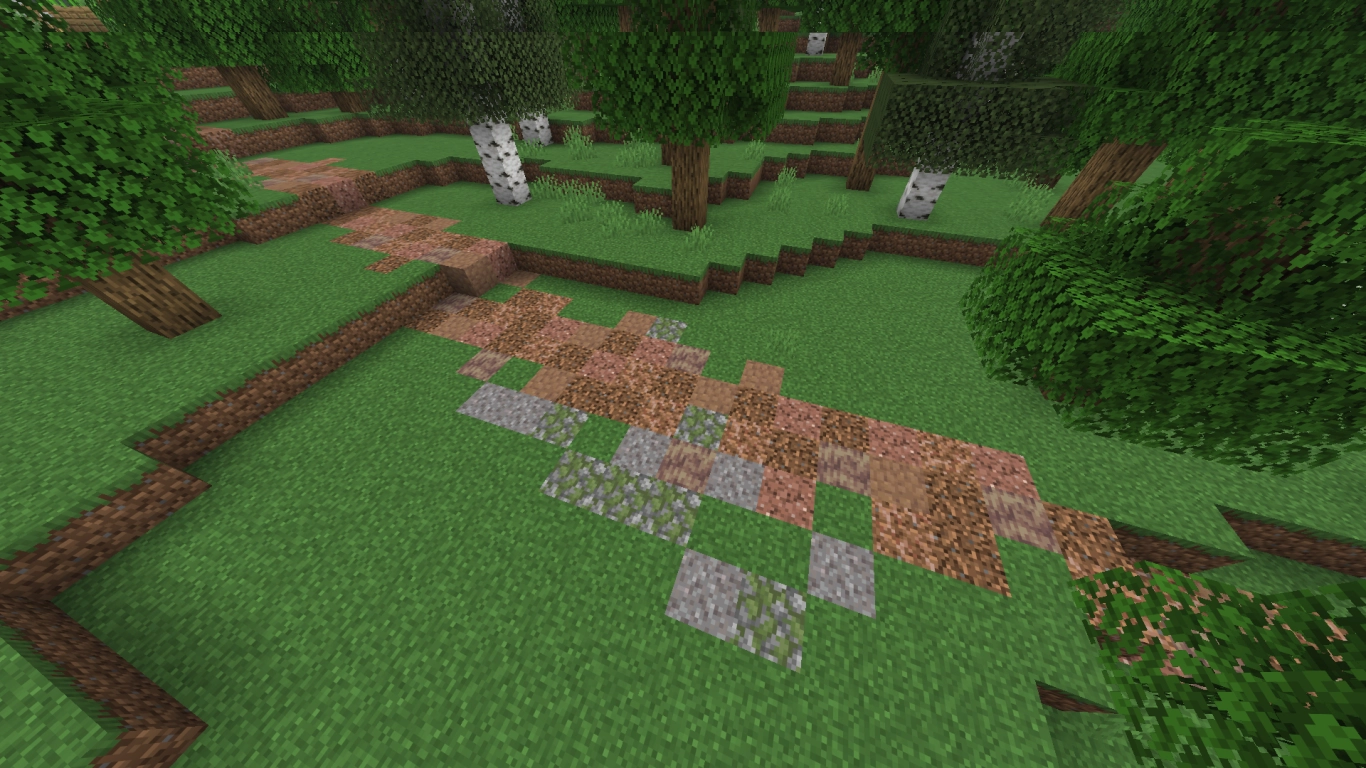
Step 6: Add decoration, nature, and lighting
The final step is where you can really cut loose. Back in step 2, we suggested noting interesting spots along the route. Now’s the time to flesh them out and tie them into the path. You can also add lighting or other features.
To finish our trail, we thickened the surrounding forest. We placed grass and ferns directly on the path to make it feel overgrown. Stone buttons or stone pressure plates work great as small pebbles along the edges. Your decorations will depend on your chosen style and can be more structured if you prefer. Either way, this is the final polish that brings your path to life.
Conclusion: Minecraft paths, trails, and roads connect your builds
Paths, trails, and roads are essential parts of your Minecraft world and can add a lot of character. Don’t think of them merely as lines between two structures—they’re standalone elements in your world. You can do so much with them and tell a story without a single word. From wide city streets to long-forgotten forest tracks, enhance your world with paths that fit the setting.
If you want to try building a cohesive world yourself, rent one of our Minecraft servers and invite a few friends! Then everyone can craft their own paths that ultimately connect.