In Minecraft, you can bring your own fantasies to life and create your very own world. This includes banners, which may seem inconspicuous at first glance, but should be present in every world. Banners are an extremely complex item, possibly the item with the most possibilities in Minecraft! Many players don’t explore their endless combinations, which is why we’re giving you the essential information today so you can use banners yourself.
Finding and Crafting Banners in Minecraft
You can obtain banners in three different ways. Perhaps you’ve already found some in your world and stored them in a chest, only to forget about them. It’s worth bringing them out and using them for your constructions.
In the world, there are various places where you can find banners:
at the entrance of an End City
in a Woodland Mansion
in villages
from Illagers
at outposts
Of course, you can also craft banners yourself. You’ll only need six wool of one color and a stick. This will allow you to create one of 16 different base banners and then build your subsequent patterns on it. It’s worth having a wool farm if you want many banners in different colors (Minecraft Wool Farm Guide: Easily Farm Automatic Wool in All Colors) .
Lastly, you can also trade banners with villagers. A cartographer or a shepherd at the expert level will trade you a banner of any color for three emeralds. This can also be a good way to obtain many banners of a specific type.
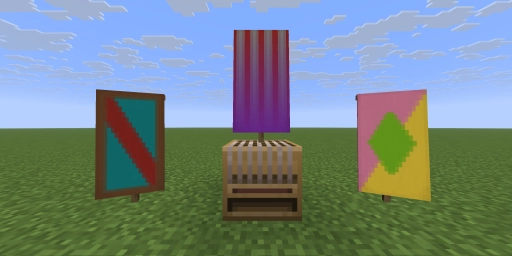
Coloring Banners with the Loom
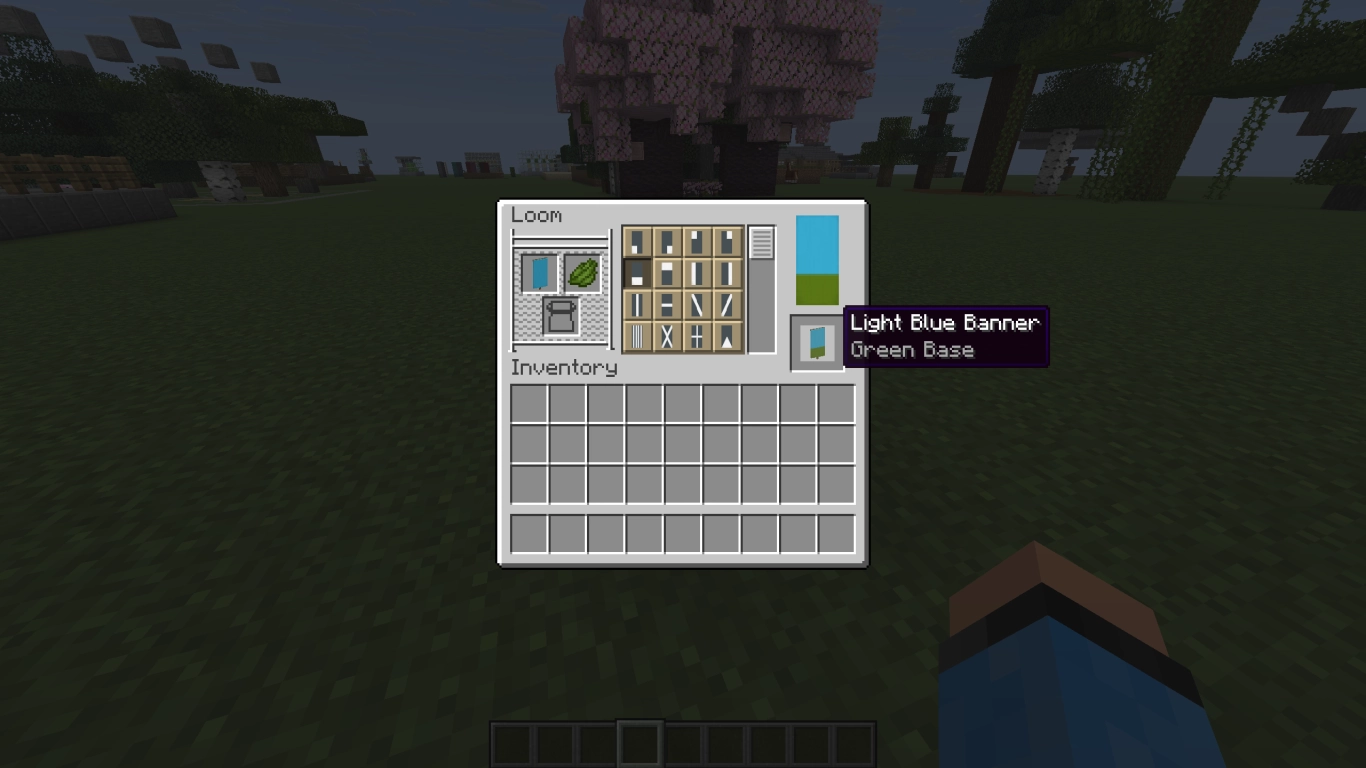
Now that you’ve created one of the 16 colored banners, what’s next? You now have endless possibilities to design the banner according to your preferences! First, you should craft a loom from two wooden planks and two strings to unlock all the options. Previously, you had to create the patterns in the crafting table, but thanks to the loom, that’s a thing of the past!
The loom provides you with a wide range of patterns to apply to your banner upon first use. You can apply up to six patterns to a banner to create something. There are geometric shapes and other designs to choose from. Place your banner in the designated field, add a dye, and select a pattern. This will then be applied, and you can continue.
Discovering Rare Banner Patterns
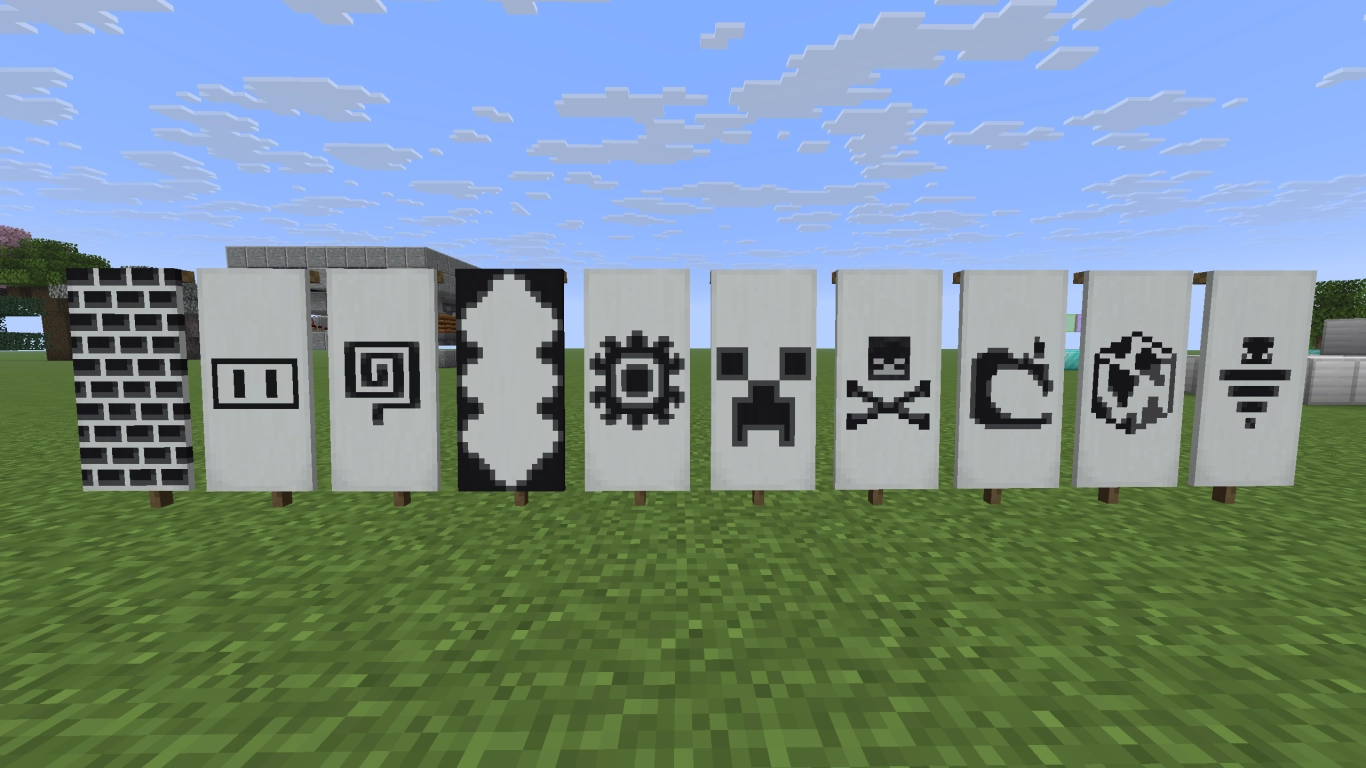
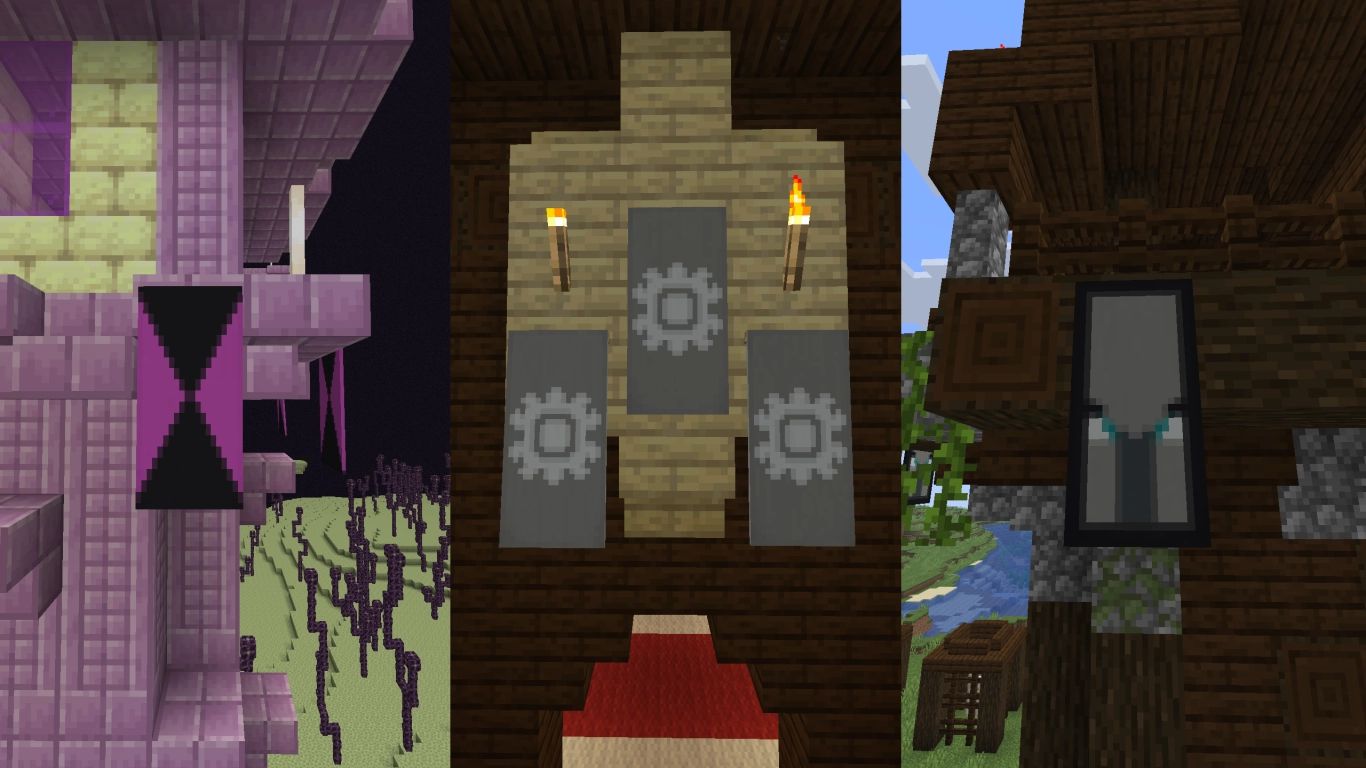
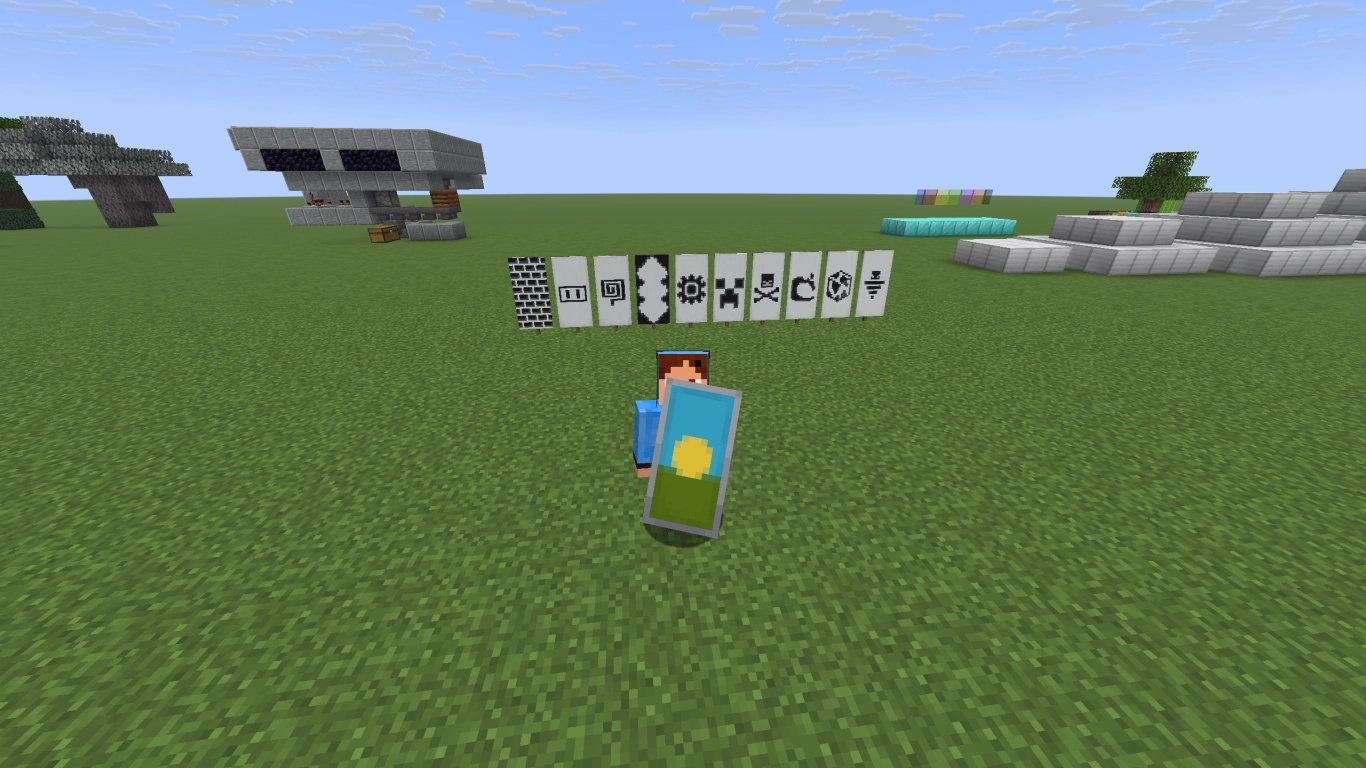
However, there are also ten additional patterns not directly available in the loom that you must craft or find. These templates represent various symbols or designs and give you even more options to make your banners unique.
The six craftable banner templates are:
Flower: Oxeye Daisy and paper
Creeper: Creeper head and paper
Skull: Wither Skeleton skull and paper
Mojang: Enchanted golden apple and paper
Thing: Vine and paper
Field Masoned: Brick and paper
The four findable banner templates are:
Globe: Trade with master-level cartographer for 8 emeralds
Snout: Reward from ominous chest in a trial chamber
Banner: Reward from normal chest in a trial chamber or loot in a chest (Minecraft Trial Chambers: How to Find & Master Them!)
Piglin: Loot from a chest in a bastion remnant (The Ultimate Guide to Minecraft Bastion Remnants in the Nether)
Once you’ve crafted or found one of the patterns, you can use it repeatedly. This is especially practical for hard-to-find items like the enchanted golden apple! They’re automatically saved in the corresponding loom and can be used for all patterns from then on.
Creative Pattern Combinations in Minecraft
With all the patterns, you have truly many possibilities to create banners in Minecraft. Remember that you can only combine the base color plus six additional patterns. Sufficient dye should also be on hand, and we’ve already made a separate guide on that (Minecraft: Complete Guide to Dyes and Automatic Farms) .
You should experiment and try to create your own patterns. Think of the banner as a kind of canvas. Start with the pattern and color that should be in the background and then work your way forward. Each pattern is added as another layer. You can also remove layers by clicking on a cauldron with water using the banner. If you like a pattern, you can duplicate it in the crafting table with a blank banner of the same base color without using additional dyes.
Of course, you can find many more patterns online that you can create. We recommend the website Minecraft Tools, where each step is individually documented. But also on Reddit, YouTube, or other forums, you’ll find plenty of great templates you can recreate.
Using Banners for Maps and Shields
There are two other cool applications for banners that you should know about. First, you can combine a finished banner with a shield, replacing the wood pattern with the banner. This is especially practical if you want your own shield or belong to a specific faction. Keep in mind, though, that the pattern is slightly reduced in size and therefore won’t look exactly like on the original banner. Still, it’s cool!
Secondly, you can also use banners as markers for maps, which is super practical! We’ve already made a complete post on cartography if you want to learn more about it (Effective Navigation in Minecraft: Using Compass and Map) . To keep track, you should rename the corresponding banners in an anvil beforehand. Place it at the desired location and right-click with the map on it. The banner will appear with its base color and name on the map. You can remove it again by clicking on it once more.
Conclusion
Banners are incredibly versatile, offering you millions of combinations of colors and patterns. Additionally, it’s fun to track down all ten rare patterns and integrate them into your loom. Rent one of our Minecraft servers and explore the colorful world of banners with your friends. You can even create your own flag for your server!
More interesting articles
The 10 Best Minecraft Building Biomes for Creative Ideas
Minecraft Tree Design: Create Your Own Perfect World
Minecraft Interior Design: 8 Pro Tips for Decor & Layout
Ultimate Guide: Mastering Terraforming in Minecraft
Effective Light Sources for Decorative Building Projects in Minecraft